 Bitaigen Research
 Pi Network is one of the most talked‑about cryptocurrency projects today, and its mobile‑mining feature has already attracted more than 55 million users.
In 2024, completing Pi Network’s KYC verification involves preparing identification documents, downloading the Pi Browser, filling out and submitting the information, and performing facial recognition. The whole process takes about 5‑10 minutes.
Below is a detailed guide covering the pre‑conditions, the full step‑by‑step procedure, and common issues, helping you pass identity verification quickly and get ready for the main‑net migration.
Our team has compiled the latest 2024 Pi Network KYC full‑process, covering the required materials, client‑side operations, and typical pitfalls. By reading this article you can grasp each key step, complete verification smoothly, and lay the groundwork for the upcoming main‑net migration. Follow the illustrated guide below for a hands‑on walkthrough.
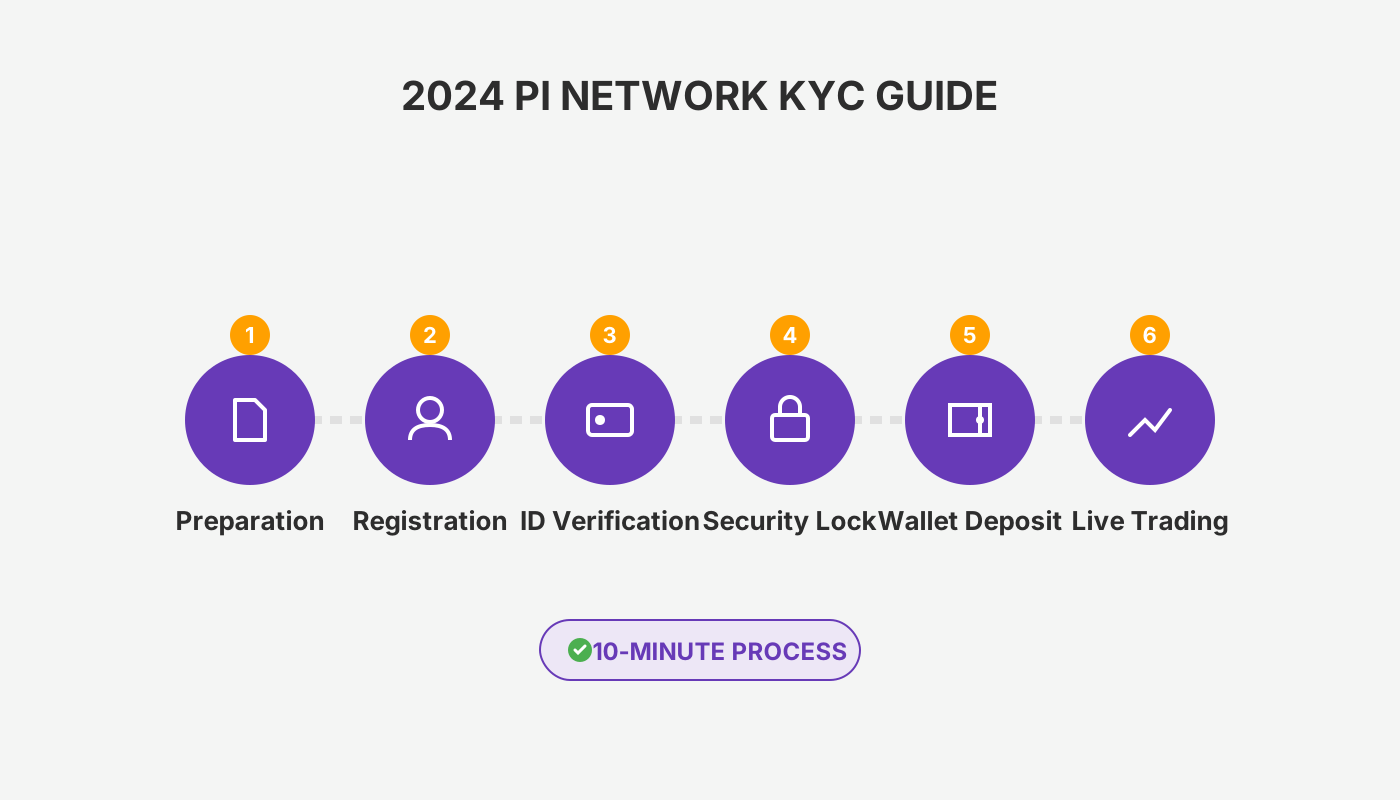
Preparation Before Pi Coin KYC Verification
Before you start the KYC application, make sure you meet the following basic requirements:
- Age requirement: Must be at least 18 years old.
- Government‑issued ID: Passport (preferred), driver’s license, or national ID card – original scan.
- Clear facial photo: Used for liveness detection and must match the ID information.
- Mining duration: You must have been mining on Pi Network for at least 30 days.
The entire application takes roughly 5‑10 minutes. After submission you will need to wait patiently for the review result. Specific requirements may vary slightly by country/region.
Pi Network KYC Full Visual Guide
When you are ready, follow the steps below to complete the KYC verification.
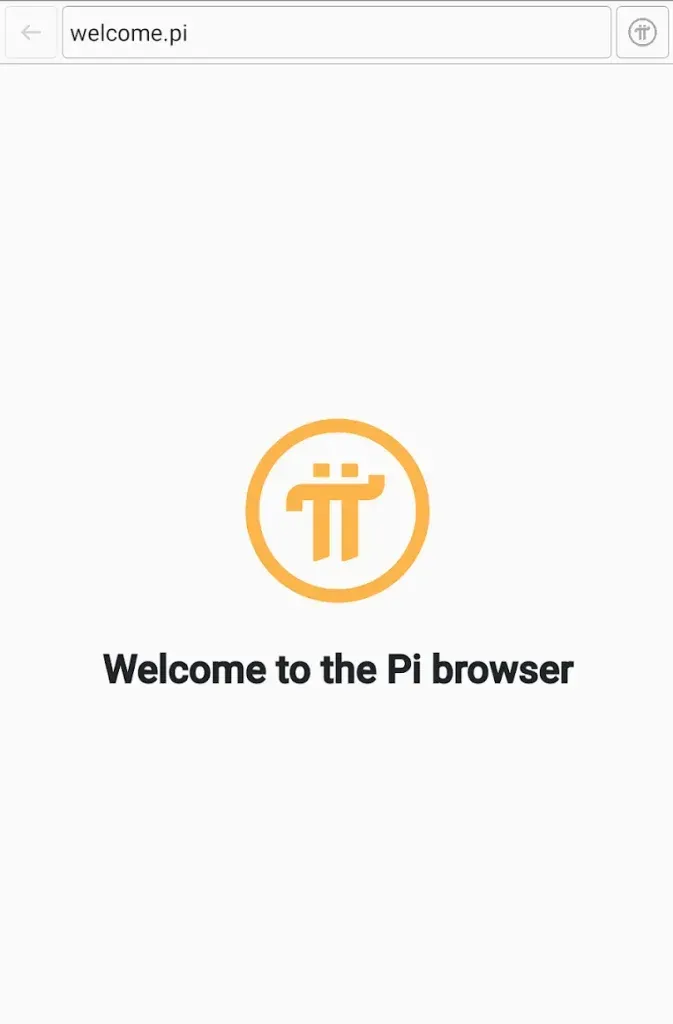
Step 1: Install the Pi Browser Application
- Go to the Google Play Store or Apple App Store and download Pi Browser.
- If you already have the Pi APP, you can download the browser directly from the pop‑up that appears once you become eligible for KYC.
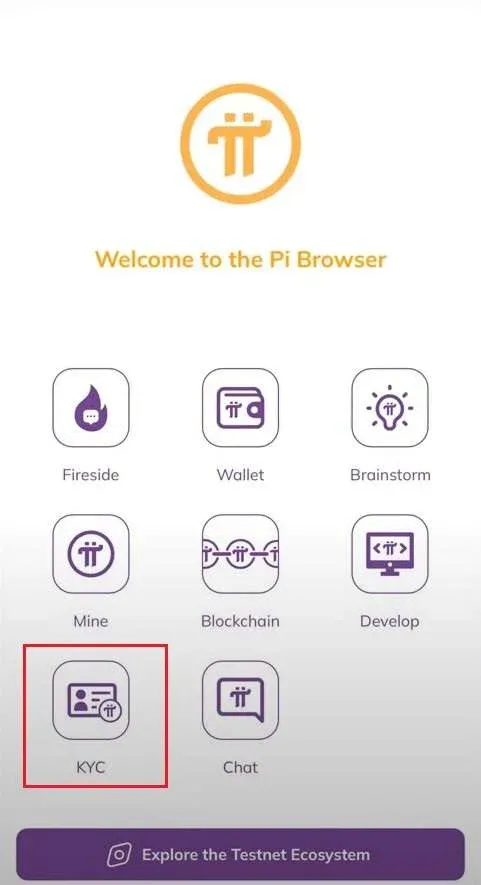
Step 2: Open Pi Browser and Select KYC
- After logging into Pi Browser, tap the KYC button on the home screen to start the verification flow.
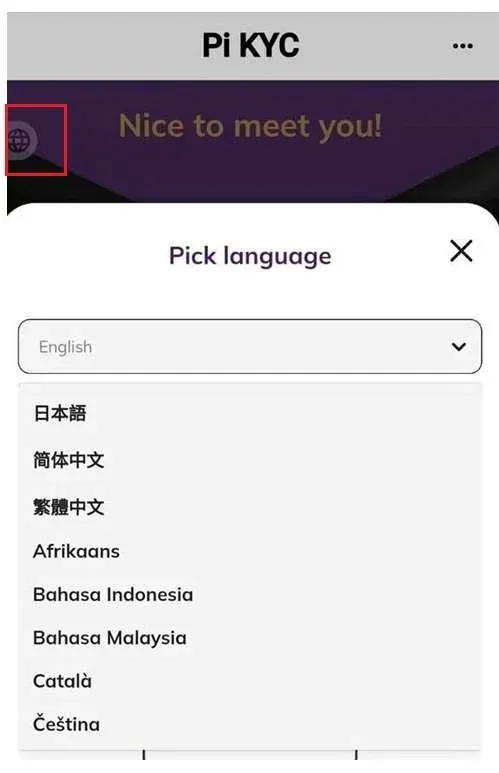
Step 3: Switch to the Chinese Interface (Optional)
- To make the process easier, tap the globe icon in the top‑left corner and switch the language to Simplified Chinese.
Step 4: Fill in Basic Information
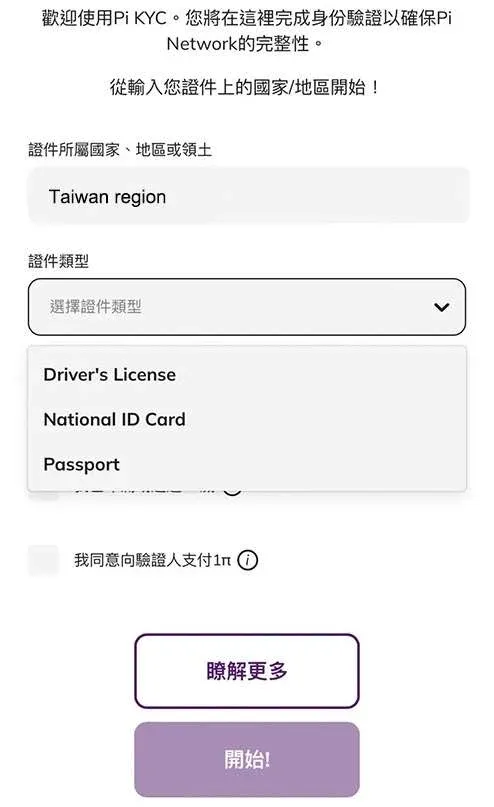
- Scroll down and select China region in the “Document Issuing Country/Region” field.
- Choose the appropriate Document Type – ID card, driver’s license, or passport.
- Tick the three consent boxes below and tap Start to proceed to the next step.
- This step will deduct 1 Pi as a verification fee.
Step 5: Review Upcoming KYC Stages
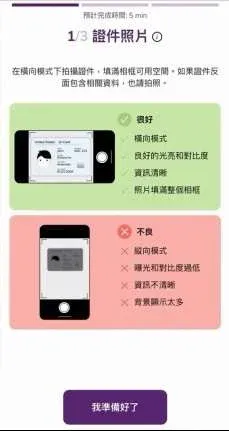
- The system will sequentially display the verification stages you need to complete. Keep tapping Next until you reach the document‑photo capture screen.




Step 6: Upload Document Photos
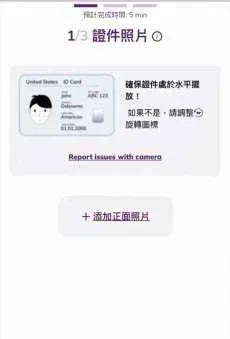
- Capture the document in landscape mode and make sure the text is legible.
- After uploading, fill in the following personal details:
- First name, middle name (optional), last name
- Gender, date of birth
- Document ID number, document expiry date
- Country of residence, address (Address 1 should be the household registration address shown on the ID)
- When finished, tap Next to move to the facial‑recognition stage.
Facial Recognition
- Tap I’m ready → Start Recording.
- Follow the prompts to perform a smile, turn your head, and other required motions.

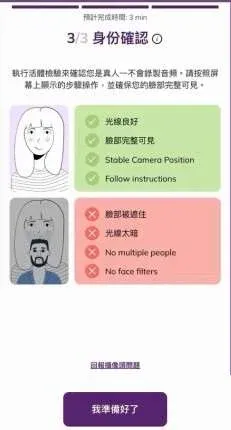
Step 7: Review and Submit Your Information
- Verify that your basic personal data, document photos, and selfie are all correct, then tap Next.
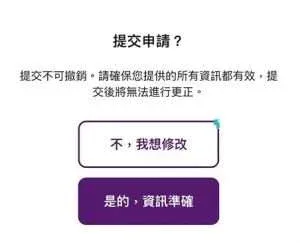
- If anything is wrong you can edit it. Once everything is accurate, tap Submit and Pay, and in the pop‑up choose “Yes, the information is ready”.
- After submission the page will display a View Status button, allowing you to see that your KYC is under review.

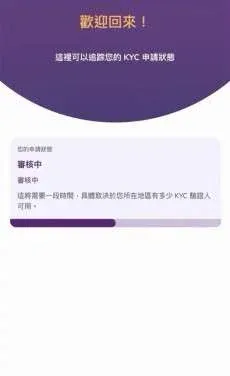
Review Mechanism: Each application is examined by at least two users from the same country/region who have already completed KYC. The reviewers receive the 1 Pi deducted earlier as a reward.
Step 8: KYC Approved
- Review times can range from a few minutes to several months, depending on the completeness of your information and the availability of local reviewers.
- Refresh the status page; once it shows Approved you can proceed with subsequent actions.
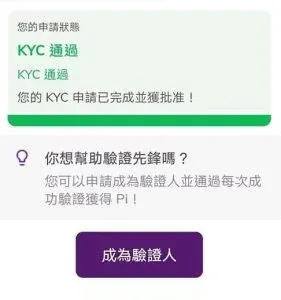
- If you wish to become a verifier, tap Become a Verifier, complete the training, and pass the quiz to start validating applications from users in your region.
Why Pi KYC Verification Matters
- Authenticity Assurance: KYC prevents identity theft and guarantees that each Pi account corresponds to a real individual.
- Prerequisite for Main‑Net Migration: Only users who have completed KYC can transfer Pi tokens to a personal wallet during the main‑net phase.
According to the official Pi blog, the migration schedule is tightly linked to the 2024 KYC grace period:
| Milestone | Requirement |
|---|---|
| **Submit KYC by 2024‑09‑30** | Applications after this date may forfeit most of the Pi you have mined |
| **Complete main‑net migration by 2024‑12‑31** | From 2024‑07‑01 onward, a 6‑month window is available to finish the migration |
| **Rolling 6‑month window** | If you miss the grace period, only Pi mined within the six months preceding your first migration will be retained |
| **Timer adjustments** | System‑wide KYC delays caused by technical issues pause the countdown, granting extra time |
Finishing KYC promptly maximizes the amount of Pi you can keep and ensures a smooth transition to the main‑net. Keep an eye on the official Pi blog for any updates to the schedule.
Pi KYC Frequently Asked Questions (FAQ)
Q1: Pi KYC is now open, how do I apply?
A: Download the Pi Browser, open the Pi KYC app inside the browser, and submit the required ID documents.
Q2: How long does the KYC process usually take to be approved?
A: Review time varies with the number of applications, the availability of regional reviewers, and the completeness of your submission. It can range from minutes to months.
Q3: Can I migrate to the main‑net while my KYC status is “Pending”?
A: No. Migration is only allowed after KYC has been fully approved.
Q4: My KYC is approved but I don’t see it in step 6 of the main‑net checklist.
A: This issue was fixed in the second‑quarter 2024 main‑net checklist sync. Always check the latest status via the Pi KYC app.
Q5: Why must KYC be completed before the main‑net migration?
A: Pi Network aims to build a global, real‑world, compliant digital‑currency ecosystem. KYC deters fake accounts from hoarding Pi, satisfies anti‑money‑laundering (AML) regulations, and upholds the “one person, one account” principle.
Q6: I have been mining for over 30 days but haven’t received a KYC invitation. What should I do?
A: Visit `minepi.com/kyc-application-access` to fill out a KYC request form, continue mining, and ensure you meet all pre‑conditions.
Summary
Completing KYC verification is a crucial step to protect your Pi Network account and unlock the full potential of Pi. Prepare your ID documents, download the Pi Browser, follow the outlined workflow, and finish the liveness check—you can be verified in roughly 5‑10 minutes. Once approved you can participate in the main‑net migration and ensure that the Pi you have mined does not become unusable due to identity issues. By following this guide, you will successfully complete the latest 2024 Pi Network KYC verification.
Related Reading
- XRP ETF Guide: Definition, Benefits, Risks & Investment Steps
- Telegram Founder Arrested – TON Ecosystem Value Still Holds
- Crypto Meets U.S. Stocks: How Companies Are Bridging the Market Gap
💡 Register on Binance with referral code B2345 for the maximum trading fee discount. See Binance complete guide.