
We break down the complete process of activating the Fantom public chain in imToken, covering node switching, asset receiving and sending, and quick troubleshooting of common issues. By following this guide you can easily get started, safely complete cross‑chain transfers and DeFi operations, and later chapters will share additional tips—worth a careful read.
Full Guide to Enabling the Fantom Public Chain in imToken
Fantom uses a Directed Acyclic Graph (DAG) architecture and supports smart contracts, offering high throughput and low latency. It aims to overcome the scalability and confirmation‑speed bottlenecks of traditional blockchains. In imToken version 2.9.3 and later, users can enter the Fantom network directly via the custom node feature to perform transfers or DeFi actions. Below we walk through three common node‑switching methods step‑by‑step and explain how to receive and send assets.
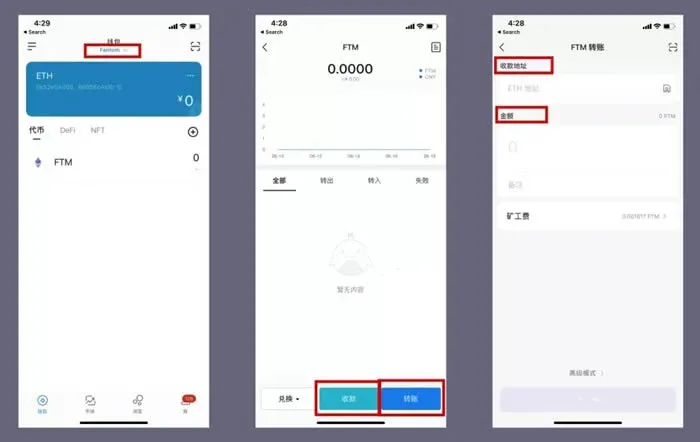
1. Asset Receiving & Sending
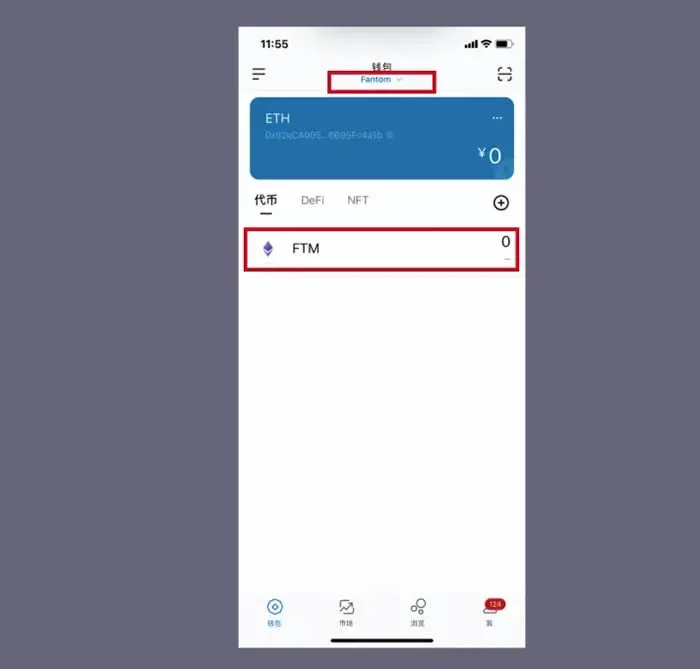
After switching to the Fantom network, go to the Assets page and tap FTM to open the receive/send interface.
- Receive: Tap “Receive” to copy the QR code or address and share it with the payer.
- Send: Choose “Send”, enter the recipient’s address and the amount to transfer, then confirm.
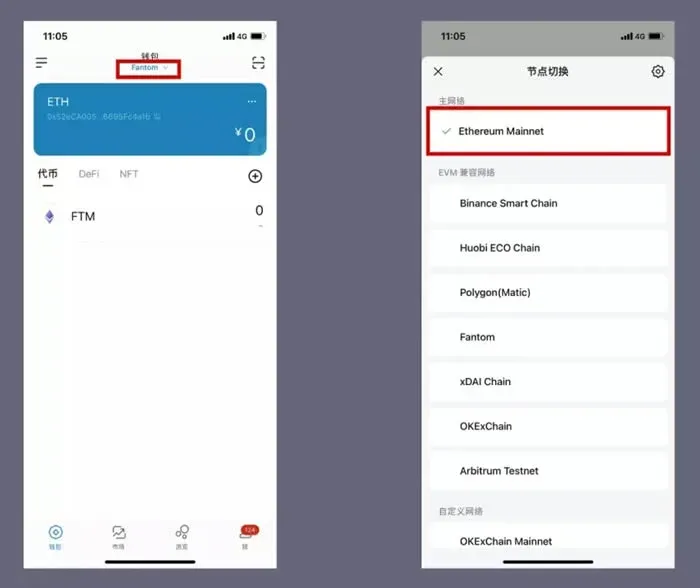
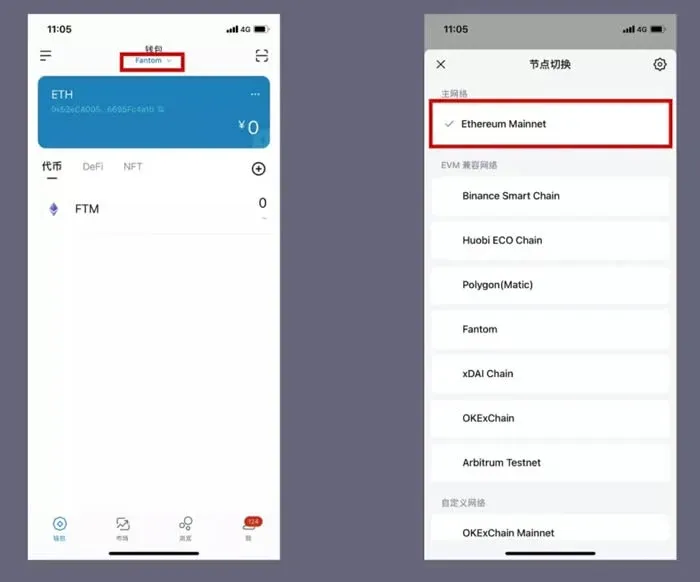
If you need to return to the Ethereum network, simply tap Fantom at the bottom of the wallet screen and, in the popup node‑switch window, select Ethereum Mainnet.
2. Three Ways to Switch to a Fantom Node
Method 1: Switch Directly from the Home Page
- Open the ETH wallet and go to the Assets page.
- Under the “Wallet” section locate Ethereum Mainnet; tapping it opens a network list.
- Select Fantom Opera from the list to complete the network switch.
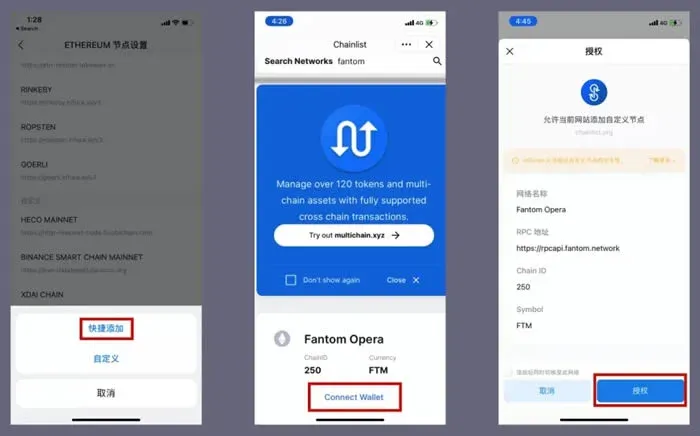
Method 2: Use the Quick‑Add Feature
- Navigate to ETH wallet → Me → Settings → Node Settings, then choose ETHEREUM to enter the node‑management screen.
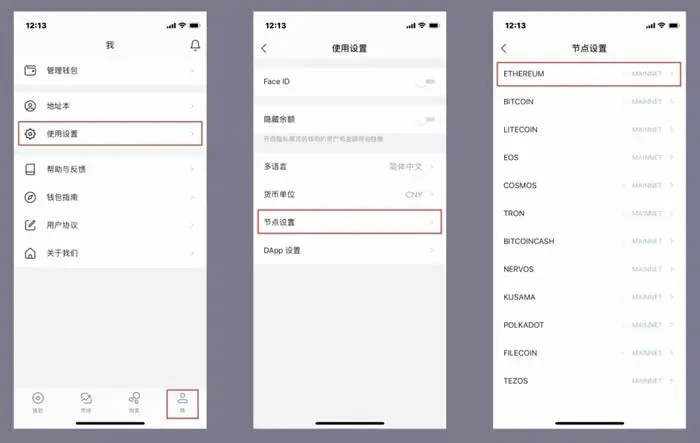
- Tap the + icon at the top‑right and select “Quick Add”. The app will redirect to the Chainlist page; scroll down, search for Fantom, then click Connect Wallet → Add to imToken and authorize the request. The Fantom node will be added and automatically selected.
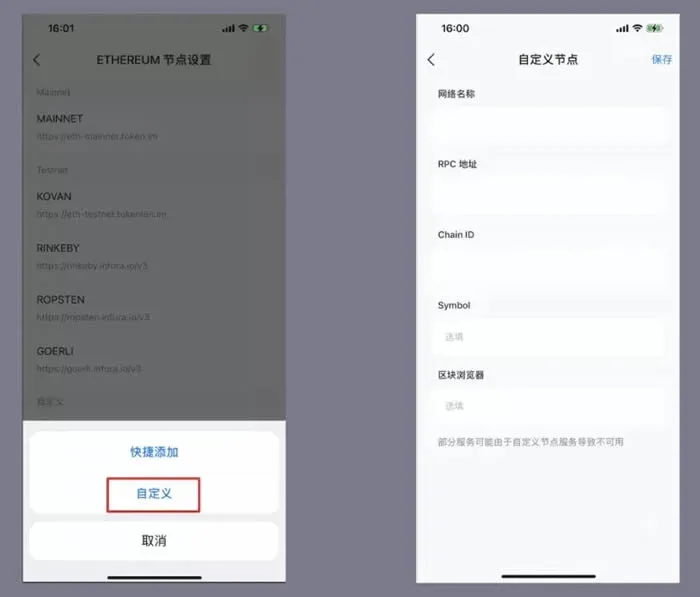
Method 3: Manually Add a Custom Node
- Perform the same first step as Method 2 to reach the node‑settings screen, then tap the + icon and choose “Custom”.
- Fill in the Fantom chain parameters in the form that appears:
| Field | Value |
|-------|-------|
| Network Name | ftm |
| RPC URL | https://rpcapi.fantom.network |
| Chain ID | 250 |
| Symbol | FTM (block explorer) |
- After completing the form, press Save at the top‑right. The custom node becomes active and the wallet switches to Fantom.
Regardless of which method you use to add the node, the Assets page will display the current network name and the FTM balance associated with the displayed address.
3. Common Node Information Resources
- Lookup website: <https://chainid.network>
- Node configuration JSON: <https://chainid.network/chains.json>
Friendly reminder: Before performing any operation, make sure your imToken app is updated to version 2.9.3 or later to benefit from the newest node support and security improvements.
---
Additional notes for a global audience
- If you need to purchase FTM tokens, major exchanges such as Binance.US (for U.S. residents) or the global Binance platform can be used. Always verify that the exchange supports fiat deposits via USD, SEPA, or SWIFT transfers.
- Crypto transactions may generate taxable events in many jurisdictions. Consult a local tax professional to understand how gains from Fantom or other digital assets are treated under your country’s tax laws.
The steps above constitute the complete workflow for experiencing the Fantom public chain within the imToken wallet. For deeper insights on node management and advanced DeFi strategies, follow the coverage on the Bitaigen (比特根) platform.
💡 Register on Binance with referral code B2345 for the maximum trading fee discount. See Binance complete guide.


