 Bitaigen Research
 OKX Web3 Wallet: A Comprehensive Guide for Global Users
After the DeFi Summer of 2020, the NFT Summer and GameFi boom of 2021, the blockchain‑driven decentralized ecosystem expanded rapidly, attracting a massive influx of users. However, with the emergence of numerous public blockchains, assets are scattered across different networks, which significantly raises the cost of querying, transferring, and managing them. At the same time, the NFT craze pushed gas fees higher, discouraging many newcomers. Is there a unified entry point that can lower the barrier to entry while helping users manage assets efficiently across chains? The answer is yes — the OKX Web3 Wallet was created precisely for that purpose.
From the perspective of the Bitaigen editorial team, we will quickly walk you through the core functions and key usage points of the OKX Web3 Wallet. This article dissects the convenience of multi‑chain management, the workflow of cross‑chain transactions, and the essential security measures, helping beginners get started smoothly in the decentralized ecosystem. Later sections include hands‑on demonstrations, so read carefully. We also showcase the details of cross‑chain transfers and NFT asset management, providing intuitive guidance for real‑world operations.
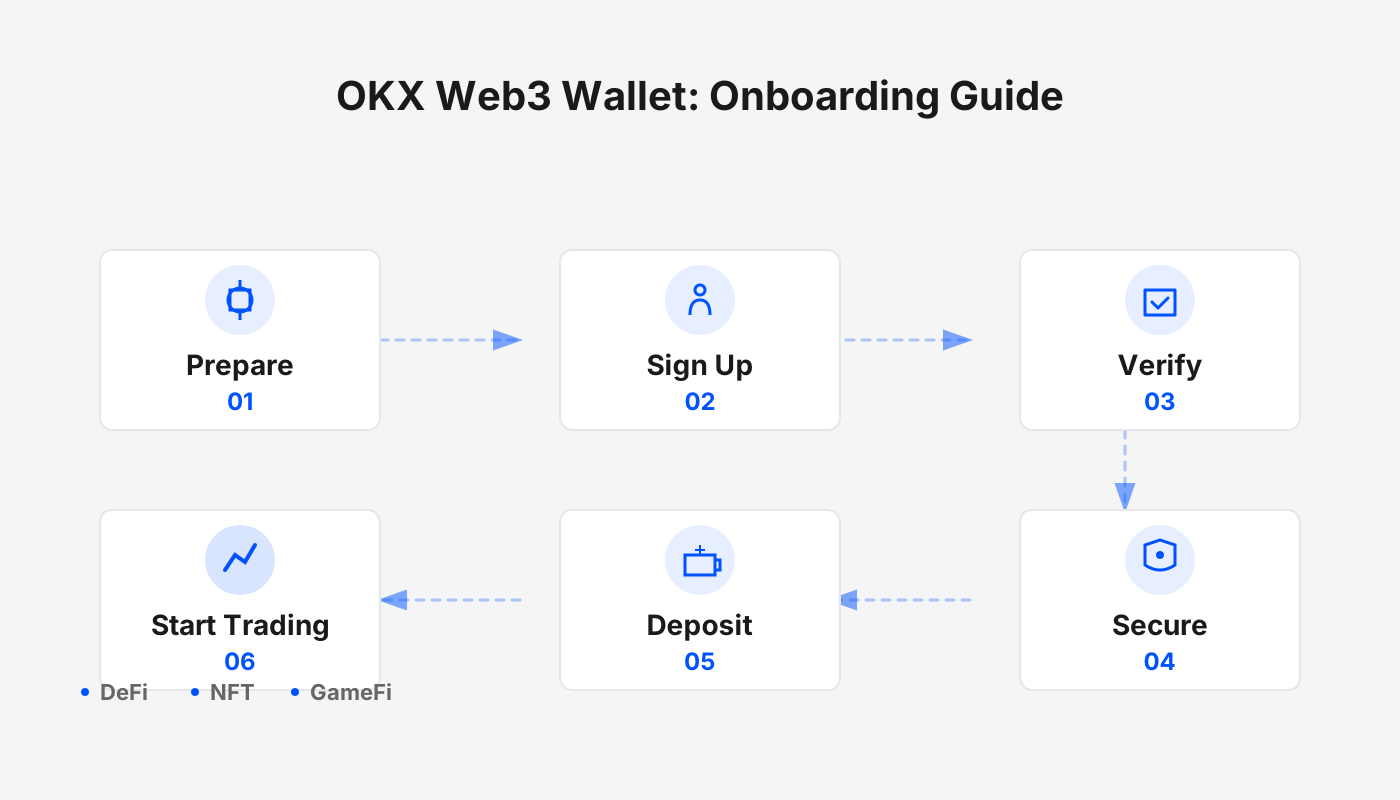
1. Core Positioning of the OKX Web3 Wallet
The OKX Web3 Wallet is a non‑custodial, decentralized multi‑chain wallet that comes with an integrated cross‑chain DEX, Yield (Web3 earning) module, and a heterogeneous NFT marketplace. With a single seed phrase, users can freely switch among more than 40 major networks such as Ethereum, OKTC, BSC, Polygon, and connect to over 1,000 DApps.
Main Advantages
- Full ownership of assets; private keys and seed phrases remain only on the user’s device.
- Withdrawals do not require platform approval, resulting in faster processing.
- One seed phrase can derive addresses on multiple chains; multiple seed phrases can also be imported.
- Cross‑platform compatibility: available on iOS, Android, and web browsers.
Users of decentralized wallets must take personal security measures: promptly back up seed phrases or private keys, set strong passwords and store them safely, beware of phishing links, and verify download sources. The OKX Web3 Wallet has passed a Slowmist private‑key security audit, ensuring that seed phrases, private keys, or passwords are never uploaded to any server.
In today’s trend toward multi‑chain interoperability, owning the OKX Web3 Wallet means you need only a single entry point to move freely among Ethereum, Arbitrum, OKTC, BSC, Aptos, and other networks, eliminating the hassle of creating a separate wallet for each chain.
2. Creating and Connecting the OKX Web3 Wallet
1. Creating a Wallet on Mobile
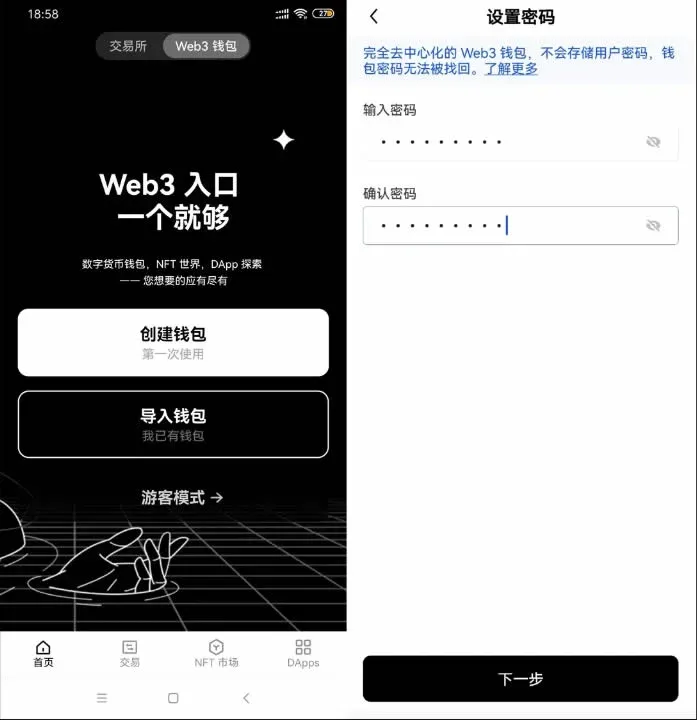
1) Open the OKX app (@click to download). On the home screen, select [Web3 Wallet] → [Create Wallet].
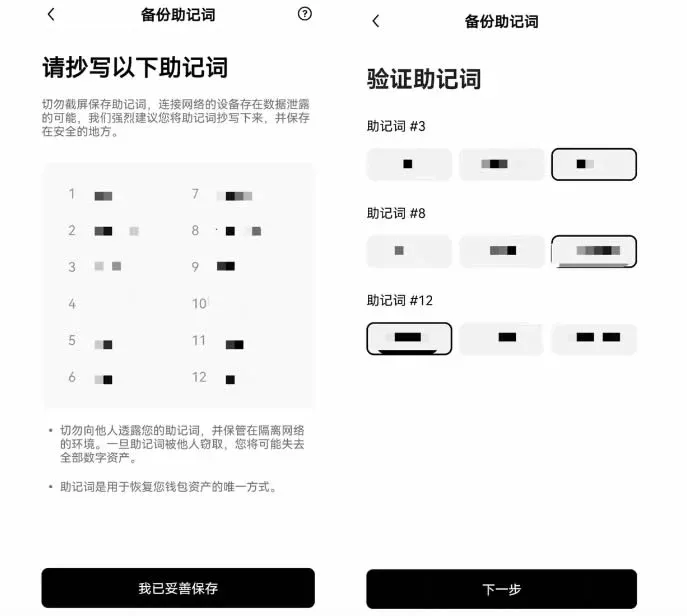
2) Set and confirm a login password. After completing the step, the system will prompt you to back up the seed phrase; be sure to follow the verification instructions.
Note for U.S. users: The download link above points to the global OKX platform. If you reside in the United States, please use Binance.US (or the U.S.‑compliant version of OKX) to comply with local regulations.
2. Installing the Browser Extension and Creating a Wallet
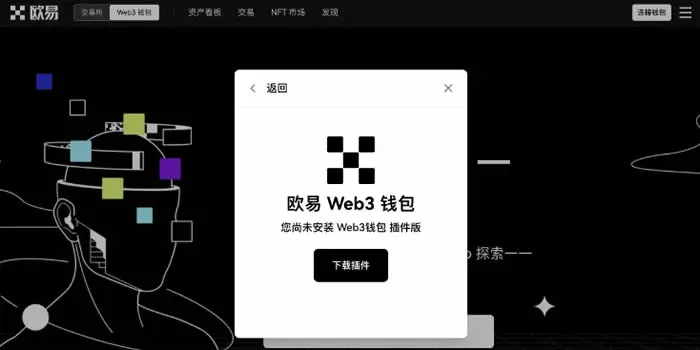
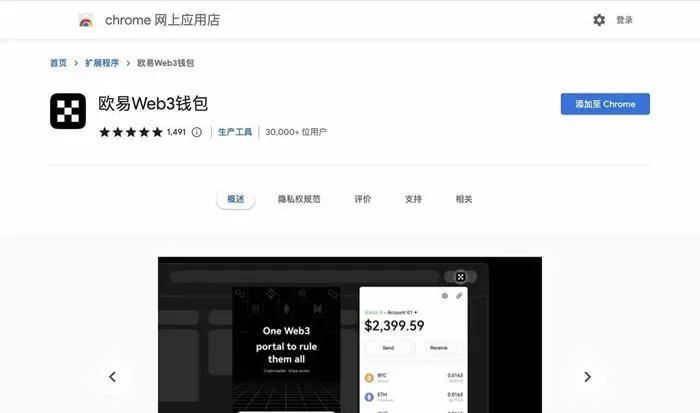
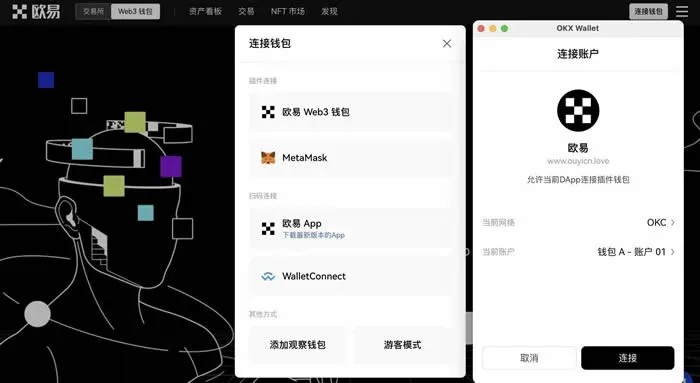
- Visit the OKX official website with Chrome, click the top‑right [Web3 Wallet] → [Connect Wallet] → choose [OKX Web3 Wallet] → [Download Extension].
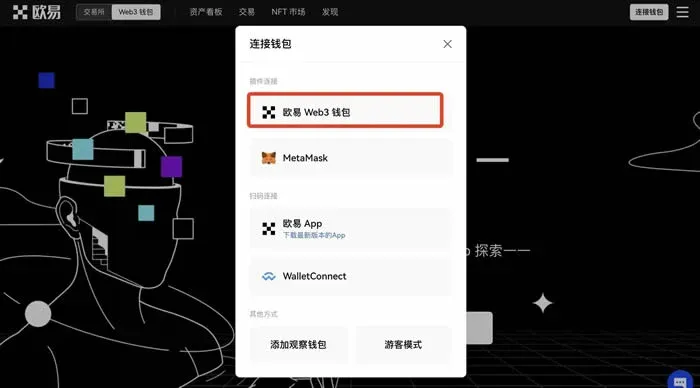
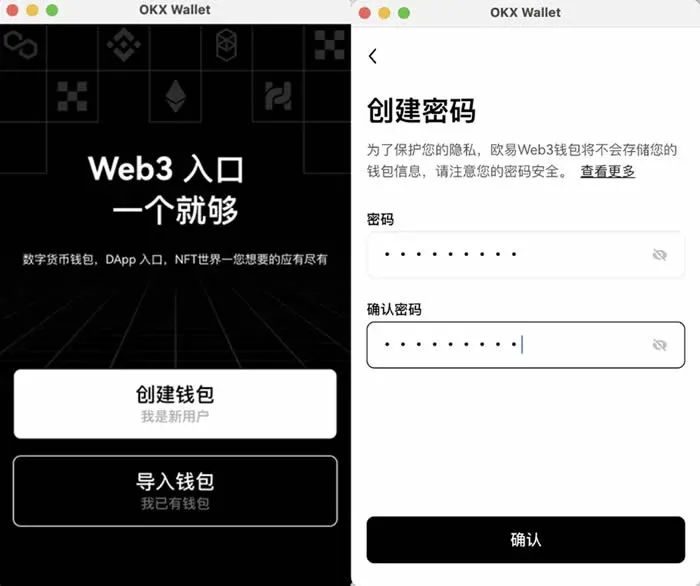
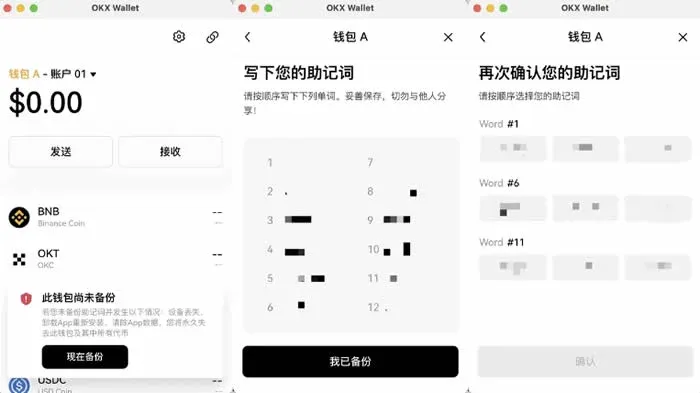
- After installation, click [Create Wallet] in the extension window, set a password, and back up the seed phrase.
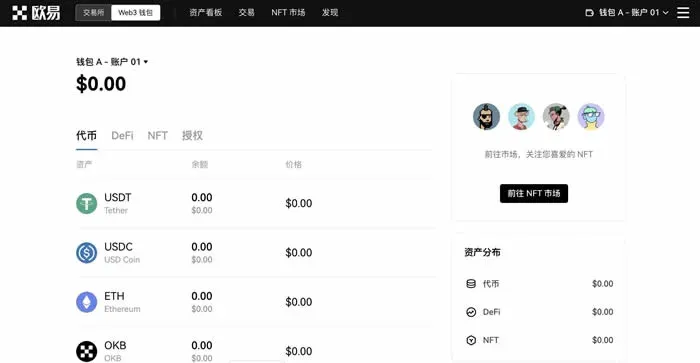
- Return to the OKX website, click [Web3 Wallet] → [OKX Web3 Wallet] → [Connect Account] → [Connect] to link the newly created wallet with the web interface.
3. Using QR Codes for Cross‑Device Connection
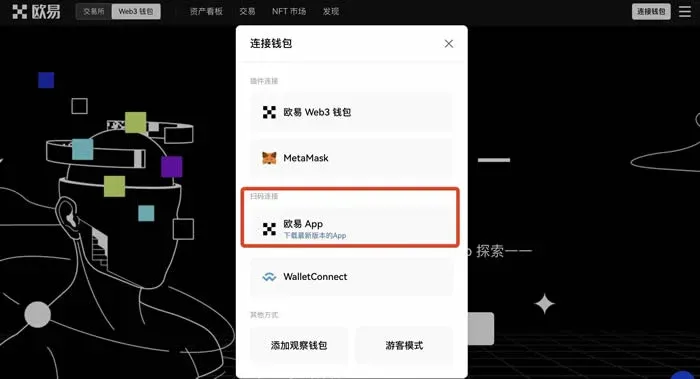
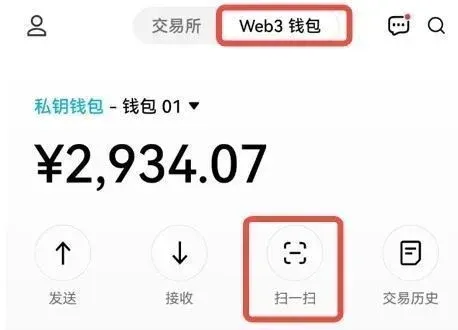
If you have already created a wallet in the mobile app, simply click [Scan to Connect] on the web page and scan the displayed QR code with the OKX app to log in instantly.
Important: OKX Web3 Wallet also offers a keyless wallet option. Users can safeguard assets without holding a seed phrase, representing the market’s first product with an emergency exit mechanism.
3. Receiving, Sending, and On‑Chain Operations
Receiving Assets
On the wallet’s home screen, tap [Receive], select the desired token, and a corresponding address will be displayed. Copy this address and paste it into the withdrawal field of any other platform to transfer assets into your OKX Web3 Wallet.
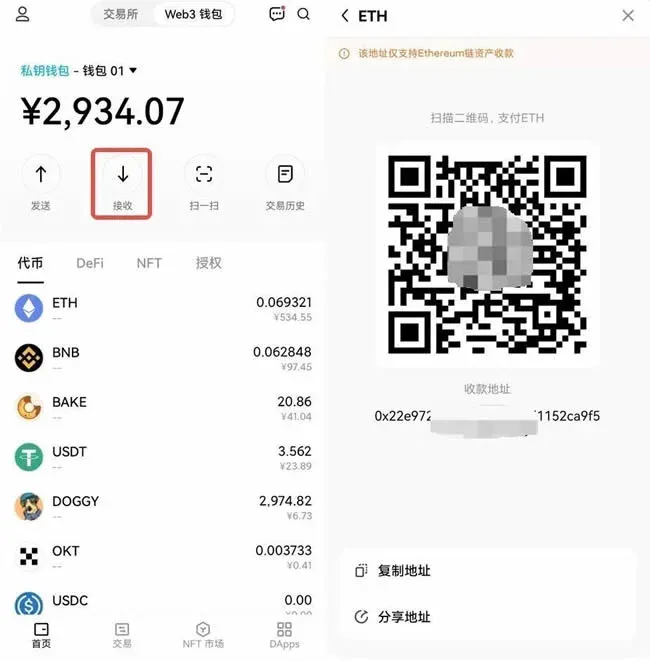
Sending Assets
Tap [Send], then follow the prompts to input the recipient address and amount. After confirming, the transaction is broadcast and the assets are deducted from your wallet instantly.
Beyond basic transfers, the OKX Web3 Wallet also integrates Swap, Yield, NFT Marketplace, and DApp Discovery functions, enabling users to explore the decentralized ecosystem comprehensively.
4. Conducting On‑Chain Trades Within the OKX Web3 Wallet
The wallet’s trading page essentially acts as a DEX aggregator: all matching, settlement, and clearing happen on‑chain via smart contracts. The system automatically calculates the optimal route, balancing exchange rates, gas fees, and slippage to provide the most cost‑effective swap for the user.
Below is an example workflow using the mobile app:
- Navigate to [Web3 Wallet] → [Swap].
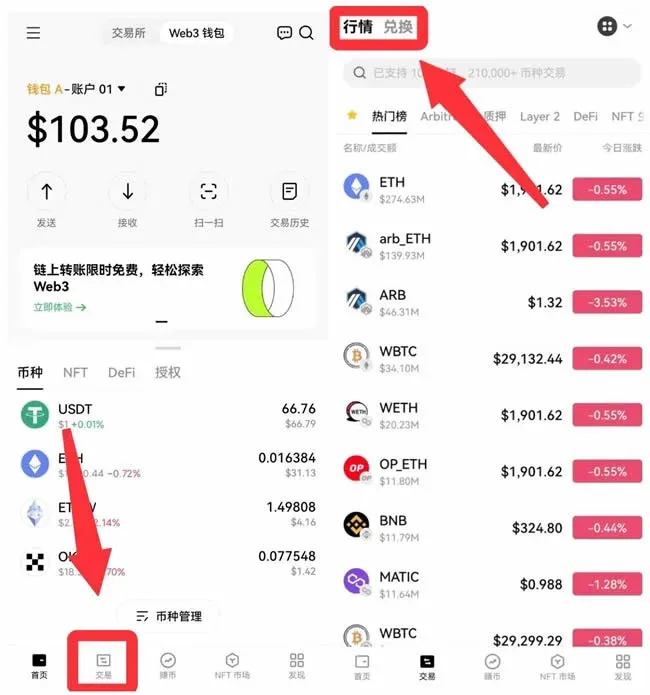
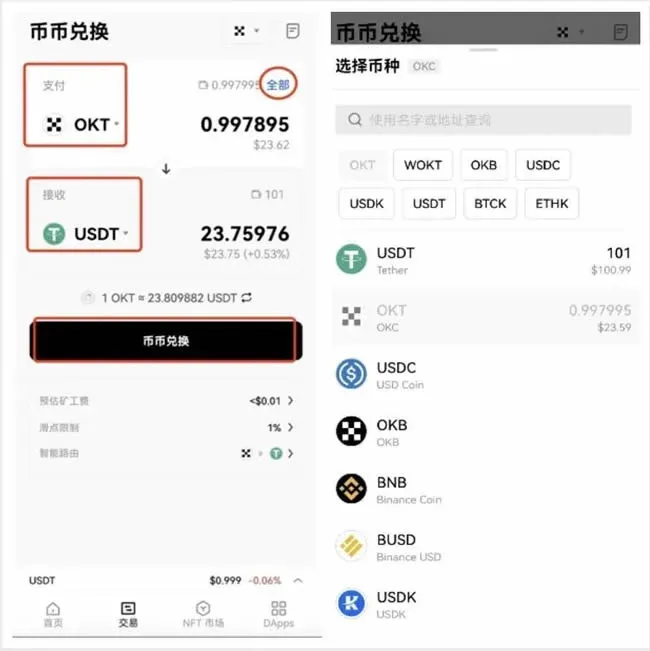
- In the From and To dropdowns, choose the tokens you wish to exchange, then enter the amount. The system will instantly display a quote. To use the entire balance, tap the [Max] button. Note that a portion of OKT will be reserved for gas.
- If you want to customize the miner fee, set a slippage tolerance, or enable smart routing, adjust these options in the Settings area.
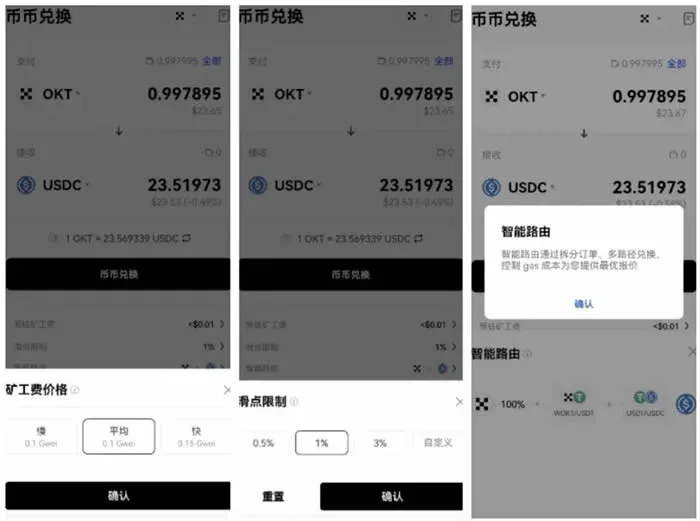
- For a token you have never swapped before, you must first Approve it. Confirm the approval in the wallet popup before proceeding.
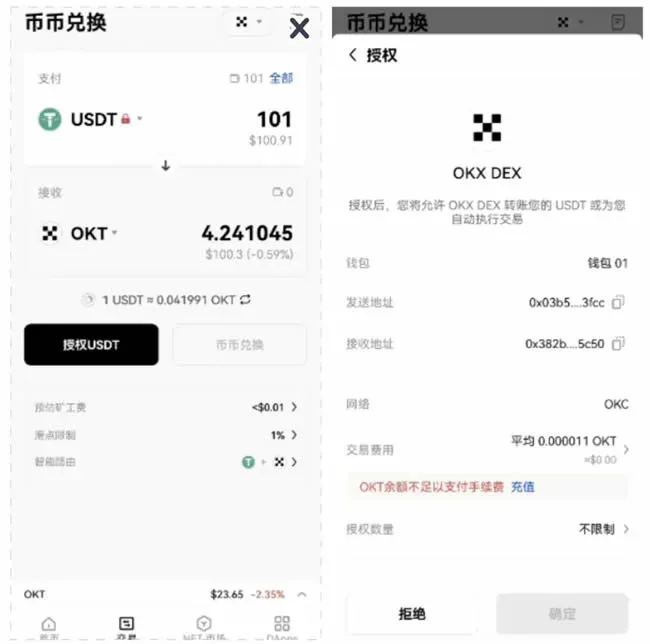
- After confirming the quote, tap [Swap]. A second confirmation dialog will appear; review the details and approve the transaction in your wallet. If the market price changes during the process, the system will prompt you to accept the new quote before completing the swap.
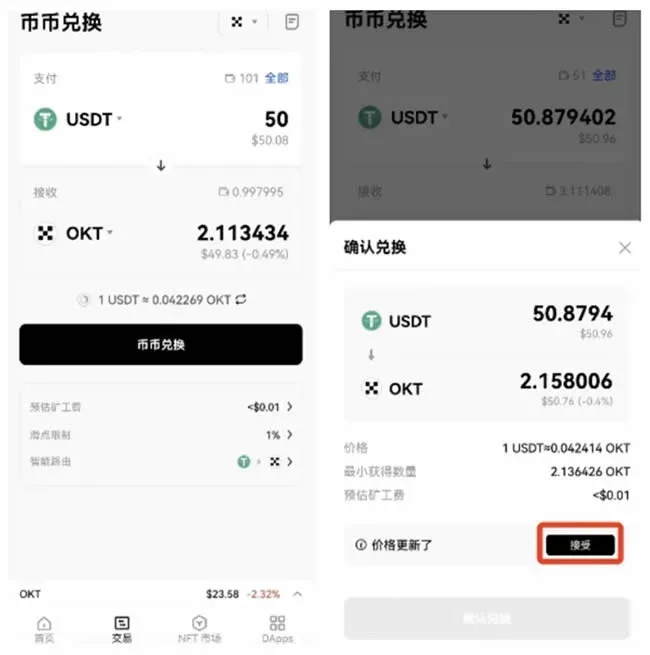
Tax Reminder: In many jurisdictions, profits from crypto swaps may be subject to capital gains tax. Users should consult local tax regulations or a professional advisor.
5. Full Guide to the OKX NFT Marketplace
The OKX NFT Marketplace offers two major sections: a secondary market for buying and selling existing NFTs, and an issuance (primary) platform for minting and launching new collections. The marketplace is fee‑free, decentralized, and aggregates assets across multiple chains.
1. Buying NFTs
1) Log in to the OKX website, then click [Web3 Wallet] → [NFT Marketplace] → [Market]. Use the search bar or filters to locate the desired NFT.
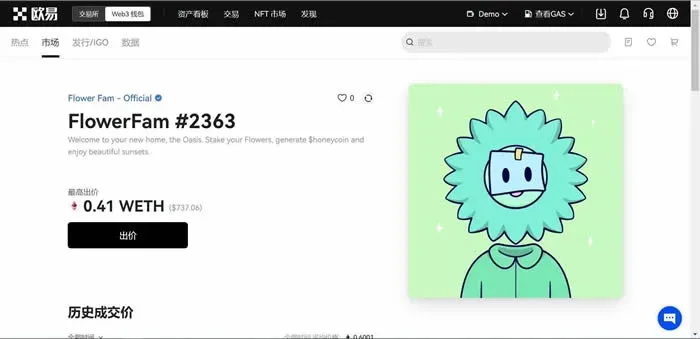
2) If the page shows a [Bid] button, the item is up for auction; if a [Buy] button also appears, you can purchase it instantly at the listed price.
- Auction: Enter your bid amount, price per unit, and expiration date, then wait for the seller’s confirmation. If the auction ends without a match, the bid is automatically cancelled.
- Buy Now: Click [Buy] to complete the transaction immediately.
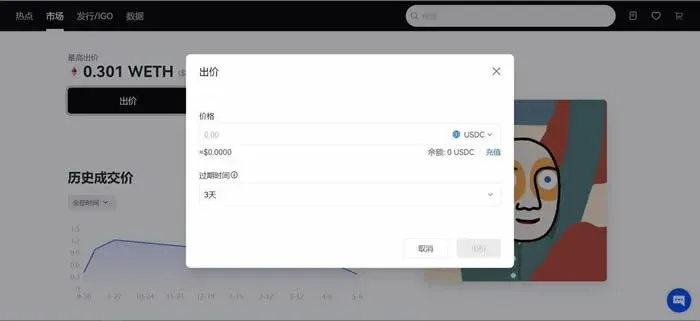
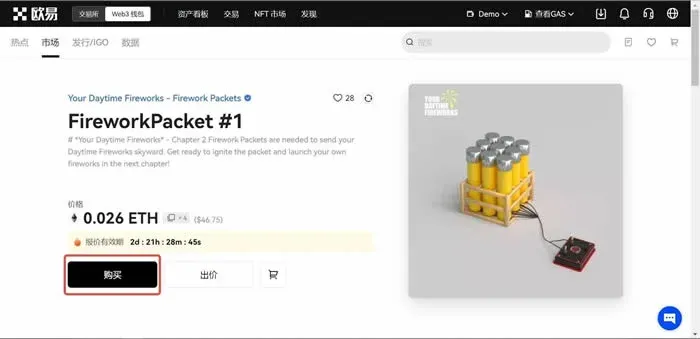
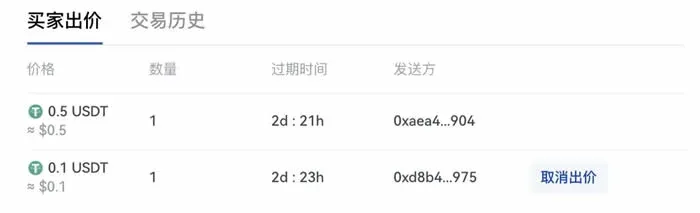
3) After placing a bid, you can view all active bids in the [Buyer Bids] section at the bottom of the page. To cancel a bid, click [Cancel Bid].
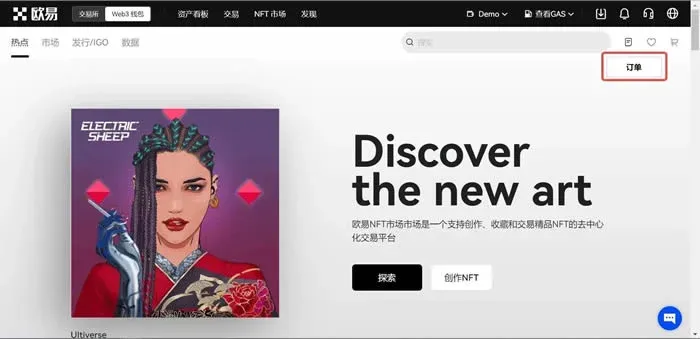
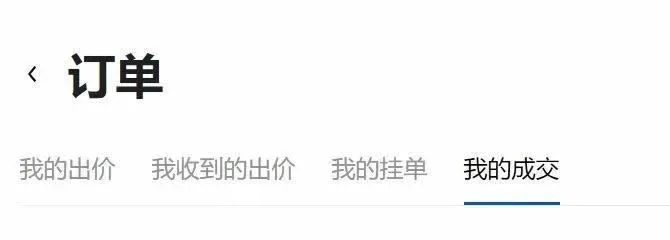
4) Successfully purchased NFTs appear under [Orders] → [My Purchases].
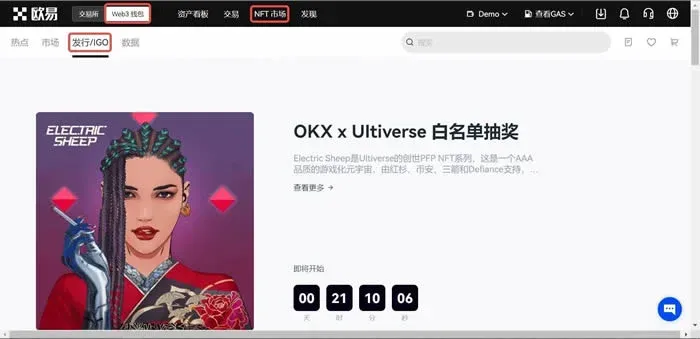
All trades are executed using WETH; the system automatically wraps ETH to WETH when you place an order. On‑chain fees fluctuate in real time according to the network’s gas price.
2. Participating in Primary‑Market Launches
1) Navigate to [Web3 Wallet] → [NFT Marketplace] → [Launch] to browse featured, popular, and historical events.
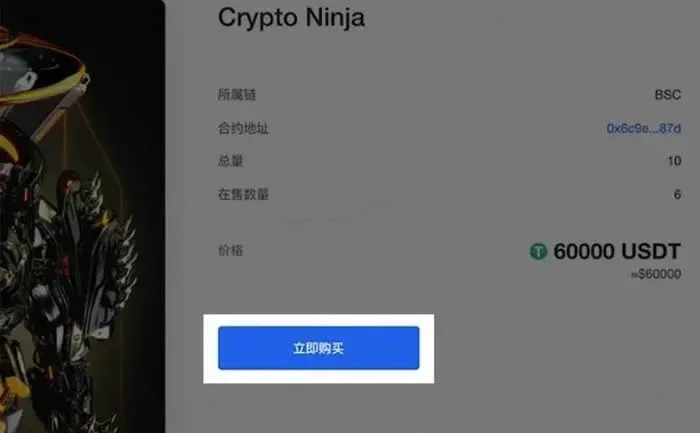
2) Choose an NFT collection you like, click [View Details] → [Buy Now], connect your wallet, and complete the
Related Reading
- deBridge Rewards: Cross‑Chain, OKX Wallet & Points
- Binance Alpha Box Guide: Reshaping Crypto Airdrop Mechanisms
- OKX Web3 Wallet Security Guide: Updates, DApp Browser
💡 Register on Binance with referral code B2345 for the maximum trading fee discount. See Binance complete guide.