
We at the Bitaigen editorial team have meticulously organized the complete workflow for the TokenPocket (TP) wallet, from downloading and installing to creating or importing a wallet and completing the first token purchase. This article focuses on operational details, complemented by practical tips, to help blockchain newcomers get started quickly while avoiding common mistakes. To smoothly step into the world of digital assets, we recommend reading the full tutorial.
How to Buy Tokens with the TP Wallet?
TokenPocket (TP) wallet is the go‑to tool for many blockchain beginners entering the crypto space. It supports multiple major ecosystems, offers a user‑friendly interface, and enables users with little experience to manage assets and trade swiftly. Below, we break the entire process into several key stages to guide you step‑by‑step from download to token purchase.
1. Obtain and Install the TP Wallet App
- Visit the official channel to download the TokenPocket application (available for iOS and Android).
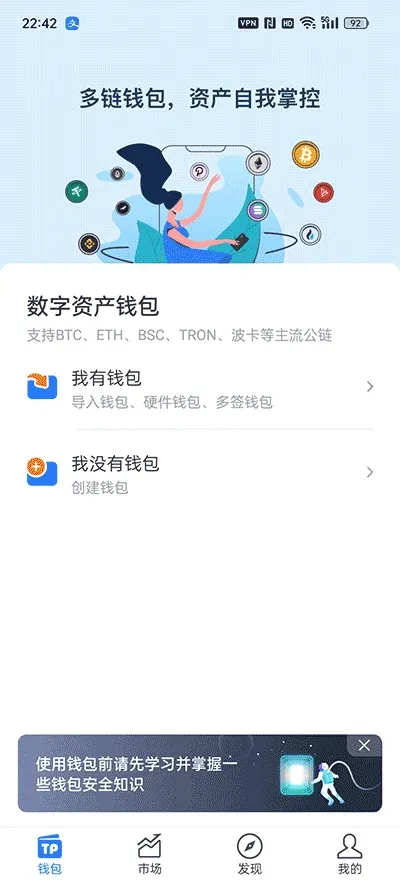
- After installation, open the app and tap 【I don’t have a wallet】 to start the creation flow.
2. Create a New Wallet or Import an Existing One
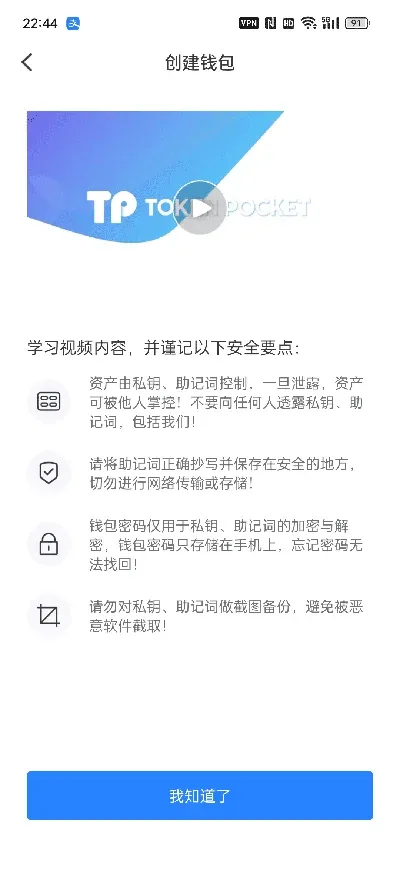
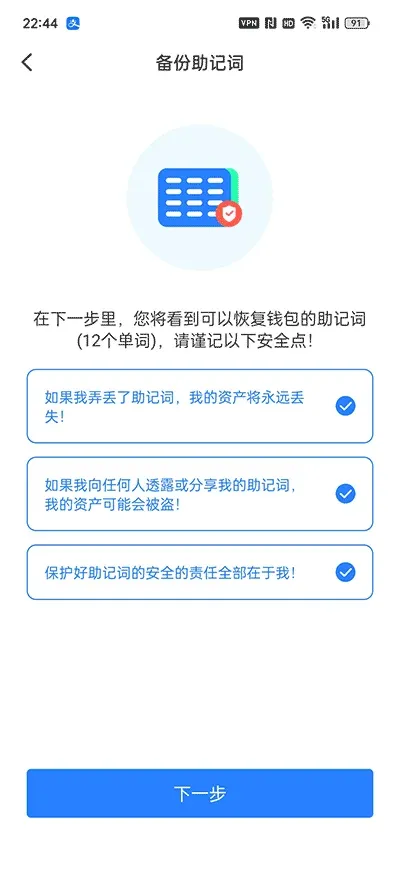
Friendly reminder: The mnemonic phrase is the sole credential for restoring your wallet. Write it down on paper and keep it safe; do not screenshot it or store it on any internet‑connected device.
- Choose Create Wallet (if you already have a wallet, you can select Import Wallet; a separate tutorial covers that).
- In the pop‑up list of underlying networks, pick the chain you wish to use (this guide uses Ethereum as an example). In most cases the system will default to recommending an Identity Wallet.
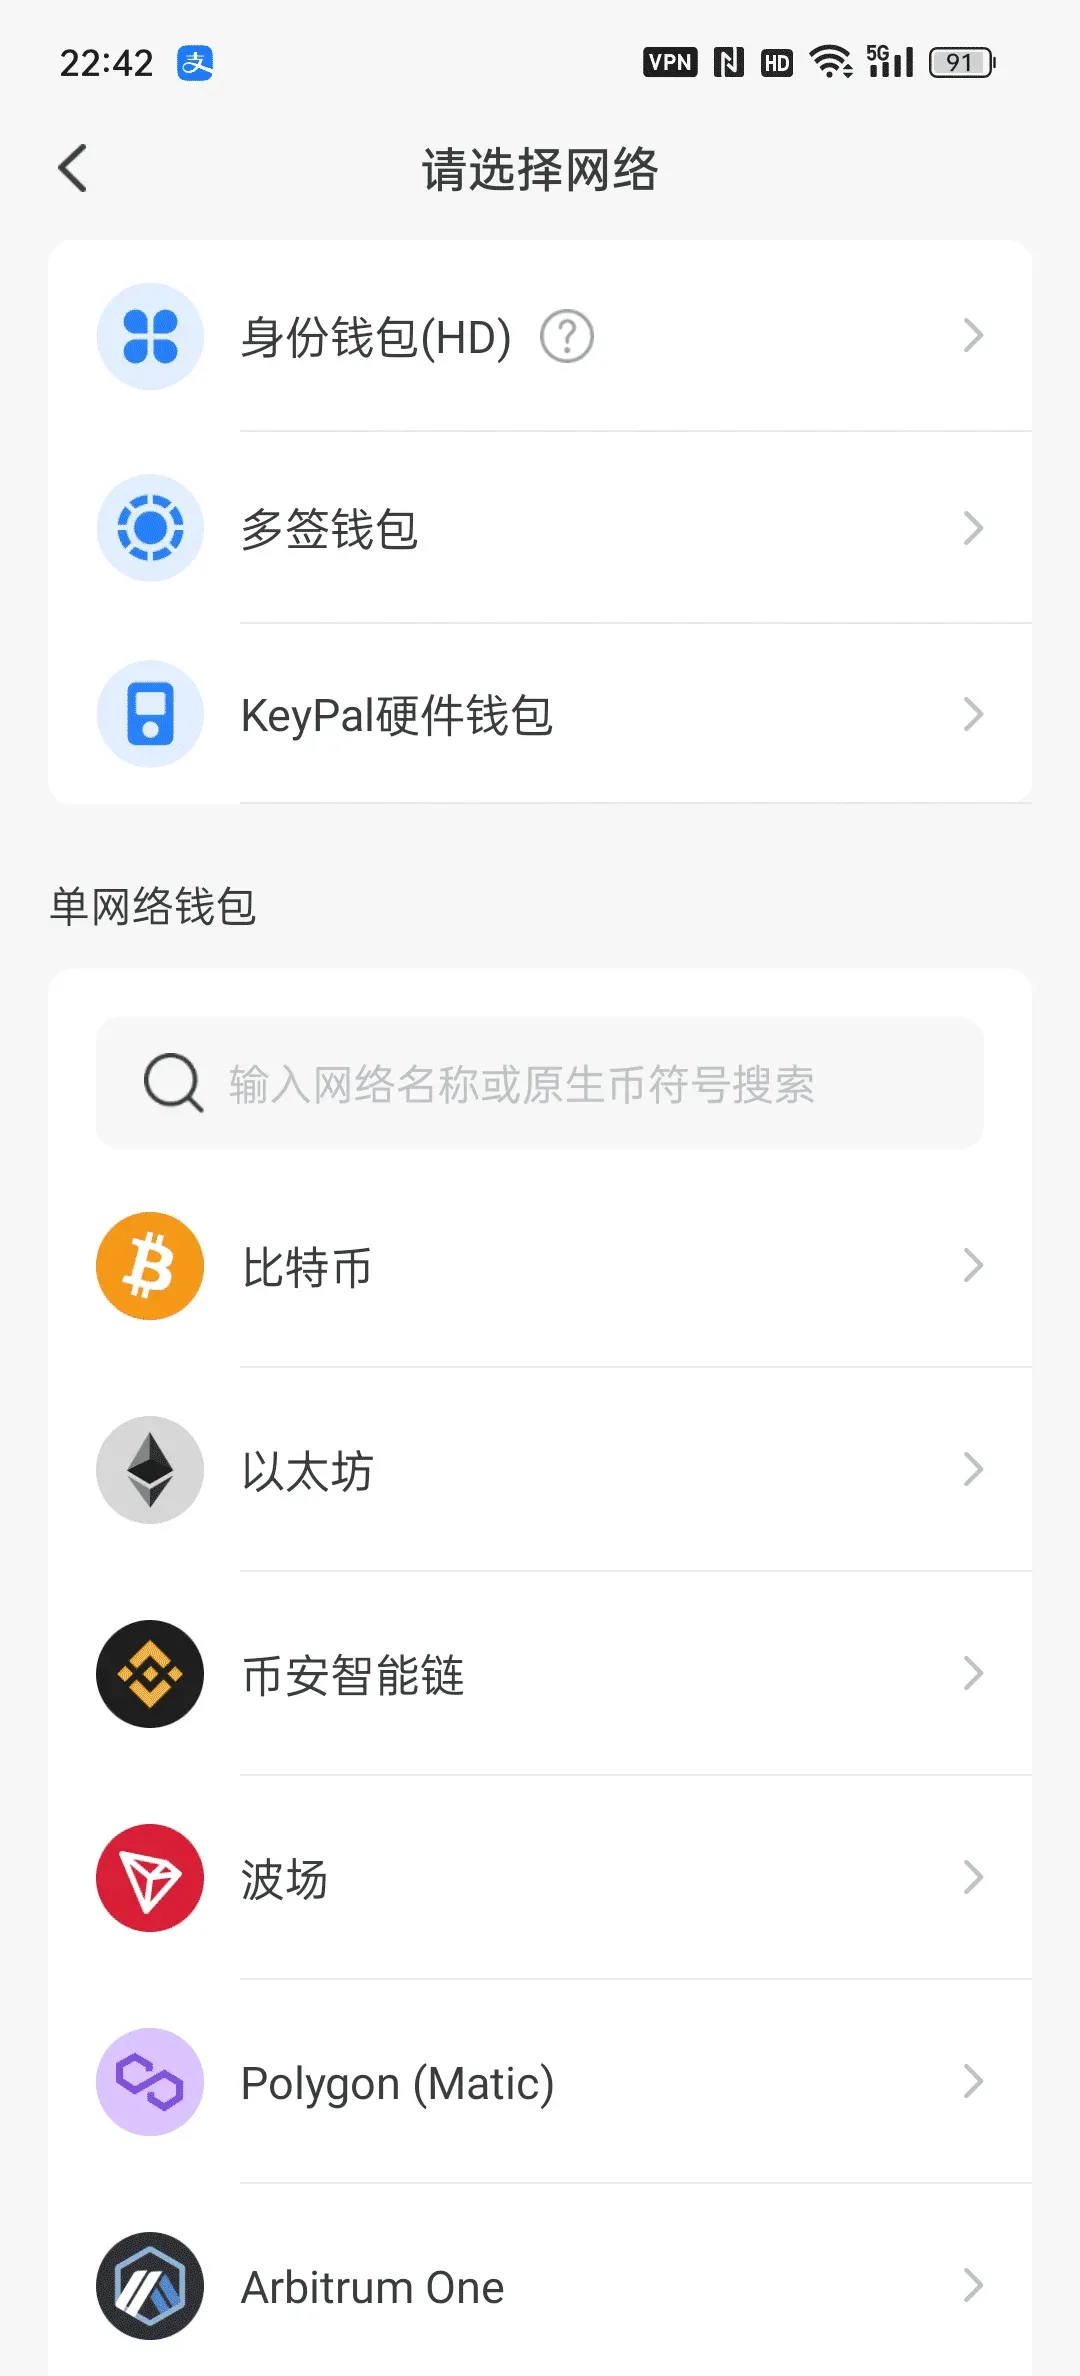
- Tap 【Create Wallet】 to proceed to the setup page.
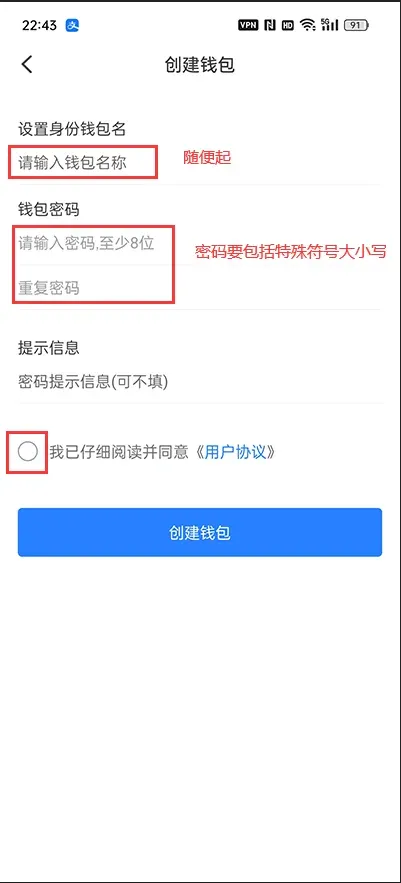
- Fill in Wallet Name and Login Password in order, check the Terms of Service & Privacy Policy, then click Create Wallet.
- The system will display a 12‑word (or 24‑word) mnemonic phrase. Be sure to select all words and record them by hand; do not use screenshots.
- After you have written them down, tap 【Backup Complete, Verify】. The app will ask you to re‑enter the mnemonic in the correct order for verification.
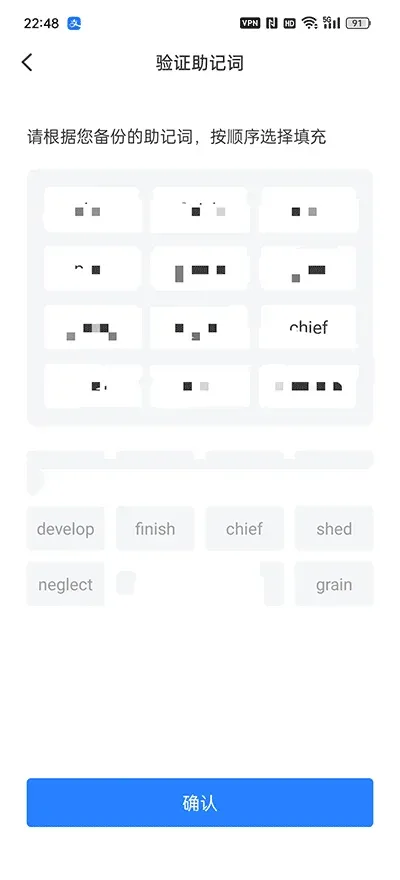
- Once verification succeeds, the system will prompt you to Confirm. After confirming, you will be taken to the wallet’s main page.
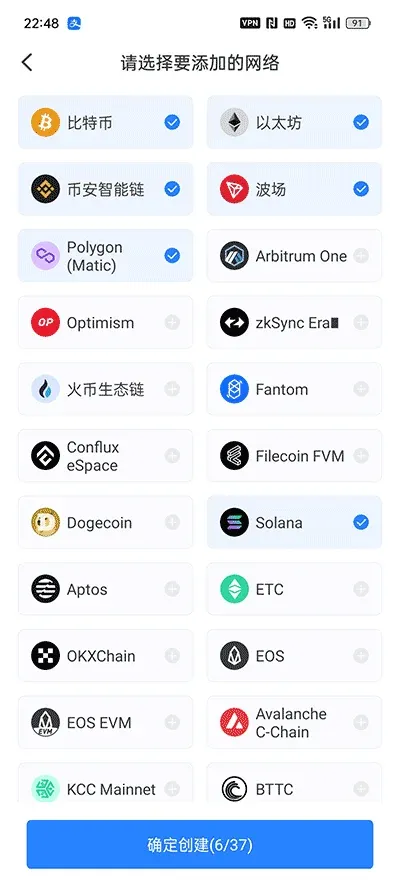
- On the main interface, the default network is already pre‑selected; simply tap Confirm to continue.

At this point, a brand‑new TP wallet has been created. You will see an empty balance in the asset list.
3. Perform a Token Purchase Within the TP Wallet
The TP wallet itself is an aggregation platform that embeds several DApps (decentralized applications). Each blockchain corresponds to a different trading entry point, for example:
- HECO Chain → Mdex
- BSC Chain → PancakeSwap
Below we use Mdex as an example to show how to swap existing USDT for a target token.
- Open Mdex (the DApp icon is located on the wallet’s home screen). The system will automatically switch to the HECO network.

- In the trading‑pair list, choose USDT → Target Token and enter the amount of USDT you wish to exchange.
- In the “Token” field, paste or search for the contract address of the target token (this is the unique identifier for the coin). Verify that the address is correct before proceeding.
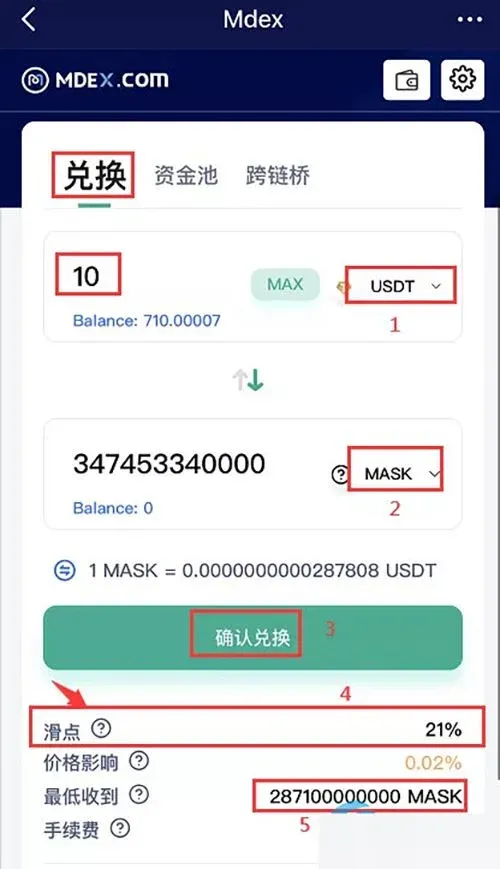
- After confirming the swap details, the system will show a slippage warning (the possible deviation between the quoted price and the actual execution price). For instance, if you set a slippage of 2 %, the amount of tokens you finally receive may be slightly lower than expected.
- Enter your wallet password to finalize the transaction. The network fee will be deducted directly from your balance.
- Once the transaction succeeds, return to the wallet’s home page; the newly acquired tokens will appear in the asset list.
Keep in mind that newly issued tokens can be highly volatile and resemble a “lottery‑style” investment. Always manage the size of your exposure responsibly.
4. Core Advantages of the TP Wallet
- Multi‑Chain Compatibility: Supports HECO, BSC, Ethereum and other major ecosystems; users can switch networks within a single interface to manage assets on different chains.
- DApp Aggregation: Built‑in DEXs such as Mdex, PancakeSwap, Newdex, etc., eliminate the need to download additional apps or switch browsers.
- Security & Reliability: Mnemonic is stored locally; private keys never leave the device. Unlike centralized exchanges, you retain full control over your assets.
- One‑Stop Management: Wallet creation, asset storage, and DApp authorizations are all handled inside the same application, making it an ideal daily entry point for asset management.
5. Summary
Through deep integration with several decentralized exchanges, TokenPocket offers users a “wallet + exchange + DApp” triad experience. Whether you want to quickly acquire a new project token or trade within the EOS ecosystem, the entire process can be completed inside the TP wallet, sparing you the hassle of separate registrations and transfers.
If you wish to explore the TP wallet further, visit its official website for the latest version and feature overview. For more detailed guides on buying tokens with TP, follow Bitaigen for future tutorials.
Note: Crypto transactions may be subject to tax in your jurisdiction; please consult a local tax professional. Users in the United States should use Binance.US (or another U.S.-compliant platform) for any fiat‑on‑ramp activities, employing USD via SEPA/SWIFT where applicable.
💡 Register on Binance with referral code B2345 for the maximum trading fee discount. See Binance complete guide.


