
<article>
We have systematically summarized the core principles and usage scenarios of hardware wallets in this article, focusing on analyzing the security advantages and operational procedures of the Ledger Nano S to help beginners quickly get started with sending and receiving Bitcoin. After reading, you will have a clearer understanding of asset protection; continue reading for the complete tutorial.
What is a hardware wallet?
A hardware wallet is a dedicated device that securely stores the private keys corresponding to crypto assets in physical hardware. Unlike software wallets, the private key never leaves the device itself and is never uploaded to the network or a computer. Therefore, all transactions must be signed on the hardware wallet, keeping the private key in an offline state at all times. As long as you purchase a cold wallet such as the Ledger Nano S through official channels, the risk of private key theft is almost negligible, thereby providing the highest level of protection for your assets.
Why use a hardware wallet?
- Exchange risk: History has seen multiple incidents where exchanges were hacked, suffered internal vulnerabilities, or simply disappeared (e.g., the Mt. Gox event), resulting in users being unable to recover their assets.
- Private key ownership: When you store coins on an exchange, the actual control of the private key lies with the platform, not the user. When airdrops or other on-chain operations occur, frequent withdrawals are often required, increasing exposure risk.
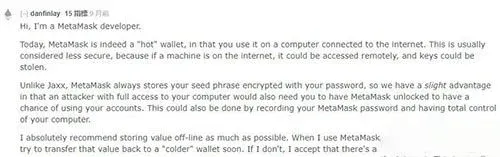
- Limitations of hot wallets: Software wallets such as MyEtherWallet, MetaMask, and imToken run on networked computers or phones. Once the device is remotely controlled (commonly referred to as a “zombie”), private keys or mnemonic phrases can easily be stolen. MetaMask developers have also acknowledged on Reddit that hot wallets are inherently less secure than offline hardware wallets.
Even if someone attempts to store private keys on an offline hard drive or old phone, such DIY cold wallets still need to be connected to a computer during use, lacking dedicated protection mechanisms, and recovery after loss is extremely difficult. In summary, although the aforementioned risks may not occur daily, their potential harm is sufficient to prompt us to reassess how we manage assets.
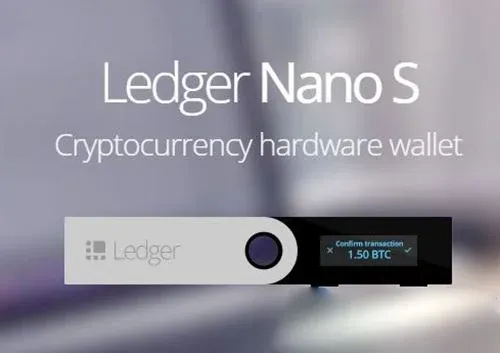
Ledger Nano S Overview
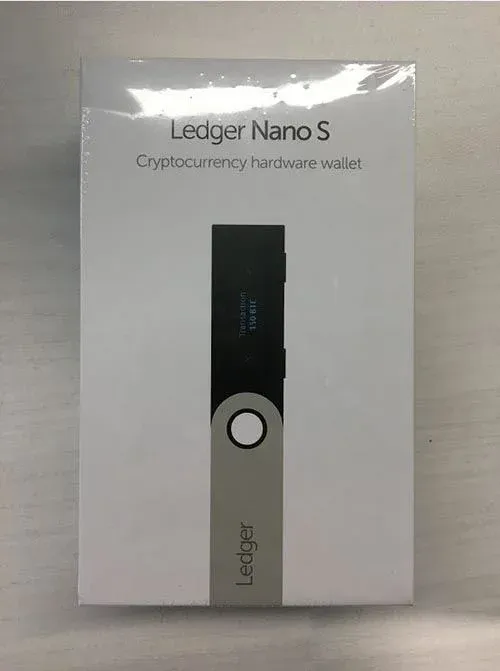
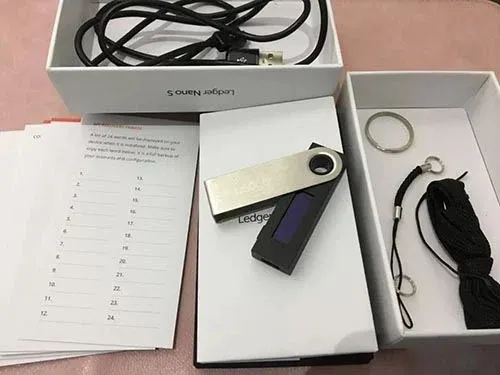
The Ledger Nano S is a portable hardware wallet released by Ledger, resembling a USB flash drive with a screen, priced at approximately 79 euros (about 85 USD). It integrates a secure chip, an OLED display, and two buttons on the left and right, making it compact and easy to operate. Below is the unboxing content from an official purchase (image placeholders retained):
- USB cable
- Three handwritten recovery phrase cards
- Ledger Nano S main unit
- Keyring and lanyard for enhanced portability
Initialization Process
- Connect the device
Use the USB cable included in the box to connect the Ledger Nano S to your computer.

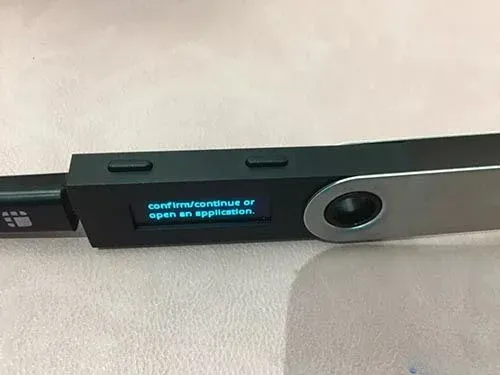
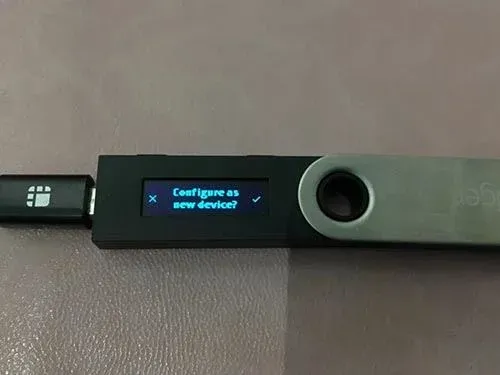
- Enter initialization
Press both left and right buttons simultaneously; the screen will prompt whether to restore an existing backup. Choose the right button → “Set up as new device”.
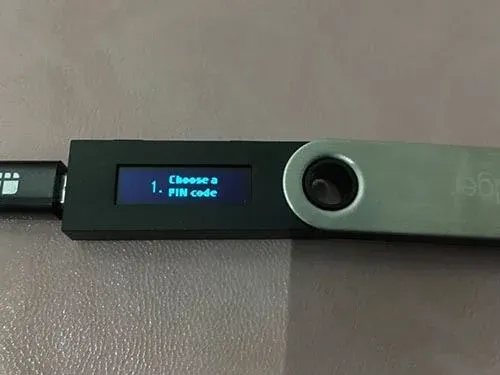
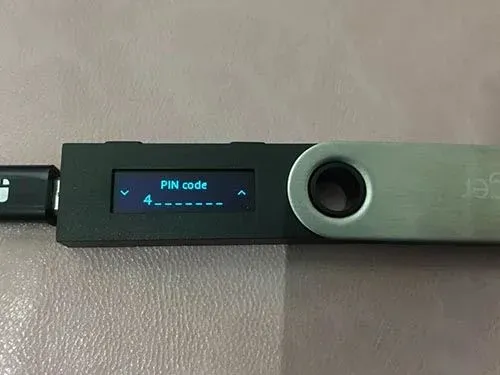
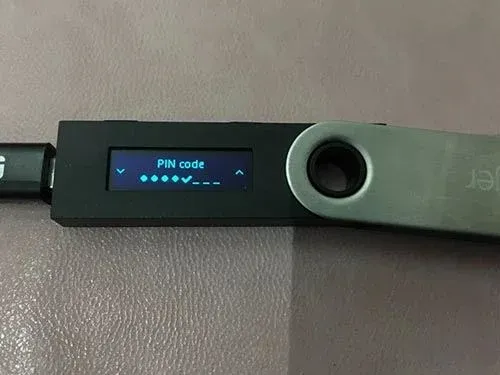
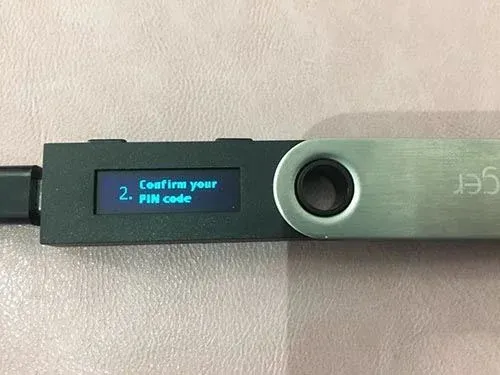
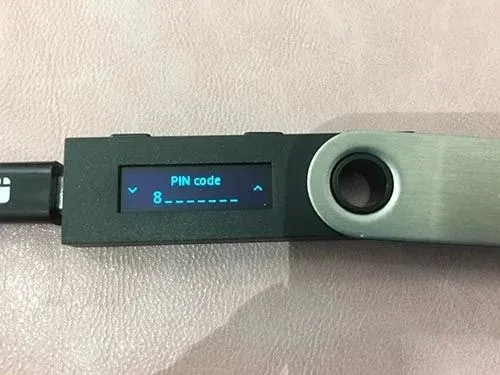
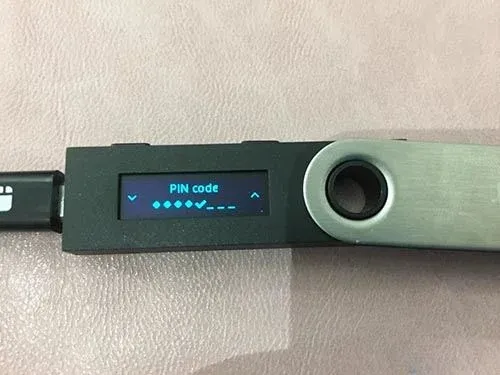
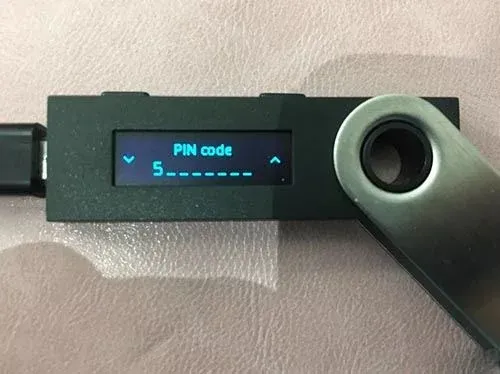
- Set unlock PIN
Enter a 4‑8 digit PIN (required each time you connect the device), confirming with the left/right buttons.
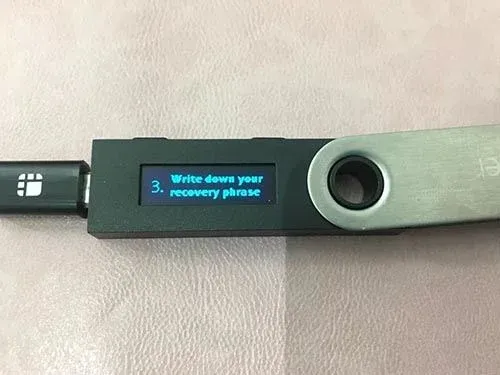
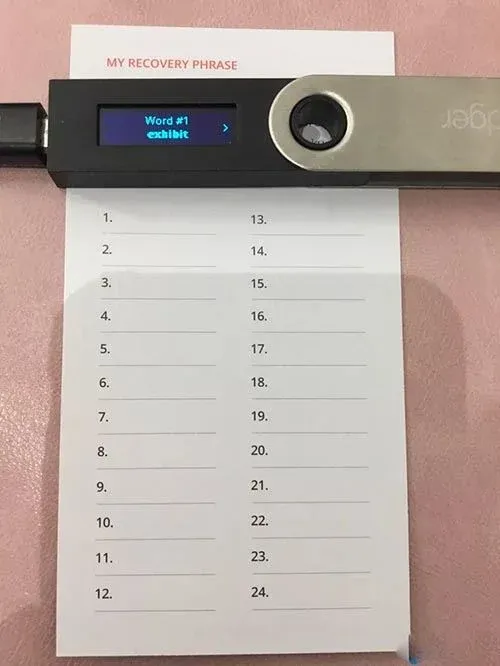
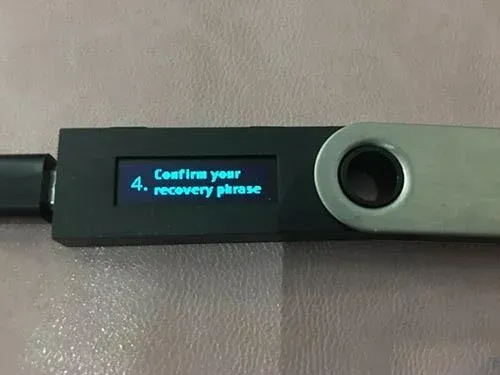
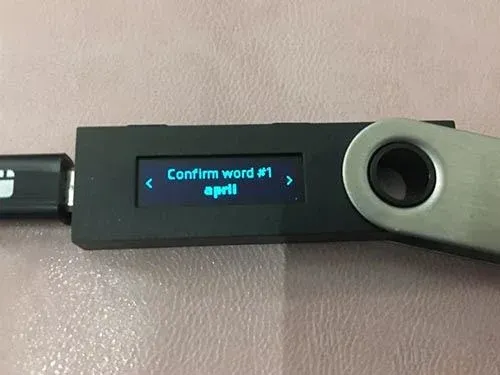
- Backup the 24‑word recovery phrase
The device will display 24 recovery words; please write them down in order on the supplied recovery phrase cards. Be sure to store the paper backup in a safe, offline location; do not keep it on any networked device such as a computer or phone.
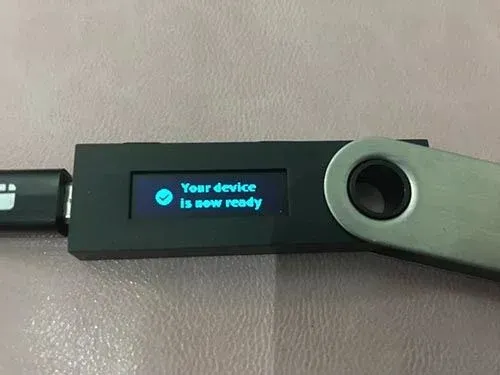
After completing the steps above, your Ledger Nano S is initialized and ready for the next stage.
Installing Ledger Manager and Applications
- Preparation
Ensure Google Chrome is installed on your computer.
- Download the official extension
Visit https://www.ledgerwallet.com/apps/manager and install the “Ledger Manager” Chrome extension.

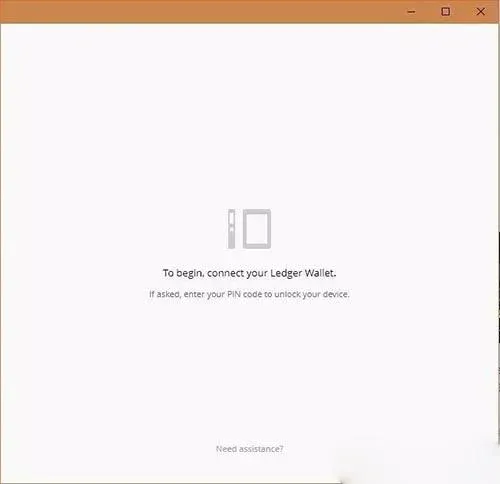
- Connect and unlock
After opening the extension, the interface will ask you to enter the PIN on the Ledger Nano S to unlock. Once entered, the manager pairs successfully with the device.
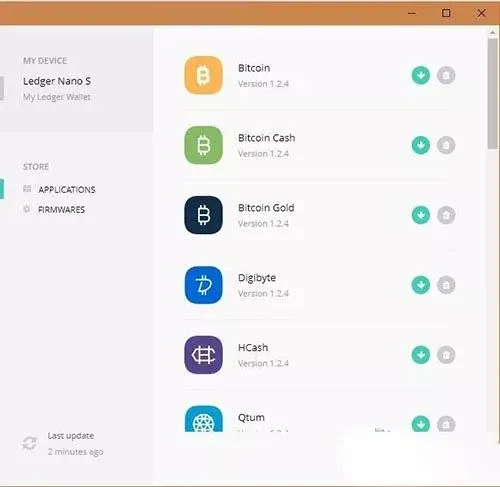
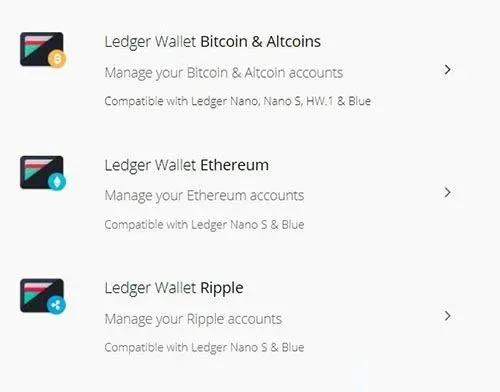
- Add coin applications
Ledger Manager works like an app store, offering apps for different crypto assets. The latest firmware has surpassed previous capacity limits, allowing multiple apps to be installed at once. Here we demonstrate installing the commonly used BTC and ETH apps:
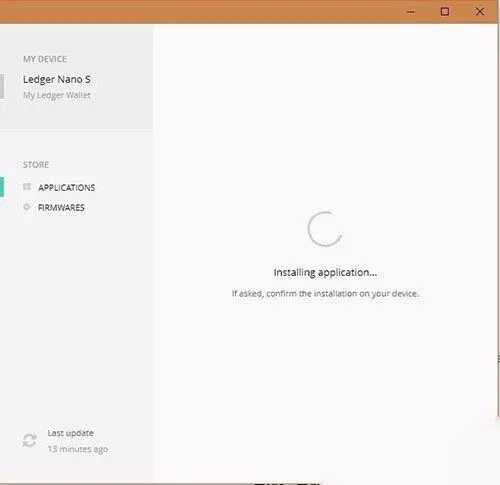
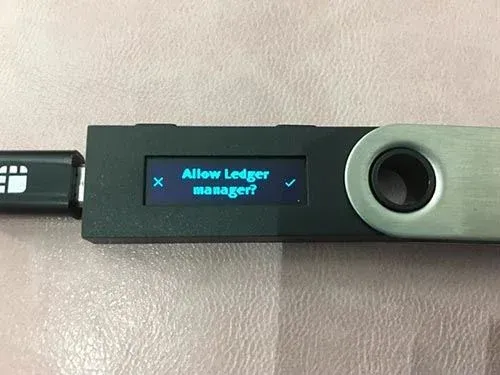
After confirming authorization on the Ledger Nano S, installation begins.
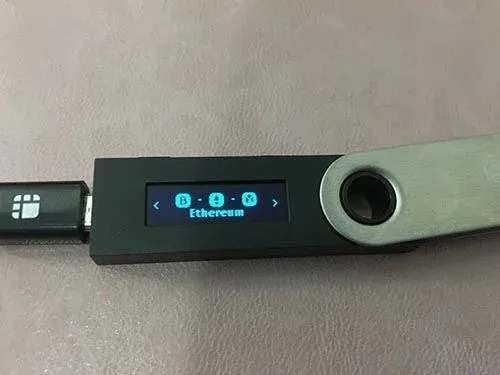
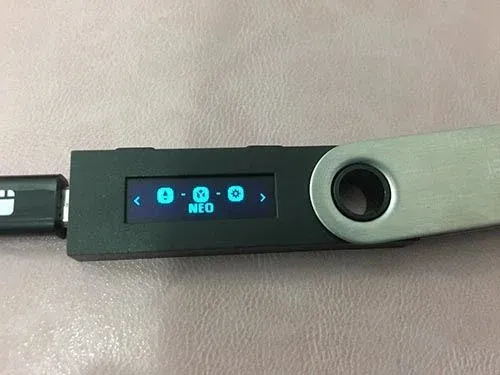
- Switch between coins
Once installation is complete, you can toggle between installed apps using the left/right buttons on the device.
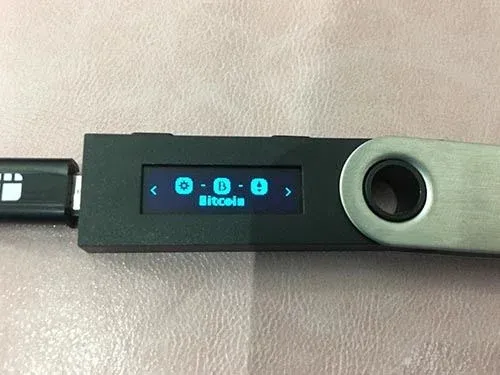
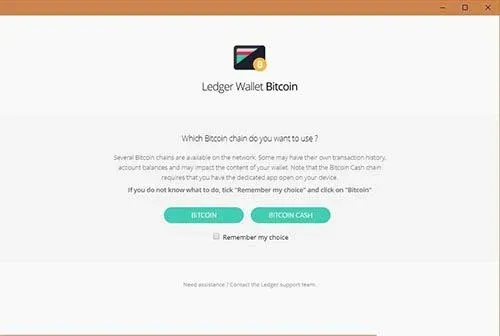
Using Ledger for Send/Receive (Bitcoin Example)
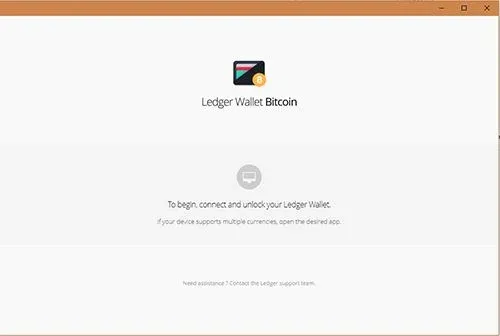
- Open the official web wallet
Go to https://www.ledgerwallet.com/apps, select the Bitcoin Web App. The system will prompt you to unlock the Ledger Nano S.
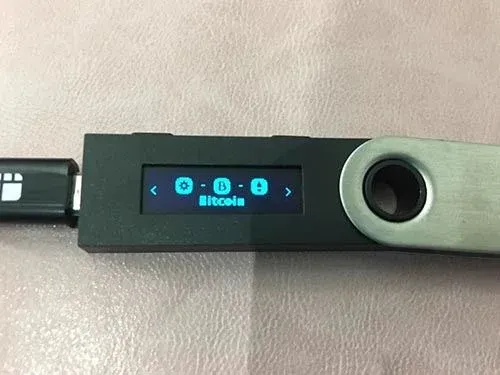
- Select Bitcoin app and authorize
After entering the unlock PIN, choose the “Bitcoin” app, confirm, and the device will activate the corresponding on‑chain functionality.

- Send a transaction
In the web interface, fill in the recipient address and amount, then click “SEND”. The transaction details are first sent to the Ledger Nano S; the device screen shows the address and amount, requiring you to confirm with the right button.


