
Introduction to Web3 and OKX (formerly OKEx)
Web3 refers to the cryptocurrency industry. To enter the Web3 space, you need to be proficient in the full workflow of buying, cashing out, trading, and on‑chain transfers of cryptocurrencies. This article uses the most beginner‑friendly Web3 platform—OKX—as an example and walks through account registration, app download, Web3 wallet creation, purchasing USDT on the exchange, trading virtual assets, and performing on‑chain transfers.
From the perspective of the Bitaigen editorial team, we help newcomers quickly master the full process of OKX app download, account registration, and wallet creation. The article focuses on practical steps, complemented by screenshots, so you will no longer feel lost when buying, trading, or transferring assets on‑chain. Follow the guide and you’ll be up and running in no time.
About OKX Exchange
OKX (originally OKCoin) was founded in 2013 by Star Xu. In its early days it focused on spot trading of Bitcoin and other cryptocurrencies, quickly becoming one of China’s largest crypto exchanges. To meet global demand and adapt to regulatory changes, the international site rebranded to OKEx in 2017 and began overseas expansion; it was renamed again to OKX in 2021 to better reflect its diversified and global business model.
Today, OKX has grown into a globally recognized digital‑asset trading platform, offering spot trading and derivatives for assets such as Bitcoin, Litecoin, Ethereum, and many others.
Development Timeline of OKX
2013 – Founding and Early Growth
- 2013: OKCoin launched in Beijing, rapidly attracting users and becoming a leading crypto exchange in China.
- 2014: Received investment from well‑known venture‑capital firms, further accelerating platform development.
2017 – Brand Revamp and International Expansion
- 2017: The international site rebranded to OKEx and opened an office in Hong Kong, officially entering the global market.
- Late 2017: Facing tighter domestic regulations, OKEx shifted part of its operations to jurisdictions such as Malta to reduce policy risk.
2018 – Technological Innovation and Product Diversification
- 2018: Launched cryptocurrency futures contracts, quickly capturing market share.
- 2018: Issued the native token OKB, providing fee discounts, voting rights, and other ecosystem benefits.
2019 – Strengthening Security and Technology
- 2019: Introduced multi‑signature, cold‑storage, and other security technologies to enhance asset protection.
- 2019: Launched OKChain, supporting decentralized trading and applications.
2020 – Deepening DeFi and Smart‑Contract Offerings
- 2020: Launched OKExChain, enabling DeFi and smart‑contract applications, and fostering blockchain‑ecosystem growth.
- 2020: Integrated DeFi projects, offering lending, staking, and liquidity‑mining services.
2021 and Beyond – Brand Upgrade and Global Footprint
- 2021: OKEx rebranded to OKX, highlighting its diversified and global strategy.
- Future: OKX will continue advancing regulatory compliance, expanding worldwide, and exploring emerging fields such as the metaverse and Web3.
OKX Account Registration and App Download Procedure
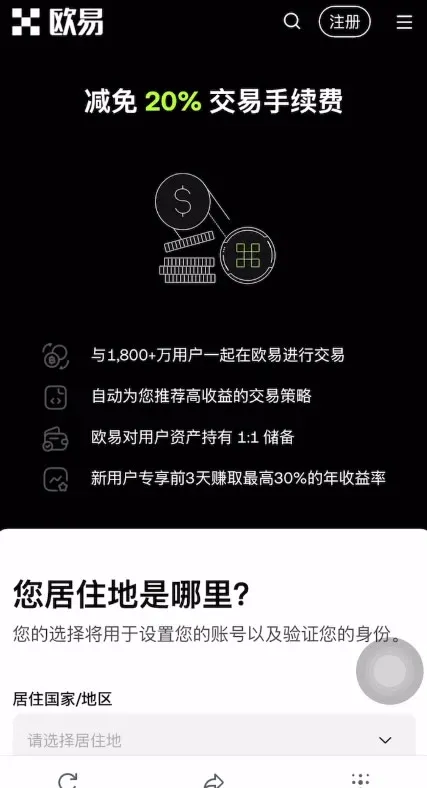
If you have not yet registered on OKX, you can complete the registration using the links and video tutorial below.
- Official OKX registration link: https://www.okx.com/zh-hans/join/B2345
- OKX app download page: https://www.bitaigen.com/binance/download
- Click the official registration link and follow the on‑screen instructions to create your OKX account.
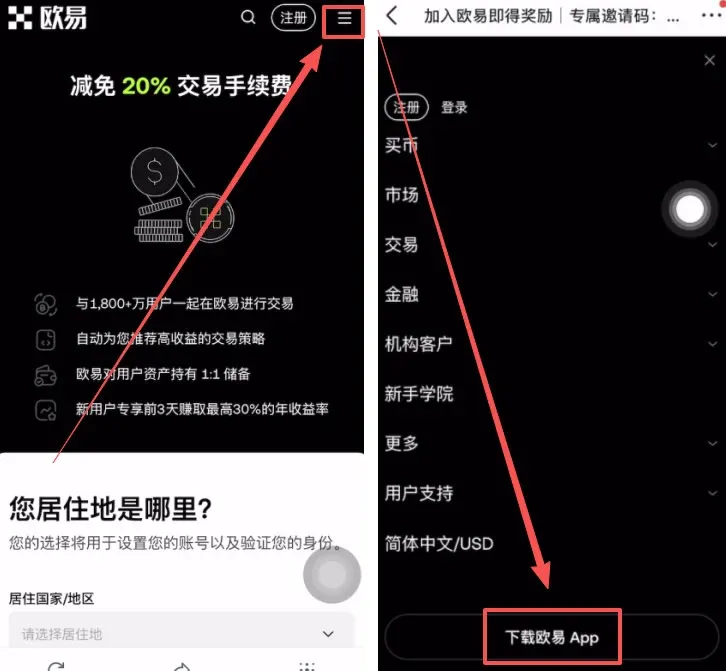
- After registration, tap the three‑line menu in the upper‑right corner and select Download OKX App.
- Android users can tap the APK file to begin installation.
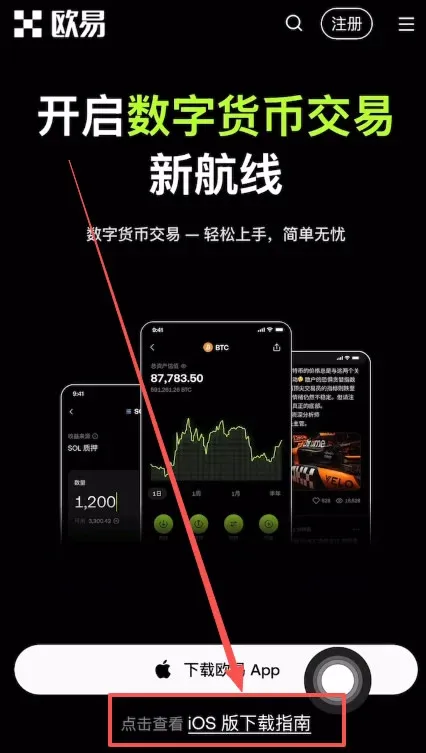
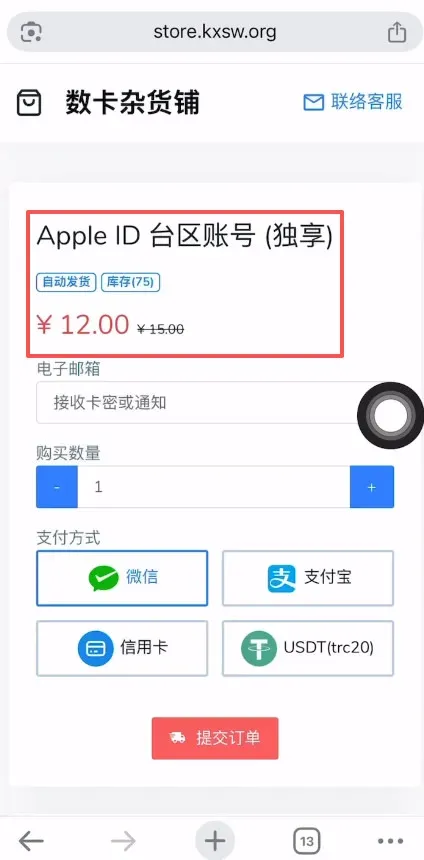
- iOS users need a Taiwan‑based Apple ID to access the app in the App Store. Search “Taiwan Apple ID purchase” and choose a non‑advertiser seller (e.g., “Shu Ka Grocery”) to obtain the ID.
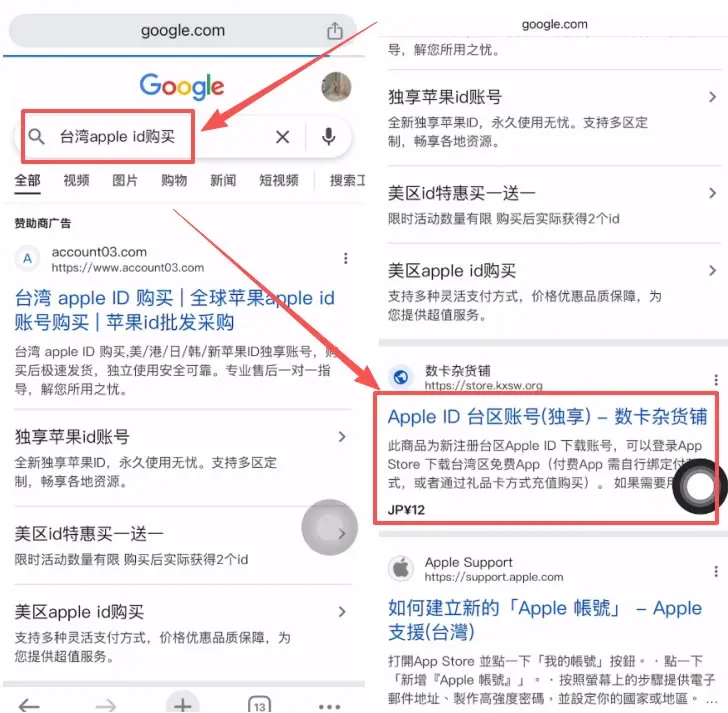
- The Taiwan Apple ID costs roughly $12 USD. After purchase, you will have the credentials needed.
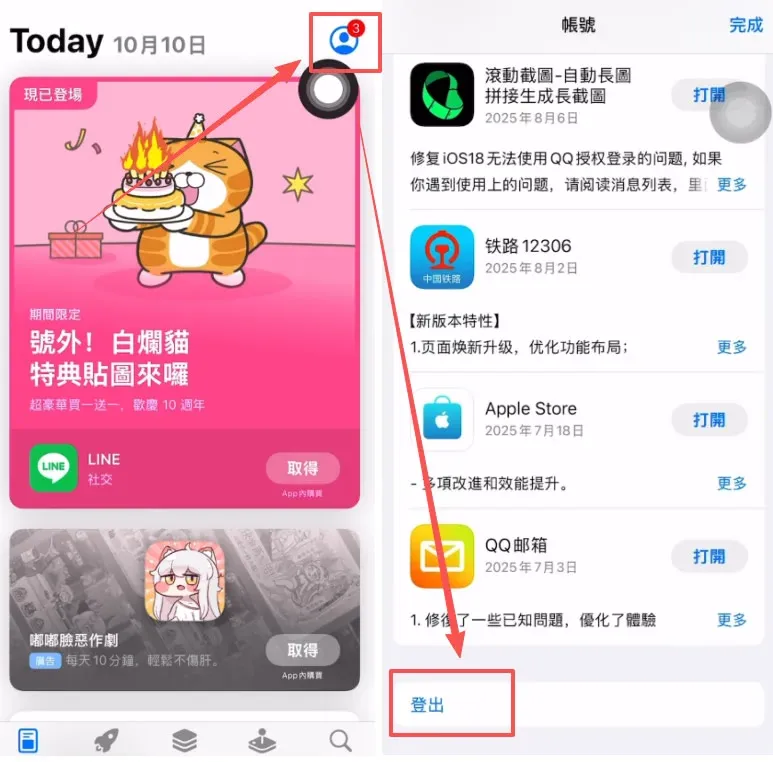
- Sign out of your current Apple ID in the App Store (tap the avatar → scroll down → Sign Out) and then sign in with the newly acquired Taiwan Apple ID.
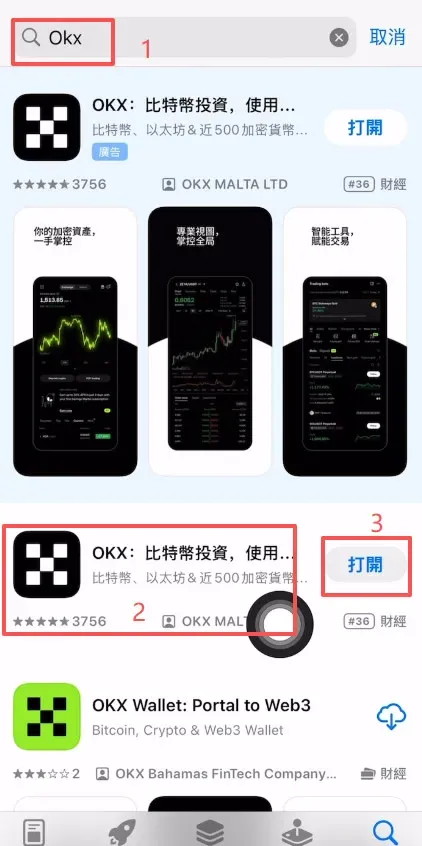
- After logging in, search for “OKX”. Choose the second result (the first is a sponsored ad) and tap Download. Once the download finishes, tap Open.
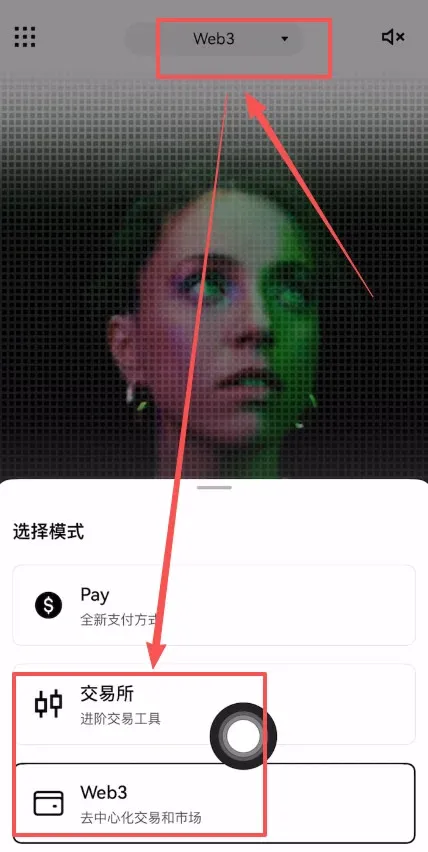
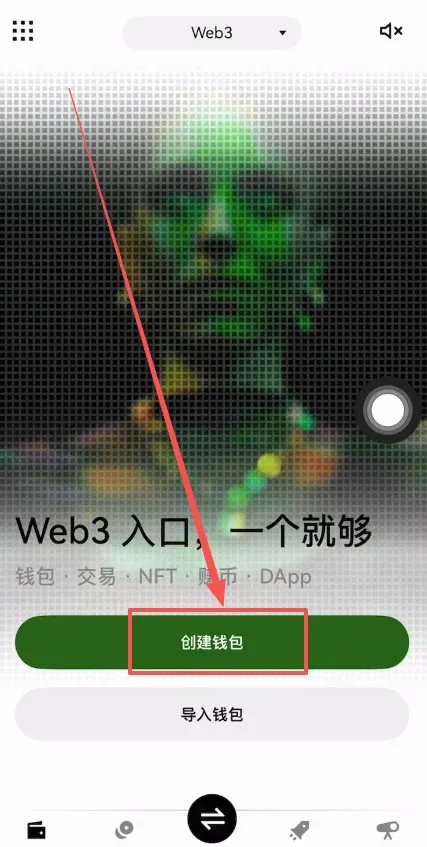
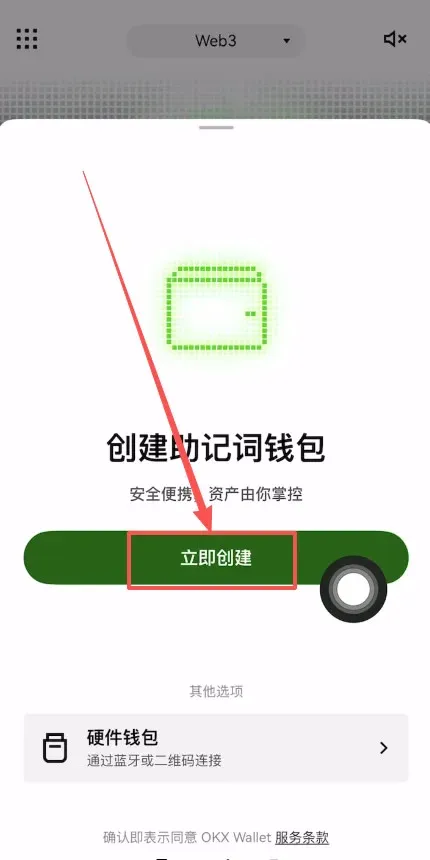
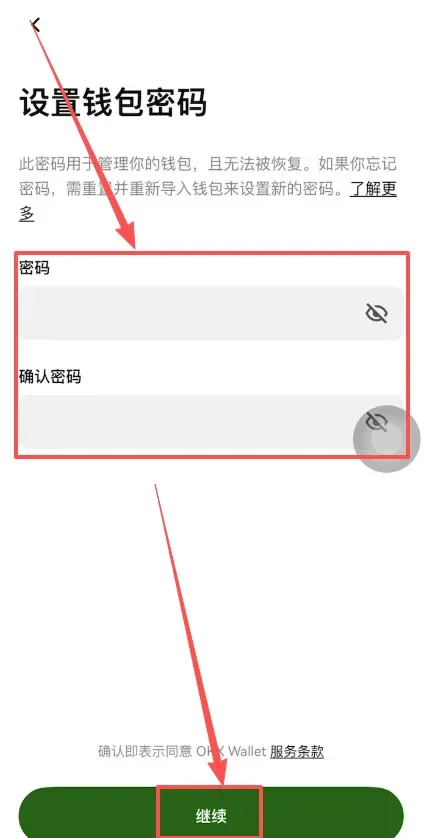
Complete Process for Creating a Web3 Wallet
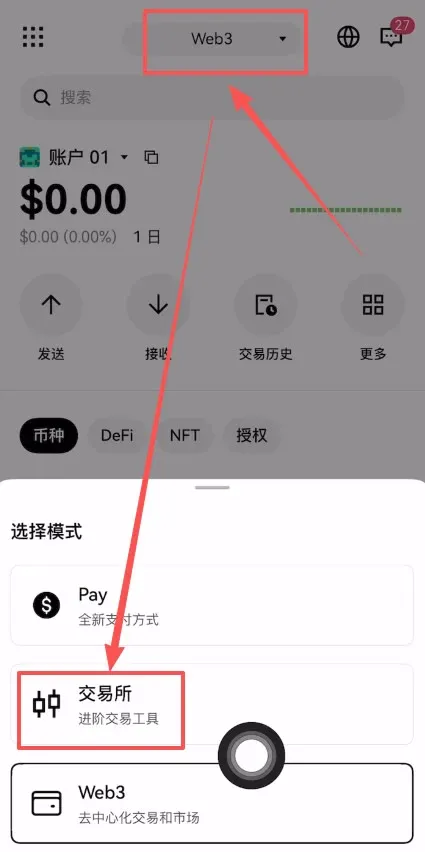
- Inside the OKX app, toggle between Exchange and Web3 at the top. The Web3 tab opens OKX’s native Web wallet.
- Tap Create Wallet to start the setup.
- Choose Create Now.
- Set a login password, then tap Continue.
- After creation, the system prompts you to back up the wallet. Choose Manual Backup and tap Continue.

- Check the “I understand” box, confirm once more, then tap Backup Now.
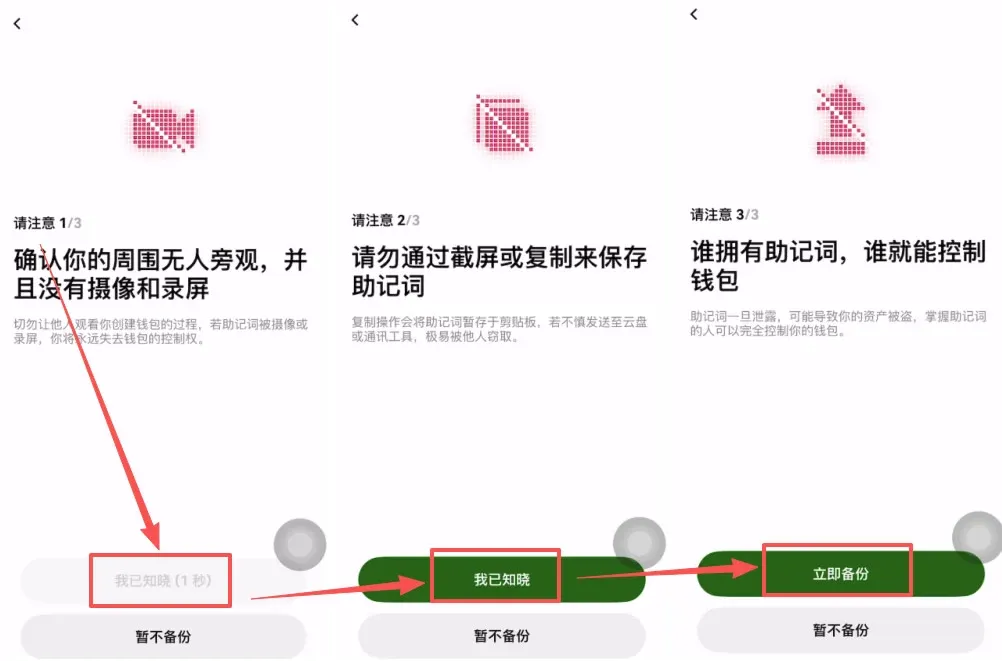
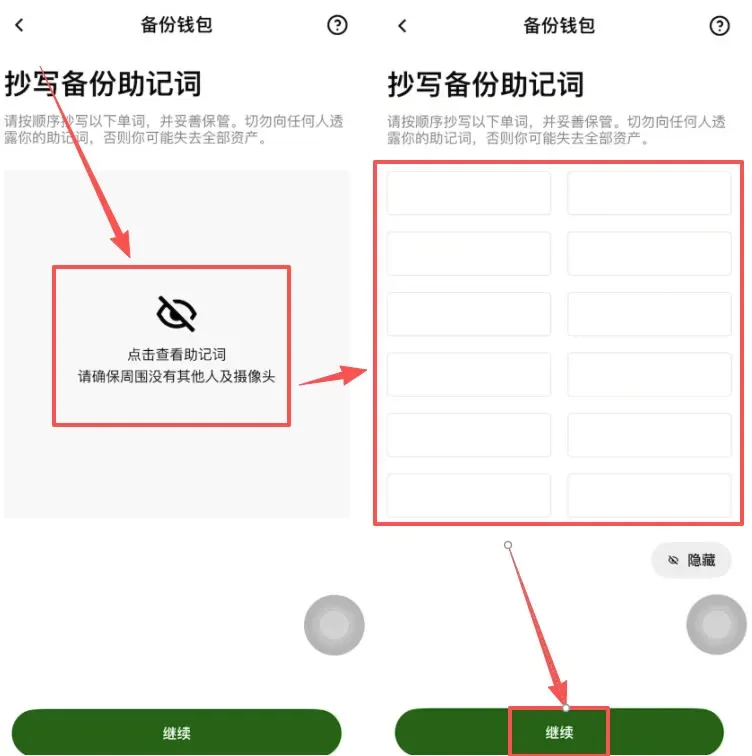
- The system will display a mnemonic phrase. Write it down on paper—do not screenshot or photograph it—to avoid loss. After recording, tap Continue.
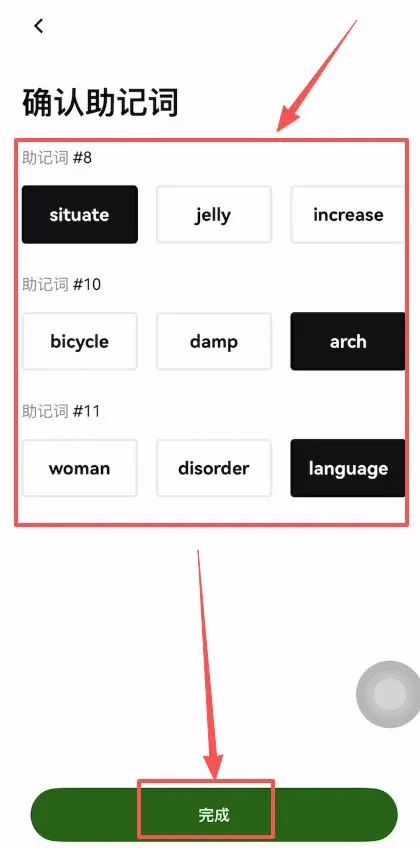
- Verify the mnemonic phrase as instructed, then tap Done. Your Web3 wallet is now successfully created.
Buying USDT on OKX
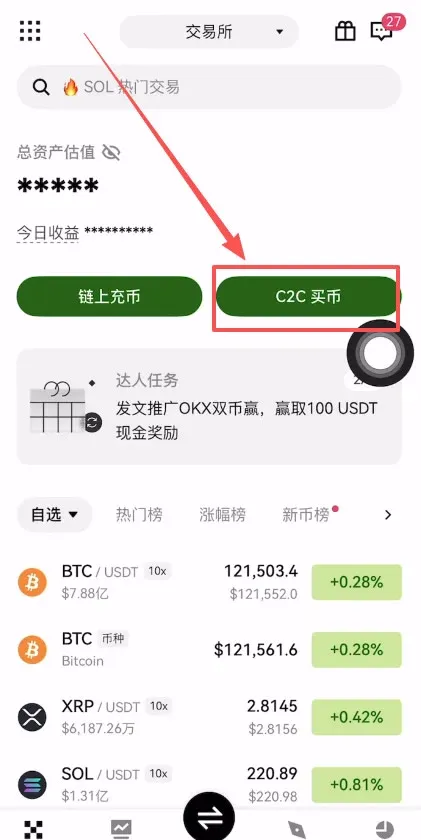
- After creating the wallet, switch back to the Exchange tab.
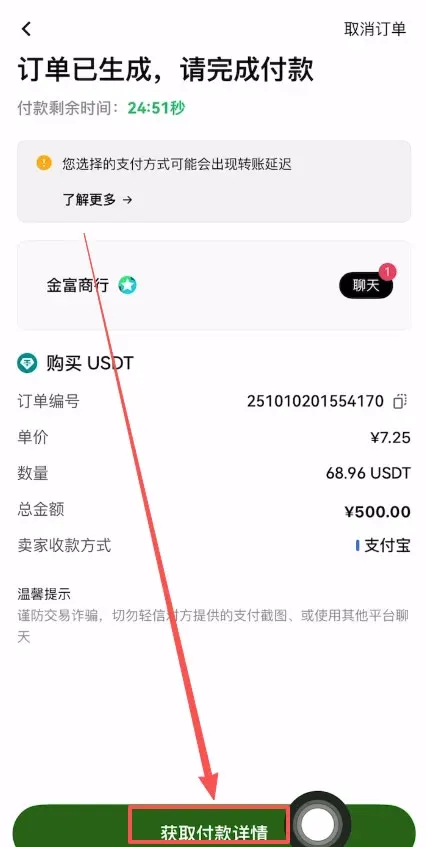
- On the home screen, tap C2C Buy to purchase crypto with fiat currency.
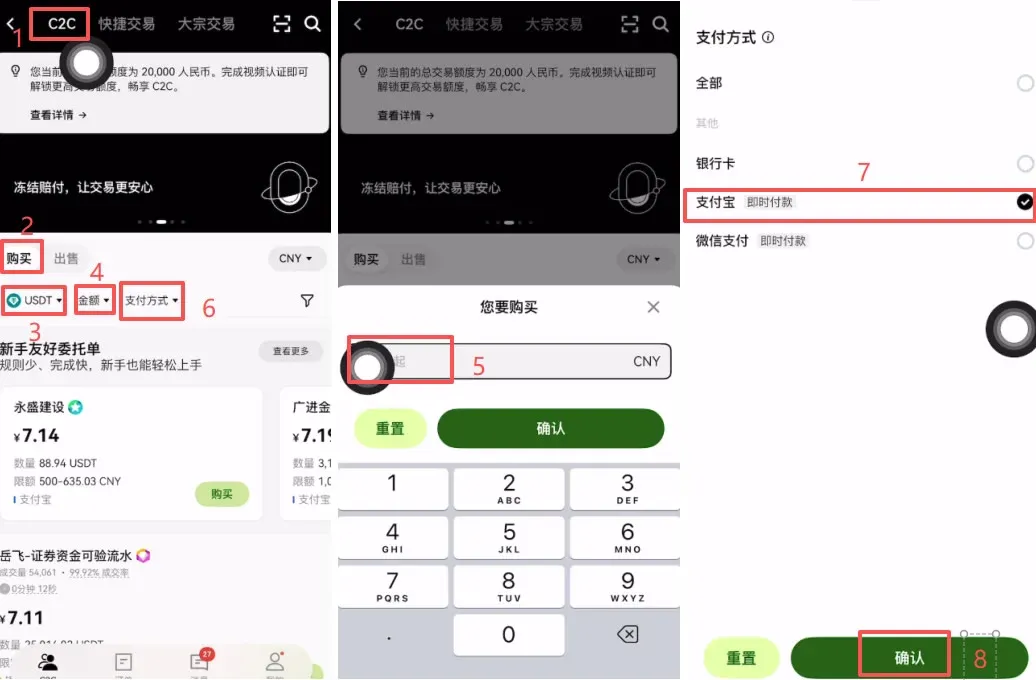
- Choose the C2C (peer‑to‑peer) mode, tap Buy, and select USDT as the asset. Enter the amount you wish to spend (e.g., $500 USD), and pick a payment method (bank transfer, PayPal, etc.). For illustration we’ll use PayPal; select it and tap Confirm.
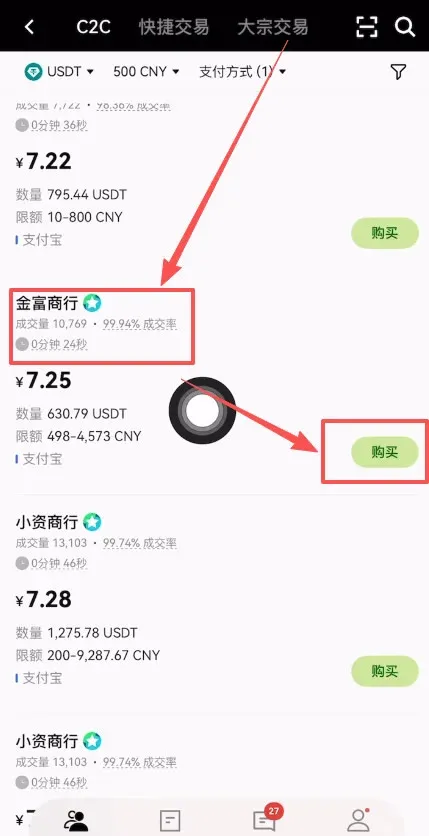
- The platform will list several merchants. It is advisable to pick a seller with high transaction volume and positive feedback, such as “Golden Trade Co.” (10,000+ trades, 99.94% positive rating). Tap the Buy button next to that merchant.
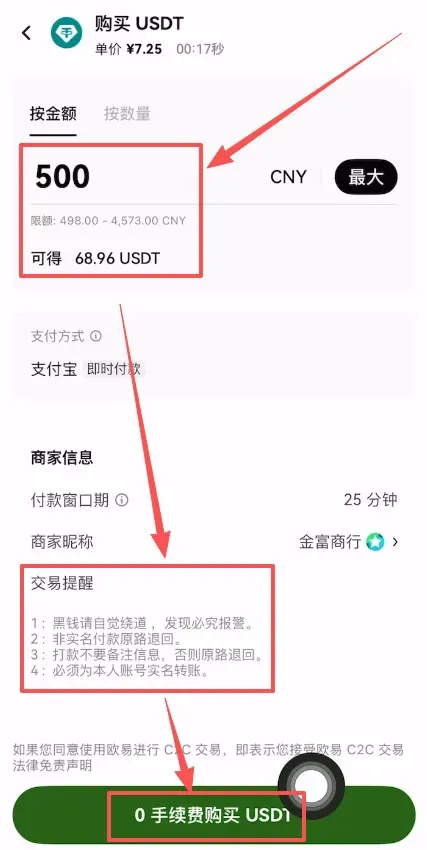
- Confirm the purchase amount again. The system will display the equivalent USDT amount (e.g., $500 ≈ 68.96 USDT) and remind you that non‑verified payments will be refunded automatically. Make sure you use a KYC‑verified personal account for the transfer. Tap Buy with 0% Fee.
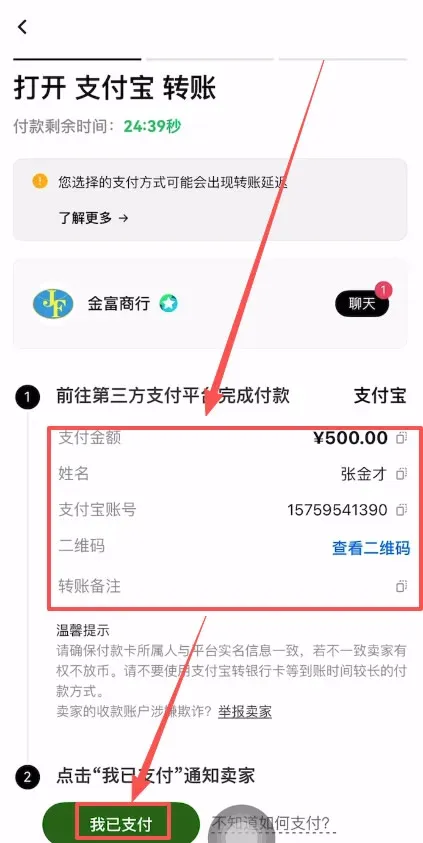
- Tap Get Payment Details to retrieve the merchant’s receiving information.
- Complete the payment using the method provided by the merchant, then tap I Have Paid and wait for the seller to confirm the transfer of USDT.
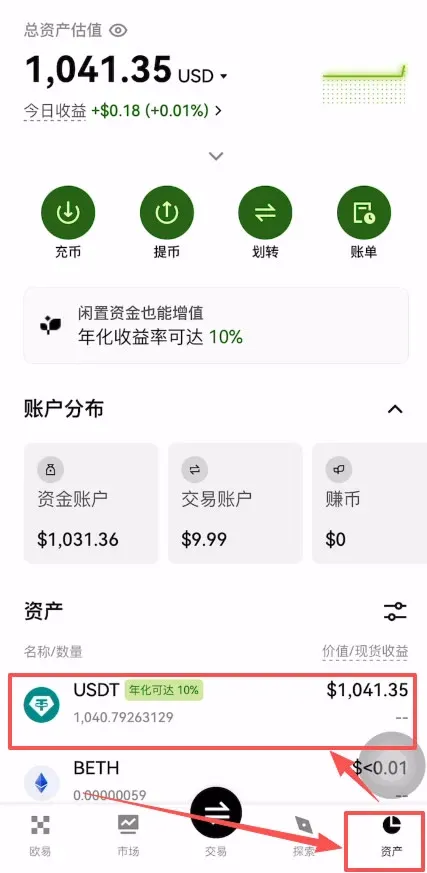
- Once the payment is successful, the USDT will appear in your Funding Account. Tap the lower‑right Assets tab to view it.
Note: In many jurisdictions, profits from cryptocurrency transactions are subject to tax. Please consult a tax professional familiar with your local regulations.
Trading BNB on OKX
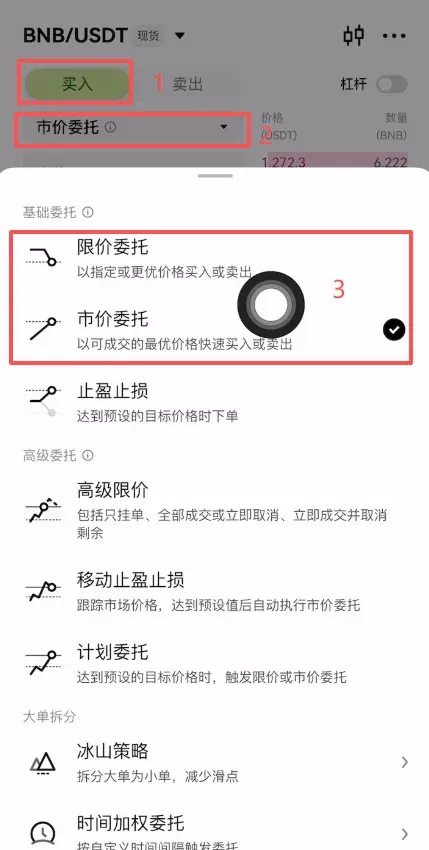
- To trade another cryptocurrency, tap the central Trade button, type the desired asset (e.g., BNB) into the search bar, and select the corresponding pair BNB/USDT.
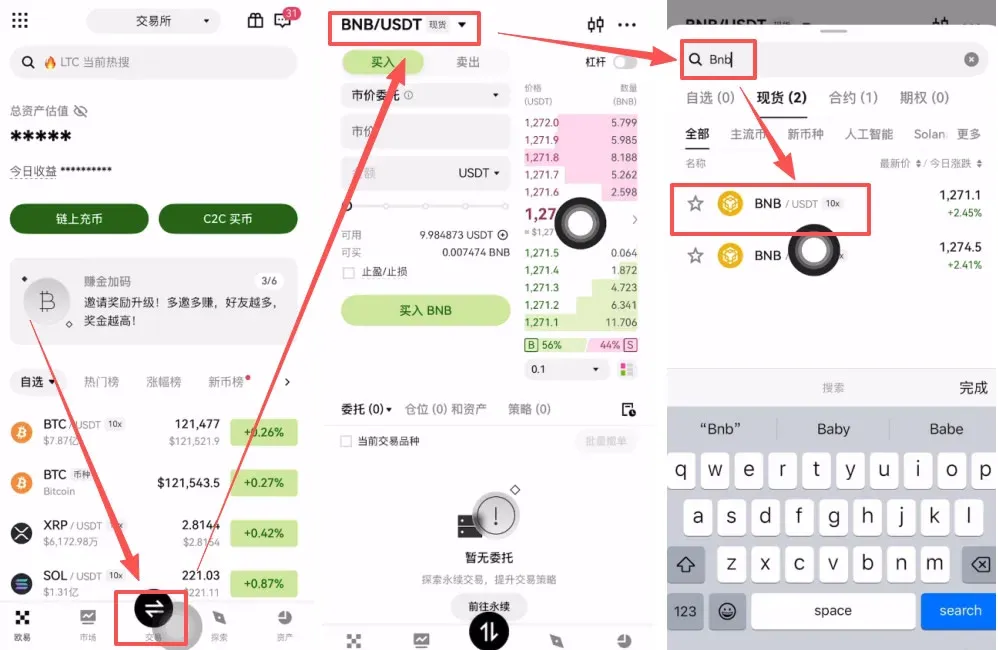
- On the trading screen, choose Buy. You can place a Market Order (executed instantly at the best available price) or a Limit Order (executed at your specified price).
- If you use a market order, enter the amount of USDT you wish to spend. Should the system indicate insufficient funds, you need to transfer USDT from your Funding Account to your Trading Account by tapping Transfer.


