
How to Register the Most Popular USDT Wallet – OKX Web3 Wallet, Transfer USDT from OKX to the Wallet, and Send It Back
After creating a Web3 wallet in the OKX (formerly OKEx) app, following the wallet‑creation and manual mnemonic‑backup procedures, and consistently selecting the TRON‑TRC20 network for both withdrawals and deposits, you can achieve seamless two‑way USDT transfers between the exchange and the Web3 wallet. The process is straightforward, secure, and reliable.
First, click the registration link for OKX below and open it with your browser.
Official OKX registration link: https://www.bitaigen.com/binance
OKX APP download link: https://www.bitaigen.com/binance/download
Some browsers may display a deceptive‑site warning because OKX services are restricted on certain platforms. Simply dismiss the warning and continue with the registration.
We have compiled a complete step‑by‑step guide for creating a Web3 wallet inside the OKX app and demonstrated how to move USDT back and forth between the exchange and the wallet. With illustrated instructions, even users who are new to on‑chain assets can follow along safely, protect their funds, and master practical techniques. Continue reading for every detail.

OKX Exchange Account Registration Tutorial
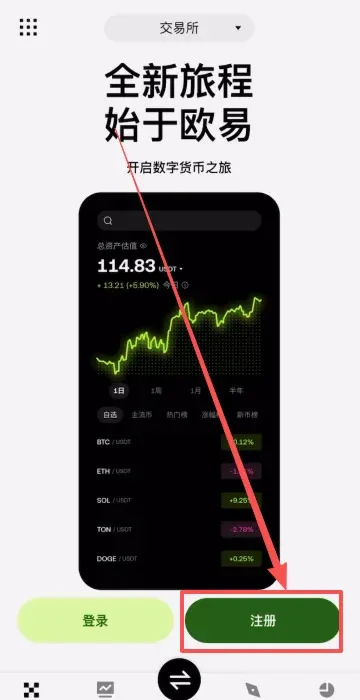
- Open the OKX app and tap Register.
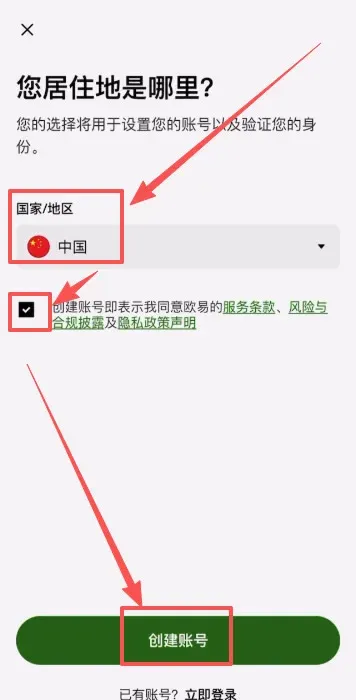
- Choose your country or region of residence (e.g., “United States” or “China”), check the agreement box, and tap Create Account.
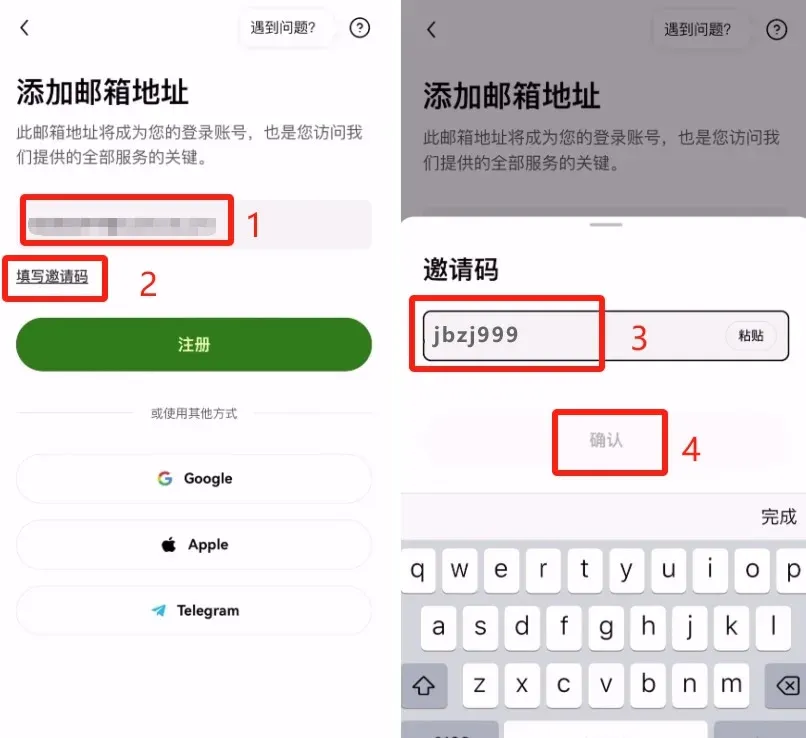
- Enter your email address. If you have an invitation code, type `B2345` in the field below and tap Confirm.
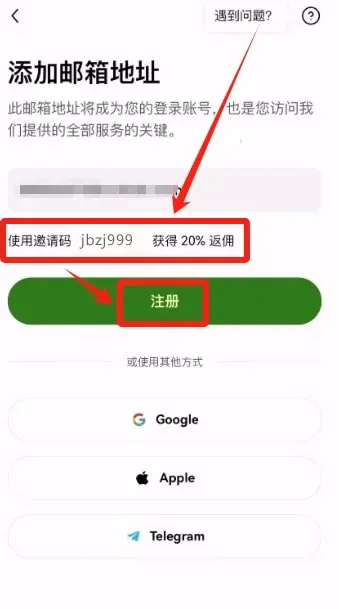
- Registering with the invitation code grants you a permanent 20 % fee discount. Then tap Register.
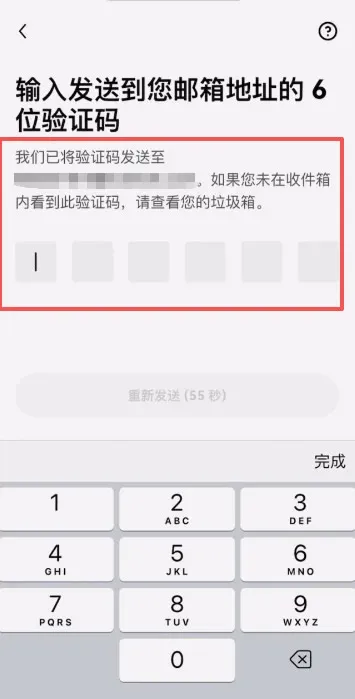
- The system will send a verification code to your email. Retrieve it, enter the code, and continue.
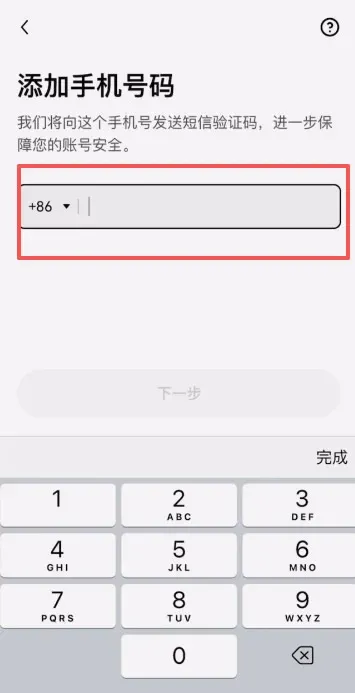
- Bind a mobile phone number to complete the registration.
- After logging in, it is recommended to finish identity verification (KYC) and set up security features before you start trading.
How to Purchase the Stablecoin USDT in the OKX App
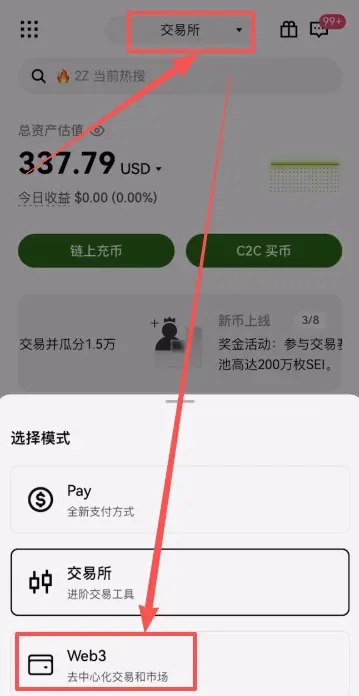
- From the home screen, tap Exchange. Inside you will see the Web3 Wallet entry point.
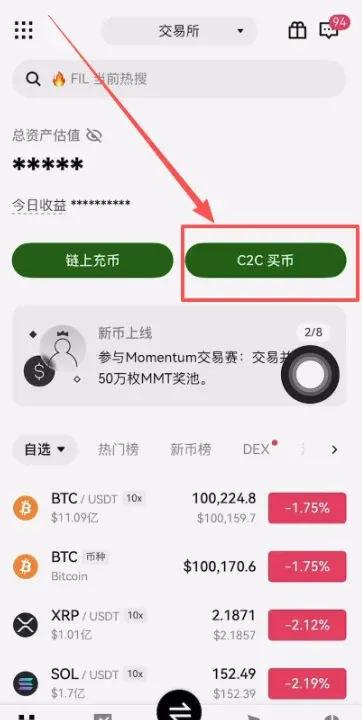
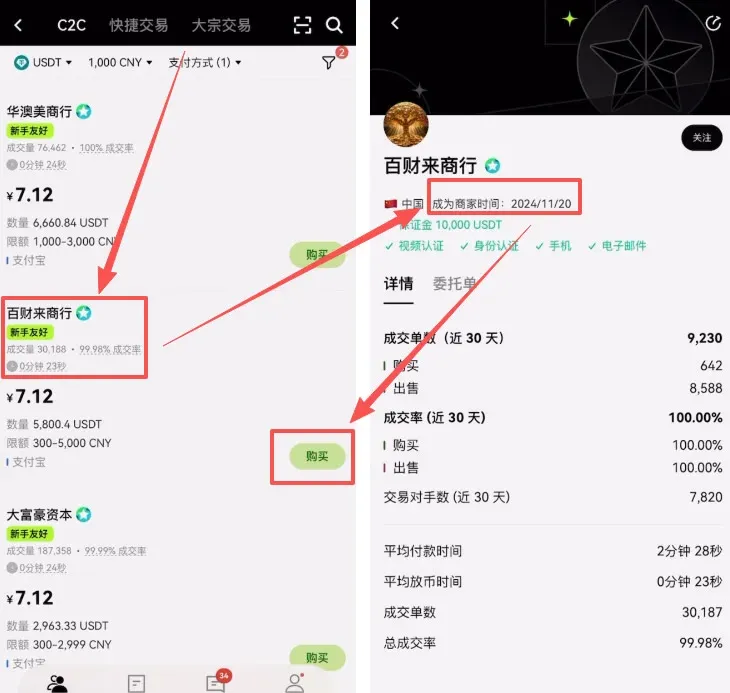
- You must first buy USDT on the exchange before you can transfer it to the Web3 wallet. Return to the exchange interface and tap C2C Buy.
- Choose C2C (peer‑to‑peer, suitable for small amounts) or Instant Trade (fast fiat‑to‑crypto).

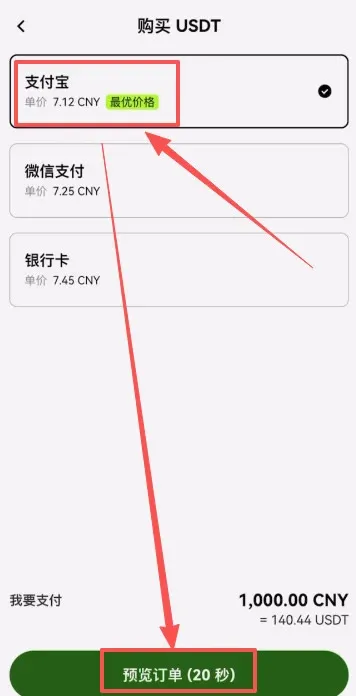
- Enter the amount of fiat you wish to spend (e.g., USD 150). Tap Select Payment Method.

- Choose a payment option such as Bank Transfer (SEPA/SWIFT), Credit/Debit Card, or a local e‑payment method. In this illustration we pick Bank Transfer and then tap Preview Order.
- After reviewing the order, you have a 30‑second window to confirm the trade. If everything looks correct, tap Confirm.

- A chat window will open where the seller may request additional details (e.g., “please pay with your verified account, no memo”). Tap Get Payment Details.
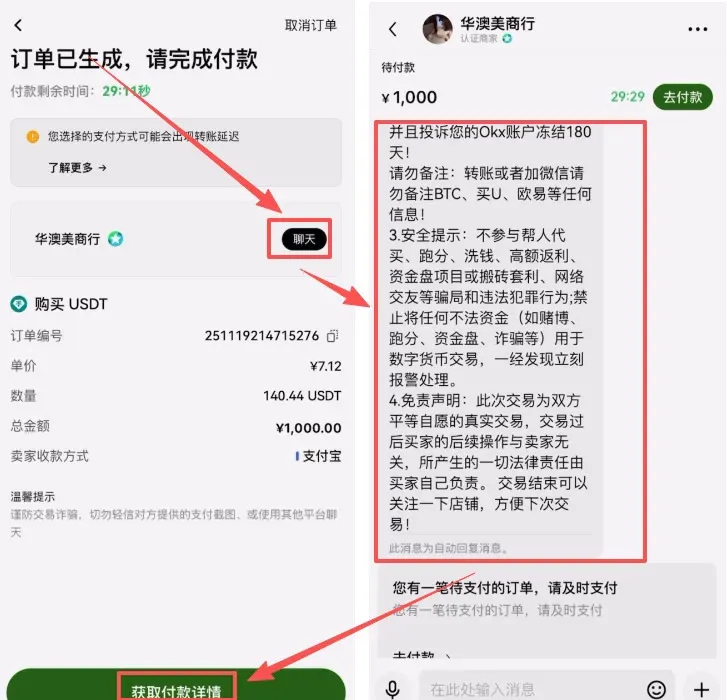
- Complete the bank transfer according to the seller’s instructions, then tap I Have Paid to notify the seller.
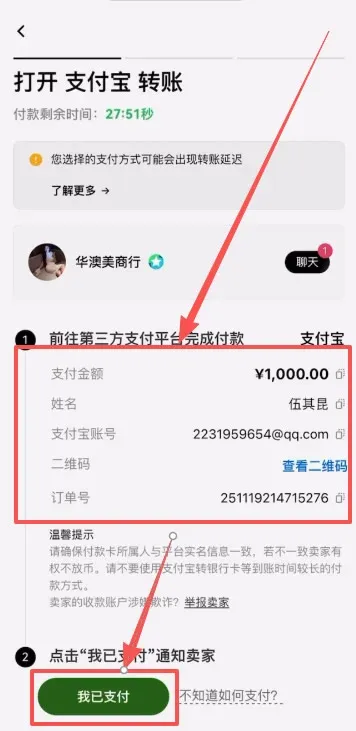
- Once the seller confirms receipt, the USDT will be automatically credited to your OKX account. The platform locks the corresponding token balance to ensure the trade’s security.
Advanced C2C Filters (Optional)
- Check “No verification required to enter” and “Beginner‑friendly orders”.
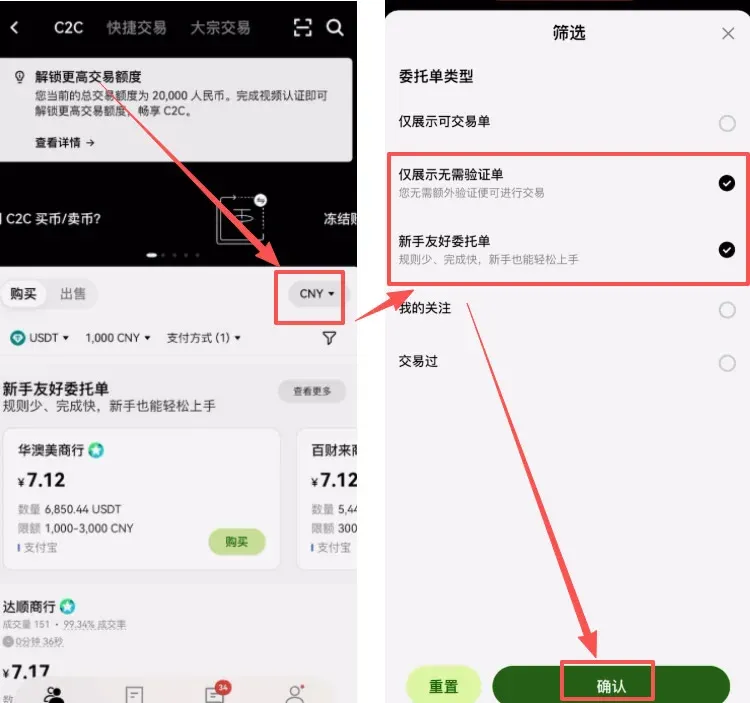
- Prefer sellers with high trading volume, high completion rates, and a long operating history to reduce risk.
- After entering the amount, tap Buy USDT with 0 % fee to place the order.
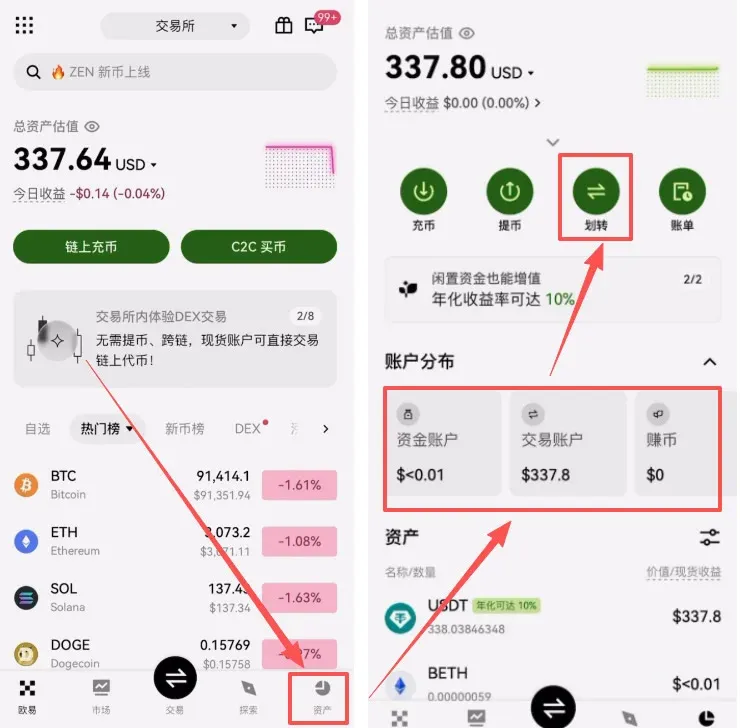
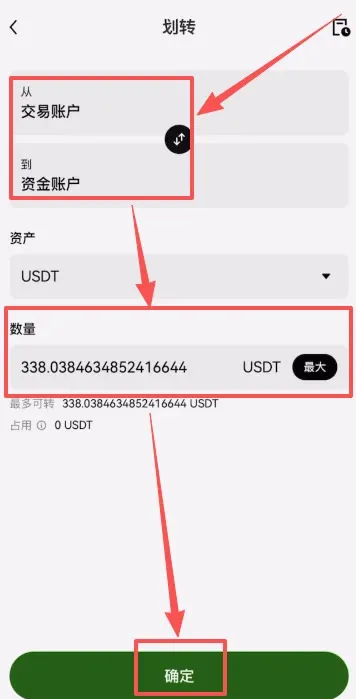
When the purchase succeeds, navigate to the Assets page and verify that USDT appears in your Funding Account. If it is not there, use the Transfer function to move the token from the Trading Account to the Funding Account.
→
OKX Web3 Wallet Creation Tutorial
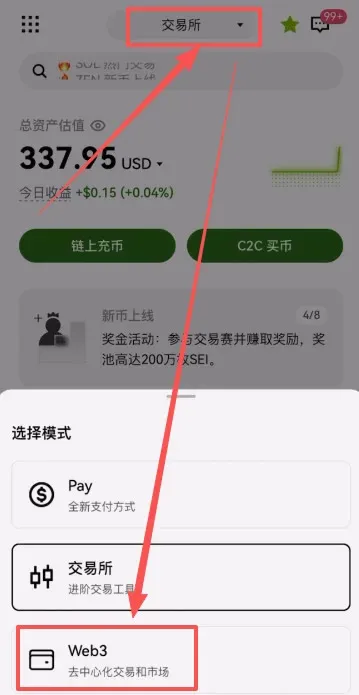
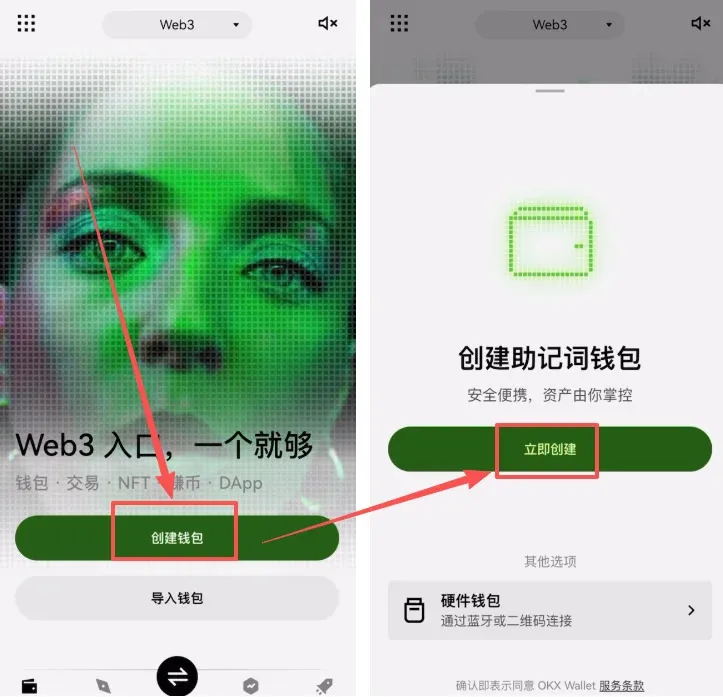
- Return to the home screen and switch the mode to Web3.
- Tap Create Wallet → Create Now, and use Face ID (or your device’s biometric authentication) to finish the creation step.
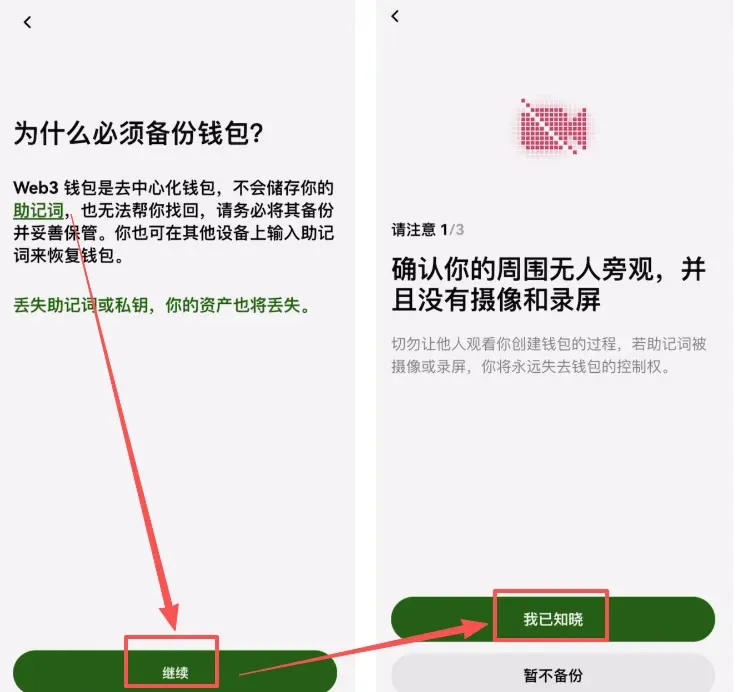
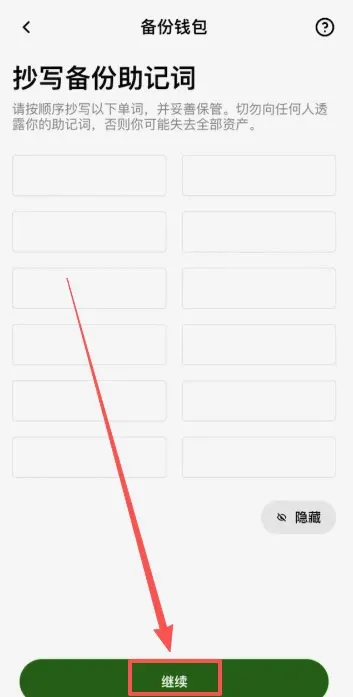
- For security, you must manually back up the private‑key mnemonic phrase.
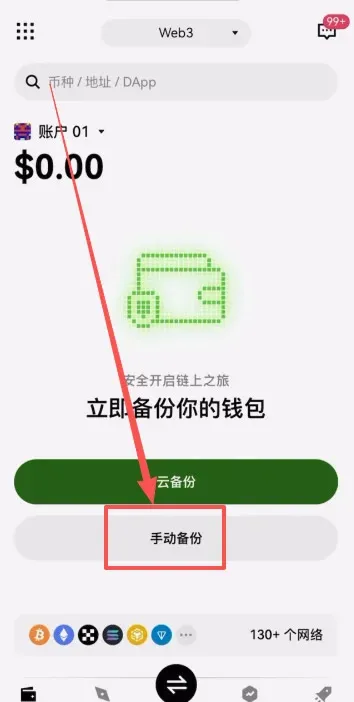
- Follow the prompts: tap Continue → I Understand → Back Up Now.
→
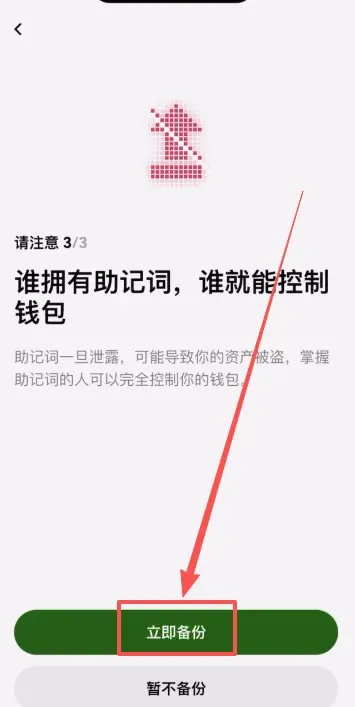
- Record the mnemonic only on paper; do not screenshot or store it online. Writing it down on a physical medium is strongly recommended.

→
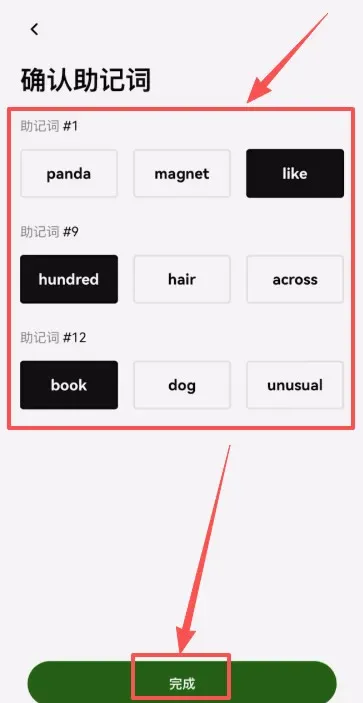
- Verify each word of the mnemonic in the correct order, then tap Done to finish the backup process.
Transferring USDT from OKX to the Web3 Wallet
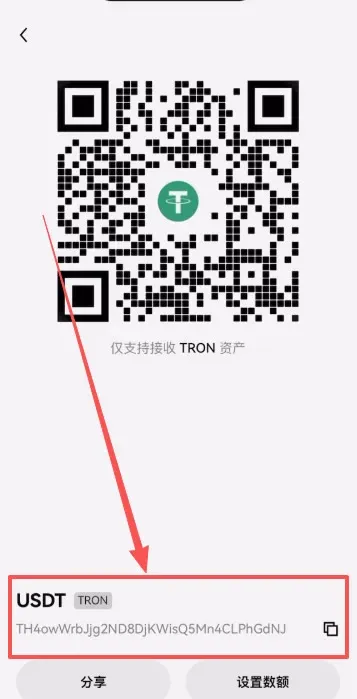
- On the wallet’s home page, locate USDT, select the appropriate chain (e.g., TRON‑TRC20), and tap Receive.
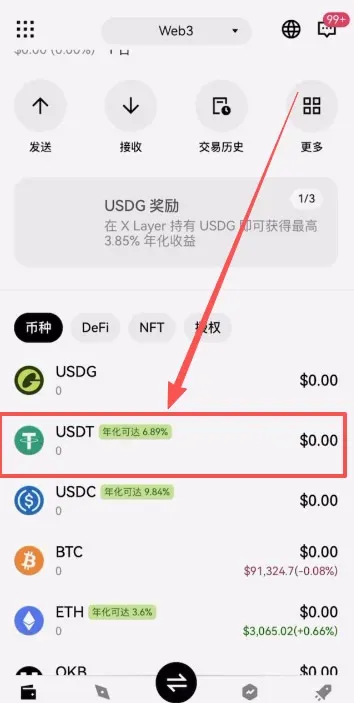
→
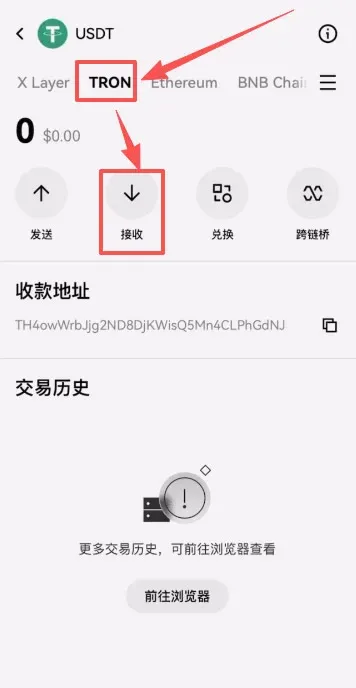
- Copy the displayed receiving address or save the QR code for later use.
- Switch back to the OKX app, go to Assets, then tap Withdraw → Withdraw Crypto.
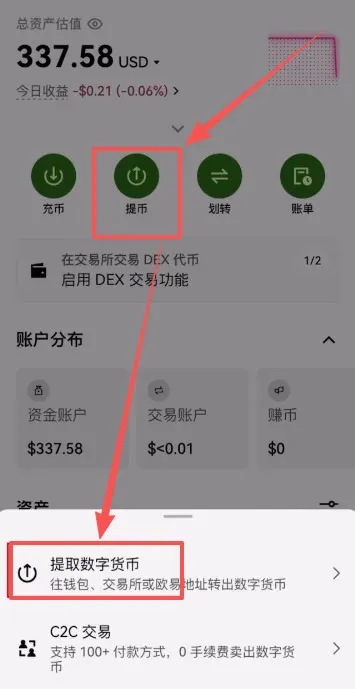
→
- Choose the saved recipient OKX Wallet (the Web3 wallet you just set up). After linking the address, tap Continue.
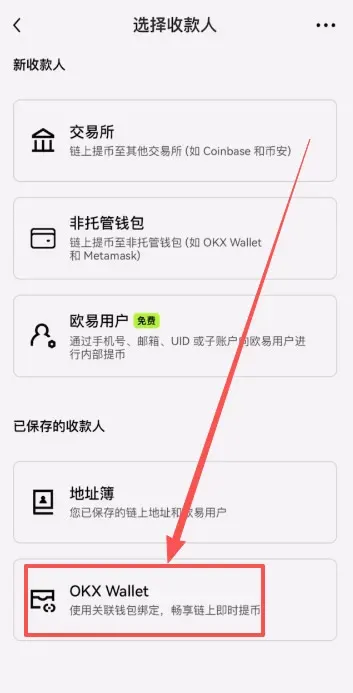
→
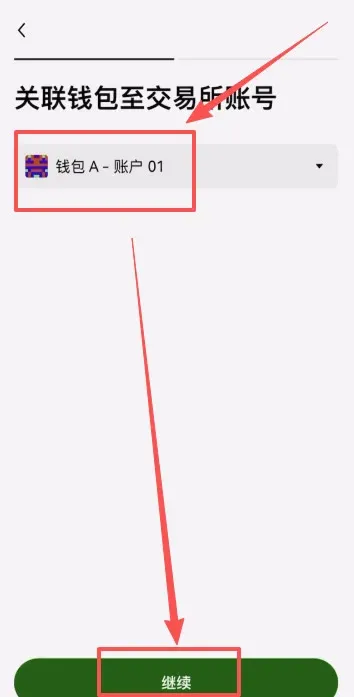
- Verify that
Related Reading
- OKX: Register, Verify, Buy USDT & Bitcoin, Withdraw Fiat
- OKX Exchange Review: Founder, App Download, Trading Guide
- Top Crypto Exchange Apps: Binance & OKX Registration Guide
💡 Register on Binance with referral code B2345 for the maximum trading fee discount. See Binance complete guide.


