
In addition to its exchange services, Binance also offers the Binance Wallet. Like MetaMask, Phantom and other products, Binance Wallet is a self‑custody wallet.
This article will explain the concept of Binance Wallet, how to use it, and the key points beginners should pay attention to. Because a wallet involves on‑chain operations, if you are still relatively new to cryptocurrencies it is advisable to first trade on the Binance exchange, become familiar with the basics, and only then start using the wallet.
⚠️ Cryptocurrencies are high‑risk assets, and on‑chain actions performed with Binance Wallet carry an even higher level of risk. The tokens, platforms and protocols mentioned in this text are provided for illustration only and do not constitute investment advice. Please read with caution.
- Official Binance Wallet link
- Binance Exchange (official registration official download)
In this guide we systematically outline the core functions and workflow of Binance Wallet, including account creation, initiating trades, backing up keys, and connecting to other platforms. With step‑by‑step illustrated instructions, newcomers can get started quickly while safeguarding their assets and avoiding common pitfalls. To master every detail of Binance Wallet, keep reading.
Differences Between Binance Wallet and Binance Exchange
Binance Wallet (also called Binance Web3 Wallet) carries the “Binance” brand, but fundamentally it is entirely different from the Binance exchange. The exchange is a centralized platform, whereas Binance Wallet is a hot wallet.
Think of the two as existing in parallel universes: they can be switched within the same app, yet they belong to separate product lines.
- Trading scope: The exchange can only trade assets that have been listed on the platform; Binance Wallet can interact with any crypto asset on supported blockchains.
- Wealth‑management features: The exchange offers a variety of investment products; the wallet itself does not provide such services and requires you to connect to decentralized finance (DeFi) projects yourself.
- Fees and chain selection: Most services on the exchange do not require a gas fee and you do not need to think about which blockchain is used. When using the wallet you must understand the concept of a chain and hold the native token of that chain to pay gas fees.
Although users must find their own DeFi solutions, Binance Wallet benefits from the same Binance brand and its UI is tightly integrated with the exchange’s asset view, making transfers very convenient.
How to Create a Binance Wallet?
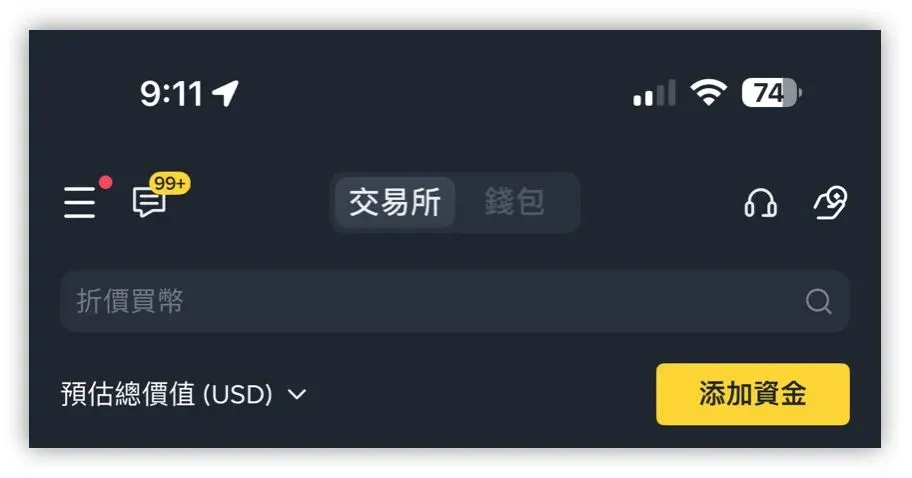
From the Binance exchange homepage, click the Wallet button at the top of the page and follow the on‑screen prompts to create a personal wallet.
Unlike MetaMask, Binance Wallet does not rely on a mnemonic phrase. Instead it uses Multi‑Party Computation (MPC) technology. After creation, you must back up the wallet; detailed steps are available in the official tutorial (official backup guide).
Brief explanation: MPC splits the private key into three shards and stores each shard in a different location. Possessing any two shards gives control over the wallet. Binance holds one shard, while the user only needs to keep one of the remaining two shards. When recovery is needed, the user can combine their shard with Binance’s shard to reconstruct the key. Even though Binance owns a shard, it cannot control the wallet on its own.
Backup methods:
- In the Web3 wallet, tap Back up now and choose either cloud backup or QR‑code backup for the private key.
- The backup process requires you to log in to iCloud and grant iCloud or Google Drive permissions to the Binance app.
- After setting a recovery password, the cloud‑stored key shard is encrypted. Binance cannot access or reset this password; keep it safe.
Transferring Assets and Gas Fees from the Exchange to Binance Wallet
Before performing any on‑chain action you need to decide which blockchain you will use and have the native token of that chain available to cover gas fees.
- For operations on the Ethereum network, you need ETH.
- For operations on BNB Smart Chain (BSC), you need BNB.
The first step is to send the appropriate gas‑fee token from the Binance exchange to your wallet.
Navigate to Binance Wallet > Assets > Receive, select Transfer from Binance Exchange, pick the token you wish to move, and then choose the transfer chain. The example below shows how to move a modest amount of BNB to the wallet for BSC gas.

On BSC, each contract interaction typically costs only a few cents. Sending roughly $10 worth of BNB is usually sufficient for most use cases.
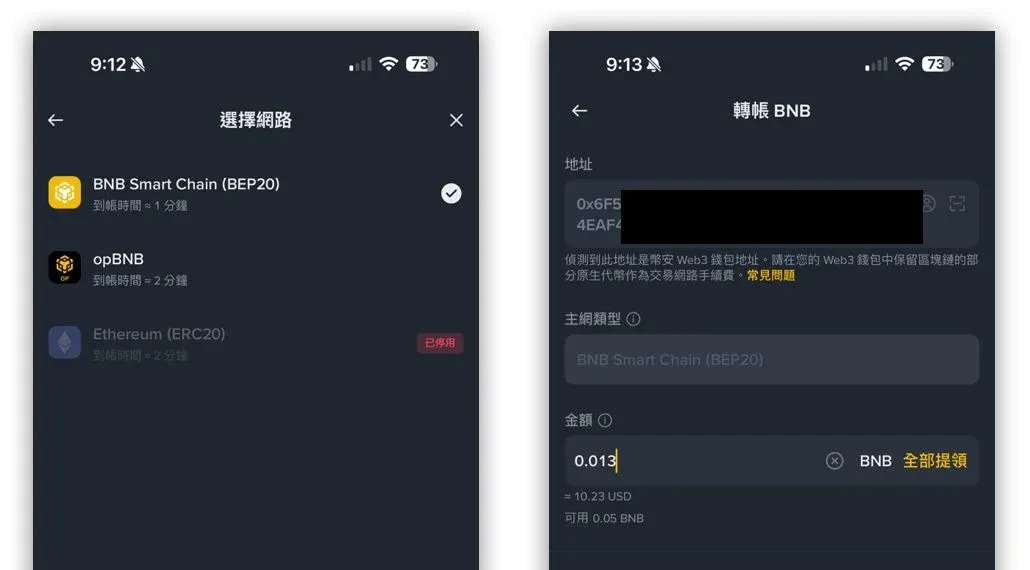
As shown, Binance Wallet automatically fills in the receiving address and pre‑selects the correct chain, reducing the risk of manual entry errors.
Tip: Always verify that the address, chain and token match exactly. The wallet can receive any token as long as the address belongs to the selected chain.
After the gas‑fee token is in place, repeat the same steps to transfer a usable amount of USDT (or any other token) into the wallet, again selecting BSC as the chain.
With both gas and token balances available, you can now trade a variety of on‑chain assets inside Binance Wallet. On the wallet’s home screen you will see a curated list of tokens. For example, tapping a token labeled $K under the Popular tab (illustrative only) shows a BSC logo next to it, indicating that the token is issued on BSC and can use the BNB you previously deposited to pay gas.
Tap Trade, specify how much USDT you want to exchange for $K, and make sure the USDT you are using also resides on BNB Smart Chain.
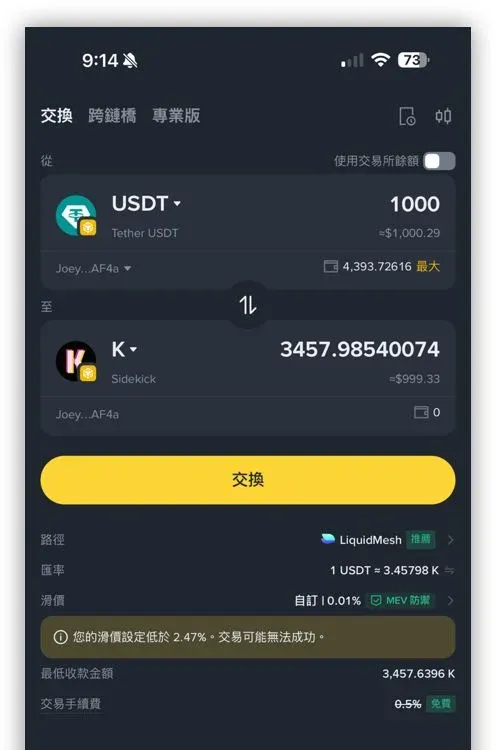
The trading interface displays several key pieces of information:
- Path: The decentralized exchange (DEX) that Binance Wallet will route the swap through (the screenshot shows LiquidMesh).
- Rate: Real‑time price of the token pair.
- Slippage: Your manually set tolerance. Too high a slippage may increase costs; too low may cause the transaction to fail.
- MEV protection: Make sure this is enabled; it helps defend against sandwich attacks on the blockchain.
Once the parameters are set, press Swap to complete your first on‑chain trade.
Connecting DApps with Binance Wallet
Within the wallet, go to Explore > DApp to see a selection of decentralized applications (DApps) curated by Binance.
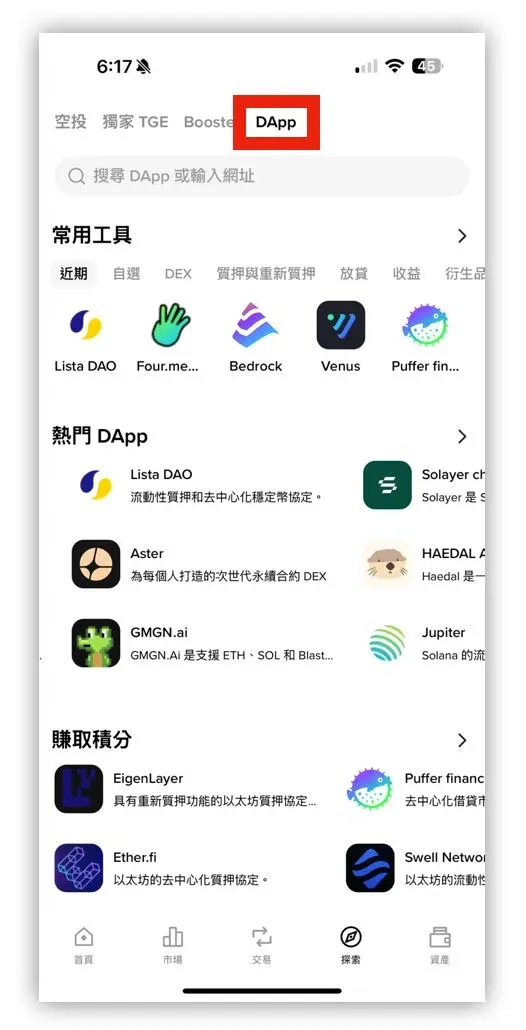
These DApps are not Binance‑owned products; they are independent DeFi services such as liquidity staking, perpetual‑contract DEXes, etc. Although Binance lists them as “featured,” this does not imply any endorsement, and any issues that arise must be addressed with the respective platform—not Binance support. Therefore, newcomers should exercise caution when interacting with on‑chain services.
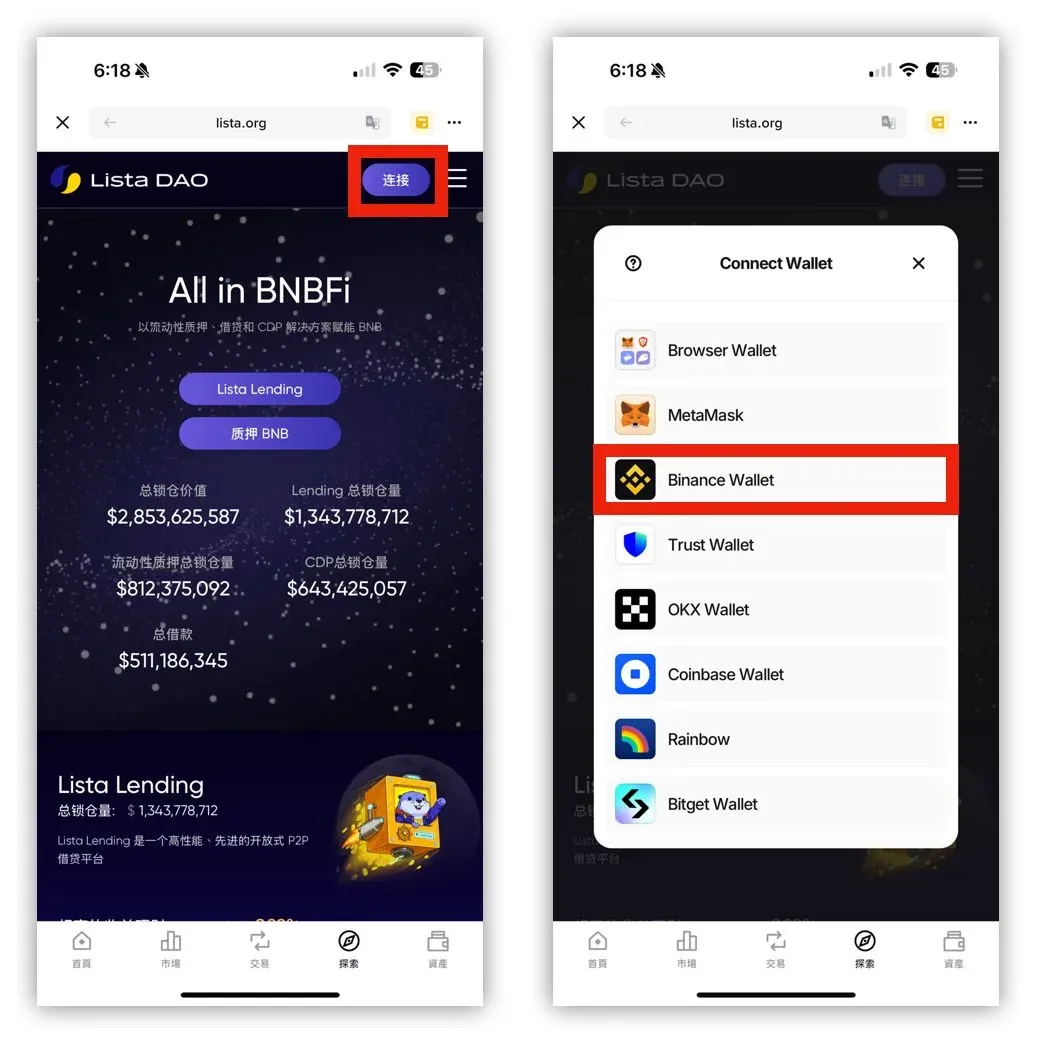
When you land on a DApp’s official website, click the Connect button usually located at the top‑right corner. In the pop‑up window choose Binance Wallet to establish the connection, after which you can start interacting with the DApp.
*(The following screenshot is for illustration only and does not constitute a recommendation.)*
Owning a hot (or cold) wallet in itself carries limited risk, but participating in DeFi projects through the wallet is considered high‑risk. This article merely demonstrates basic wallet usage and the concept of gas fees; it does not advise beginners to engage in DeFi investments at this stage. For newcomers, a hot or cold wallet should first be viewed simply as a tool for storing crypto assets.
Tax note: Gains from cryptocurrency transactions may be taxable in your jurisdiction. Users should consult local tax regulations and consider reporting requirements, especially when converting between fiat (e.g., USD via SEPA/SWIFT) and crypto.
Regional note: Users residing in the United States must use Binance.US rather than the global Binance platform.
That concludes the comprehensive overview of Binance Wallet. Remember, on‑chain actions entail higher risk; always act prudently.
💡 Register on Binance with referral code B2345 for the maximum trading fee discount. See Binance complete guide.


