
USDT, as a stablecoin pegged to the US Dollar, is often used as a hedge in the highly volatile crypto market. After purchasing it, safely storing it becomes the primary concern for investors. The mainstream secure‑storage solutions available today are concentrated in a handful of well‑regarded wallets. This article evaluates them from a security perspective and provides a step‑by‑step guide to generating a USDT address inside imToken.
In this article we have compiled the most reputable USDT storage solutions on the market, focusing on the private‑key protection and multi‑chain compatibility of mobile, hardware and other wallet types. We also walk you through the complete process of creating a USDT address in imToken, helping you keep your assets safe during market turbulence. Keep reading for the details.

Which type of wallet is best for holding USDT?
Based on publicly available security assessments and user feedback, the following wallets stand out for private‑key protection and multi‑chain asset compatibility: imToken, TokenPocket, Ledger, HyperPay, Cobo, Trezor, OKX Web3 Wallet, MetaMask, BitKeep, BitPie, among others. Below is a brief overview of their core features.
1. imToken
imToken is a mobile‑focused lightweight wallet that emphasizes locally held private keys, ease of use, and multi‑asset management. It offers market tracking, price alerts and other tools to keep users informed about market movements.
2. TokenPocket
TokenPocket supports assets across many blockchains. During login you can set a password and enable fingerprint or facial recognition. Private keys are stored locally and isolated by a three‑layer algorithm, ensuring that sensitive information is not leaked.
3. Ledger
Ledger, the leading hardware‑wallet brand, uses smart‑card technology to achieve the highest level of private‑key protection. When querying balances or sending transactions, the hardware device must work together with its companion software. It is compatible with Bitcoin, Ethereum, Zcash and many other major chains.
4. HyperPay
HyperPay combines custodial wallets, self‑custody wallets, co‑custody wallets and hardware wallets into a single solution. It adheres to the principle “security first, value creation as the mission,” providing global users with asset custody, wealth‑creation services and payment functions in a one‑stop platform.
5. Cobo
Cobo has built an end‑to‑end storage ecosystem that includes the Cobo Wallet, Cobo Custody and Cobo Vault. It supports more than 40 mainstream assets, over 900 tokens and roughly 20 staking products, allowing users to switch freely between cloud wallets and HD (hierarchical deterministic) wallets.
6. Trezor
Originating from the Czech Republic, Trezor is known for its “zero‑trust” security model, which assumes that any component of the system could be compromised. Consequently, it implements multiple layers of protection and is widely regarded as a reliable hardware‑storage solution.
7. OKX Web3 Wallet
OKX Web3 Wallet is a heterogeneous multi‑chain wallet that supports over 60 public chains. It includes built‑in DEX, marketplace, DeFi‑asset analytics and offers advanced features such as MPC wallet creation and mnemonic‑cloud backup.
8. MetaMask
MetaMask appears as a browser extension, eliminating the need for a separate download. By installing the extension on Chrome, Firefox, 360 or other browsers, users can start instantly. It is lightweight, easy to use and primarily targets the Ethereum ecosystem.
9. BitKeep
BitKeep integrates five major functions—wallet, exchange, DApp, financial services and enterprise‑grade tech—into one platform. It employs full‑node security isolation, a patented DESM algorithm and offline cold storage, supporting batch transfers across multiple chains and cross‑exchange scheduling.
10. BitPie
BitPie is built on an HD wallet, multi‑signature and on‑chain transaction architecture, providing send/receive capabilities for Bitcoin, Ethereum and other chains. It is suitable for users who prefer a streamlined experience.
How to generate a USDT wallet address in imToken?
imToken 2.0 supports multi‑chain asset management. Below are the steps for adding USDT on both the TRC20 (Tron) and ERC20 (Ethereum) networks. It is recommended to download the app from official sources (e.g., the Bitaigen store) and avoid unofficial installation packages.
Adding TRC20 USDT (Tron network)
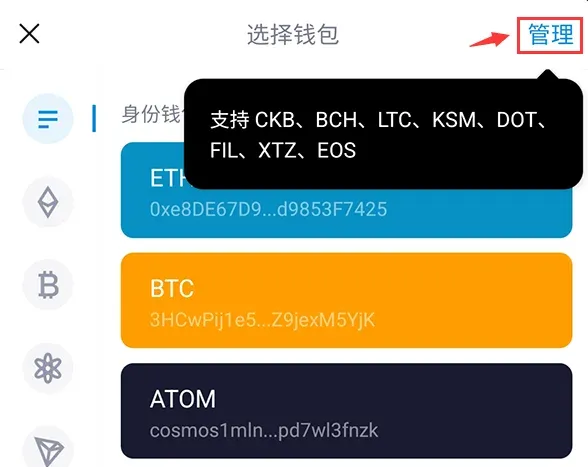
- Open imToken, tap the Manage button at the top‑right of the main screen, then add the desired network and wallet.
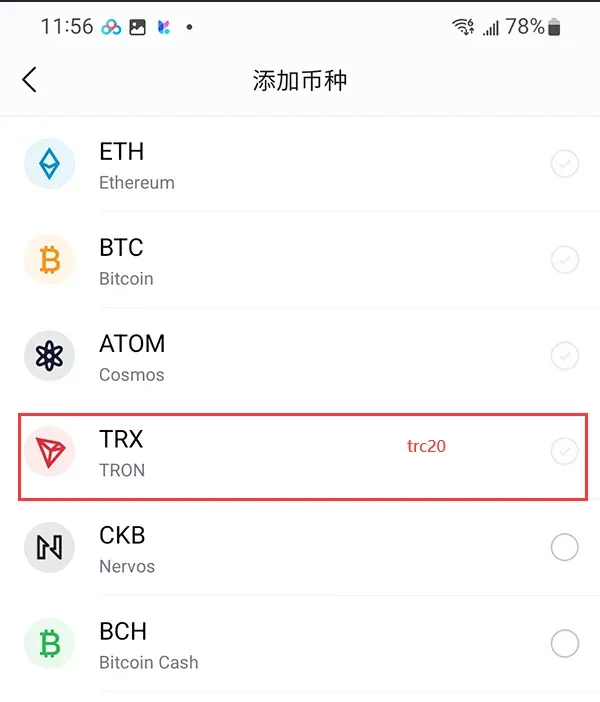
- Go to the Wallet page, select Add Wallet (or Add Token), and choose TRON in the pop‑up window.
- After confirming the network, the app will automatically display USDT (TRC20) within a few seconds. If it does not appear, you can refer to the ERC20 addition method and search manually.
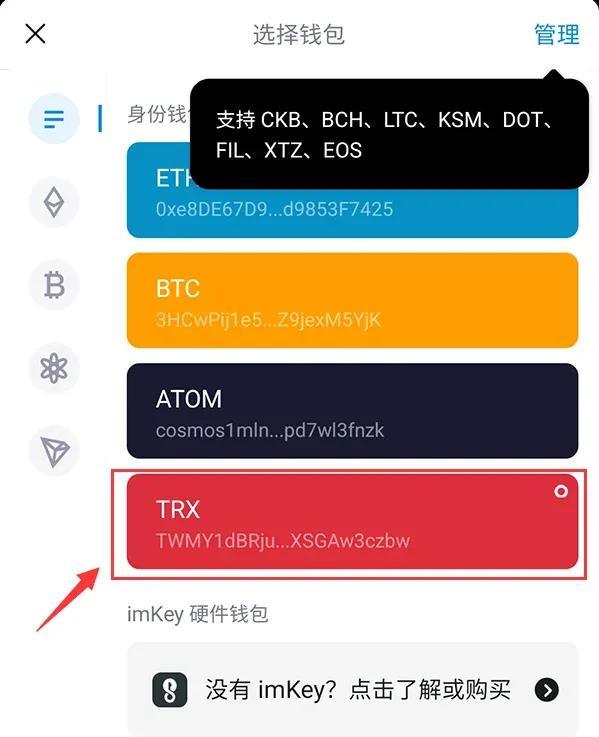
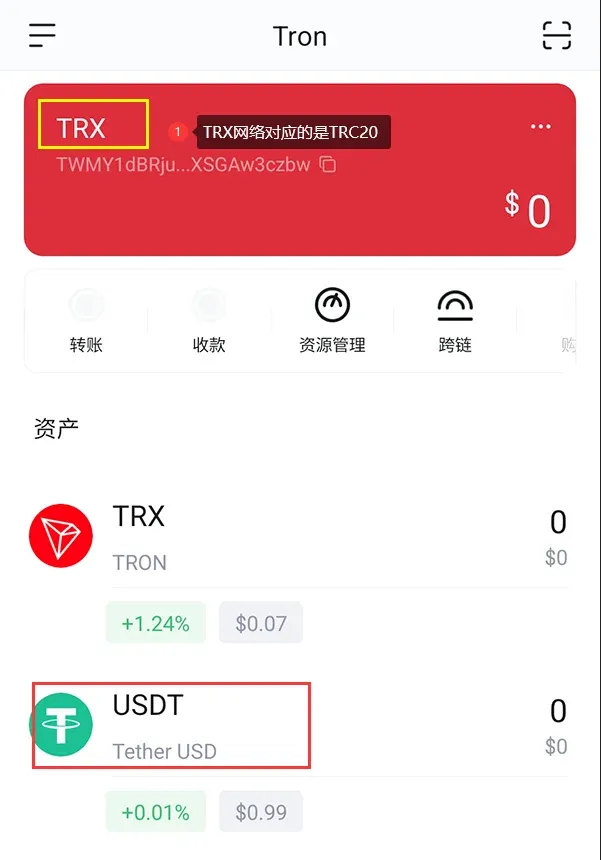
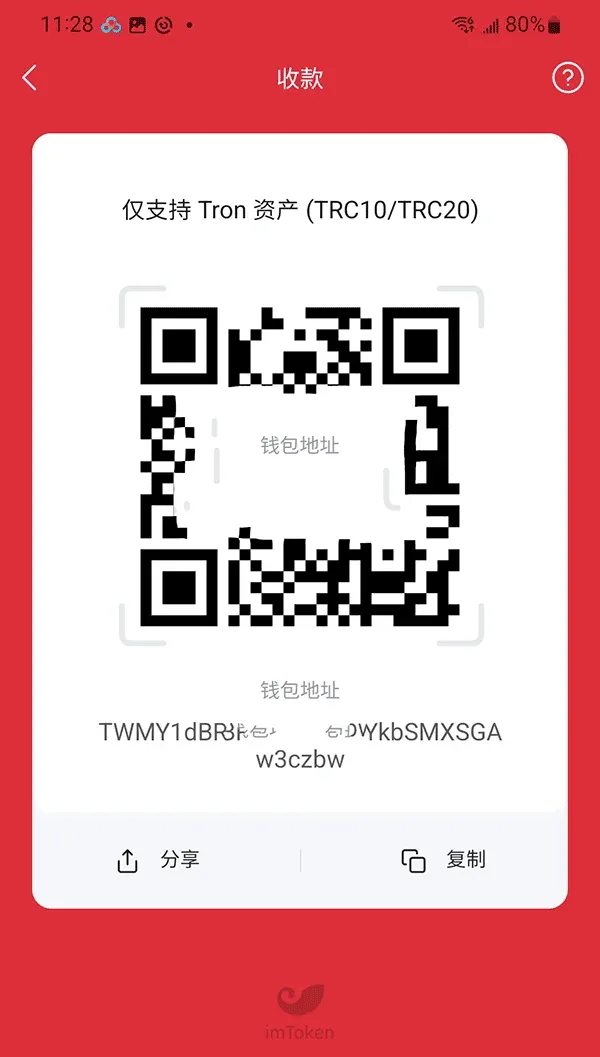
- Once added, tap the USDT entry; the bottom of the page will show Receive and Transfer buttons for the respective actions.
Adding ERC20 USDT (Ethereum network)
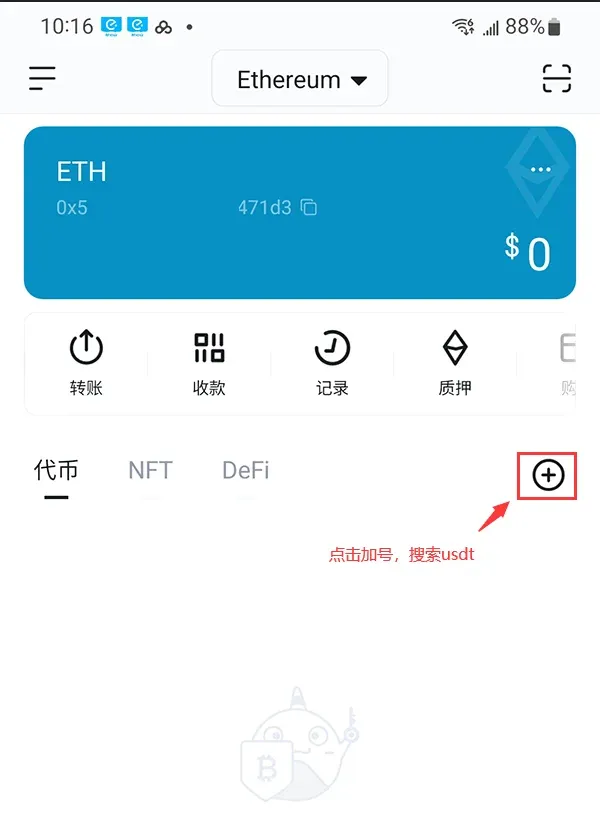
- On the imToken main screen, switch to the ETH network using the selector at the bottom‑left.
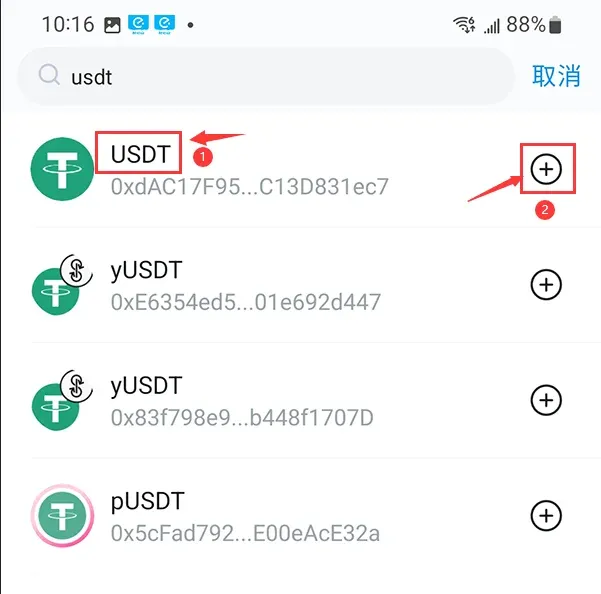
- Tap the + icon on the right and type “USDT”.
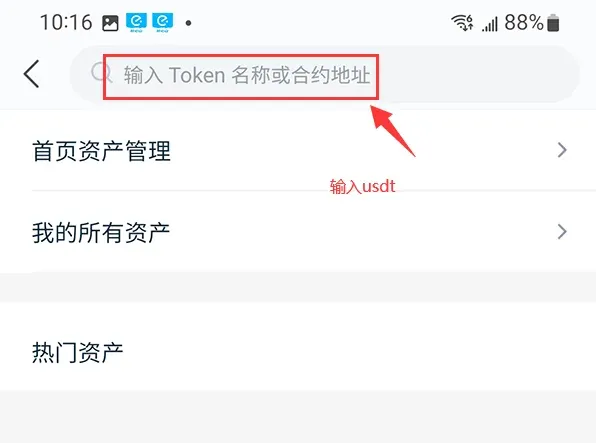
- Select USDT (ERC20) from the results; after confirmation, USDT will appear in your asset list.
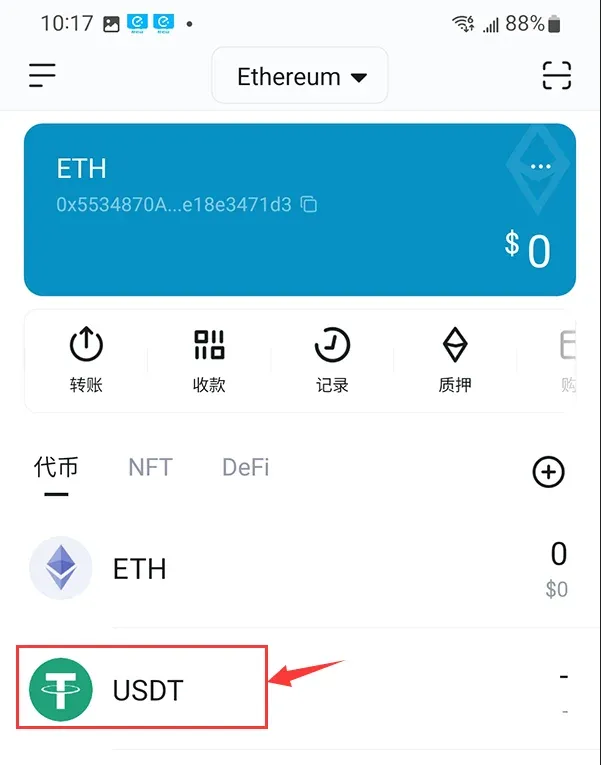
- Open the USDT detail page and tap Receive to copy the corresponding ERC20 address, then send USDT from another wallet or exchange to that address.
Adding via the Assets page (alternative method)
- Launch imToken 2.0 and go to the Assets page.
- Tap the + button at the top‑right and choose Add Token.
- In the search box type “USDT”, select USDT (ERC20) and confirm the addition.
- After the token appears in the asset list, open its page and tap Receive to obtain the address.
With each iteration of blockchain technology, imToken 2.0 has expanded to support Ethereum, Bitcoin, EOS and many other chains, and now includes a DApp browser, built‑in exchange and more. The ecosystem will continue to grow.
Precautions before using
- Before adding a TRC20 address, make sure you already hold the corresponding USDT or have a source for incoming transfers.
- If you are unsure about the contract details, consult the token issuer’s official website or a blockchain explorer.
- Always double‑check the contract address, token name and symbol before confirming, as mistakes can lead to irreversible loss.
Main differences between TRC20 and ERC20
TRC20 (Tron)
- Fast transaction speed: The Tron network can process thousands of transactions per second.
- Low fees: A single transfer costs only a few TRX.
- Rapidly expanding ecosystem: Smart contracts, developer communities and use‑case adoption are growing quickly.
ERC20 (Ethereum)
- Flexible fund management: A standardized token interface makes it easy to layer various financial products.
- Broad application scope: A large number of ICO projects were issued as ERC20 tokens.
- Strong developer ecosystem: Ethereum benefits from a massive developer community and enterprise support, driving continuous standard evolution.
Conclusion
The wallets listed above all score highly in terms of security and user reputation. Investors can choose based on personal needs, usage habits and the level of multi‑chain support required. Regardless of which wallet you ultimately adopt, keep your private keys as the top priority, back up your mnemonic phrases regularly, and perform proper risk assessments to ensure the safety of your USDT holdings.

Related Reading
- Best Wallets to Securely Store USDT: Hardware & Software Guide
- Bitcoin Hardware Wallets: Ledger, Trezor, KeepKey Review
- Choose a cryptocurrency wallet by assessing asset types, usage frequency, and se
💡 Register on Binance with referral code B2345 for the maximum trading fee discount. See Binance complete guide.


