 Bitaigen Research
In the world of crypto assets, USDT is the most widely used stablecoin and is often employed as a value anchor or a bridge for transfers. Binance offers two entry points—C2C (peer‑to‑peer) trading and Quick Buy—so that even users who are new to digital currencies can purchase USDT as easily as shopping on an e‑commerce site. The following sections break down the entire workflow from registration and order placement to fund arrival, helping beginners acquire USDT on Binance quickly and safely.
In this article we walk Binance newcomers through the complete steps—from account registration and identity verification to a rapid C2C USDT purchase—accompanied by screenshots. By avoiding common pitfalls, you can complete your first transaction with confidence. Once you master these basics, obtaining stablecoins will feel as smooth as buying a product online; later sections also contain detailed tips worth reading.

Registration and Preparation
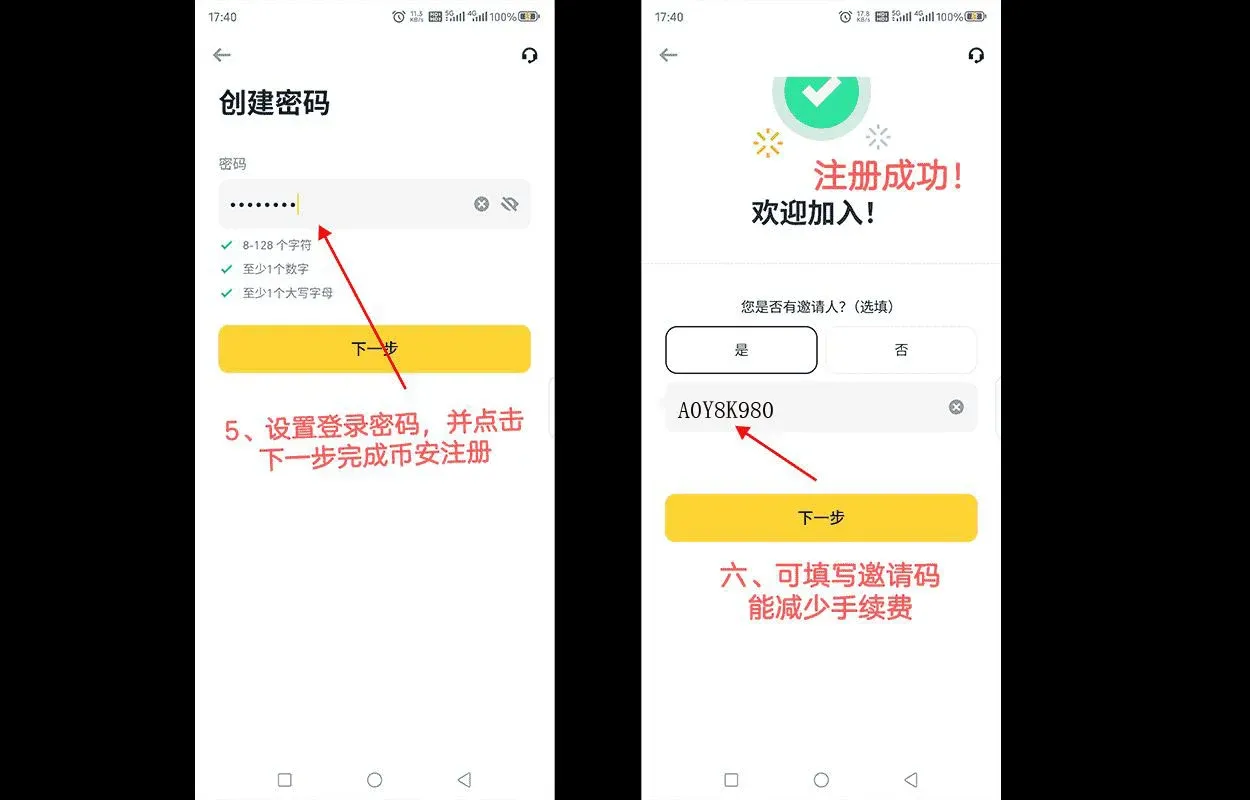
Create a Binance Account
- Official registration link: <https://accounts.binance.com/register?ref=B2345> (copy and open in your browser)
- Android app download: <https://www.bitaigen.com/binance/download>
After registering through the above links, the system will automatically associate the referral code `B2345`. Once registration is complete you will be eligible for any referral rebates. Complete KYC (Know‑Your‑Customer) identity verification, and on the Wallet page bind your preferred payment methods (bank card, SEPA/SWIFT transfer, etc.). This preparation is essential for the upcoming C2C transactions.
What Are C2C and “Quick Buy”?
- C2C (Customer‑to‑Customer): In Binance’s C2C marketplace, individuals or merchants publish ads offering USDT for sale. The platform provides neutral services only—information display, escrow, and dispute arbitration. After you select a suitable seller and make the payment, the platform releases the USDT once the receipt is confirmed.
- Quick Buy: Built on top of the C2C market, Quick Buy is a “one‑click” mode. You simply enter the amount of fiat you wish to spend or the amount of USDT you want to receive, and the system automatically matches you with the best‑priced seller and places the order, eliminating the need to manually browse ads.
The core difference is that the former requires you to pick a seller and confirm payment details yourself, while the latter lets the system handle matching and order creation for a more streamlined experience.
Detailed Order Placement Process
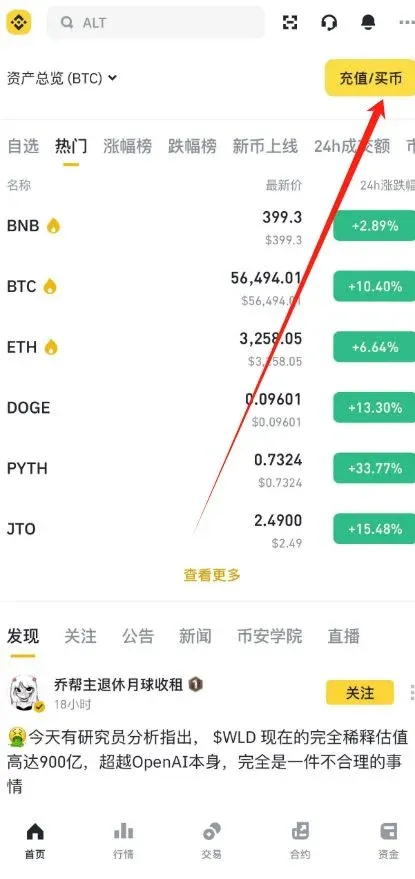
1. Access the Buy Crypto Page
Open the Binance app and tap the “Deposit / Buy Crypto” button in the top‑right corner to reach the purchase interface. The page is divided into a “Custom” section and a “Quick” section; the latter is geared toward users who want to finish a trade rapidly.
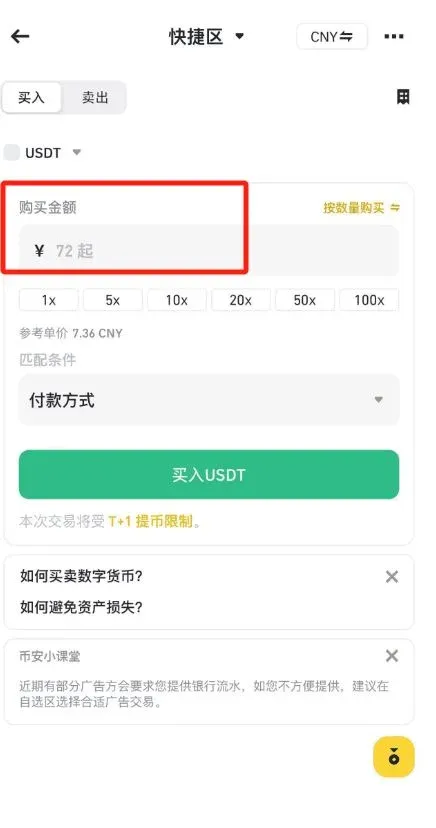
2. Choose Your Buying Method
In the Quick area you can input either a fiat amount (e.g., $1,000 via SEPA, SWIFT, or a linked bank card) or a USDT quantity. The system will display the corresponding exchange rate and selectable multiples (1X, 2X …). For example, the minimum purchase might be 10 USDT; 1X equals 10 USDT, 2X equals 20 USDT, and so on.
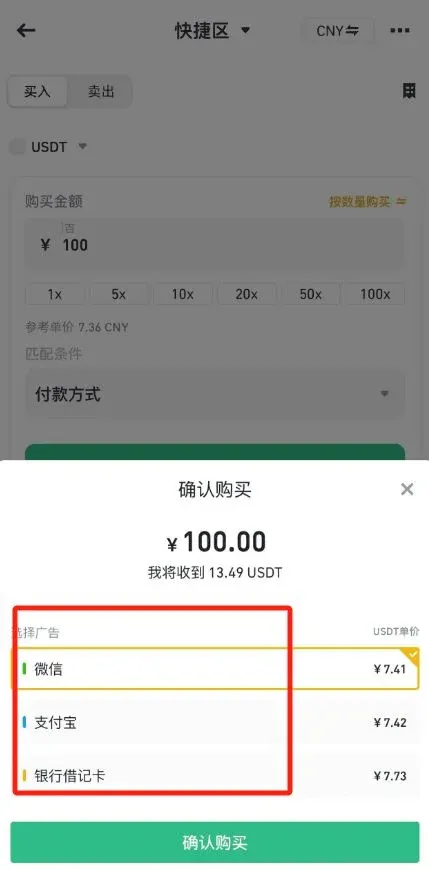
3. Review Seller Information
The platform automatically filters sellers that meet your amount requirement and offer the most competitive price. Each advertisement displays:
- Seller’s nickname
- Order completion rate
- Average release time
- Accepted payment methods (bank transfer, SEPA, SWIFT, etc.)
Select a seller with a high rating, fast release speed, and a payment method that matches yours, then tap “Place Order.”
4. Complete the Payment
The order page will present the seller’s receiving account details or a QR code. Transfer the exact amount within the stipulated time frame, then click “I have paid.” If you forget to confirm payment, the order may be automatically cancelled due to timeout, and you will need to contact Binance support for assistance.
5. Verify Release Status
Once the seller confirms receipt of your funds, they will release the USDT to your Binance Wallet → Spot Wallet within a few minutes. You can monitor progress on the Orders tab or wait for the push notification confirming the successful release.
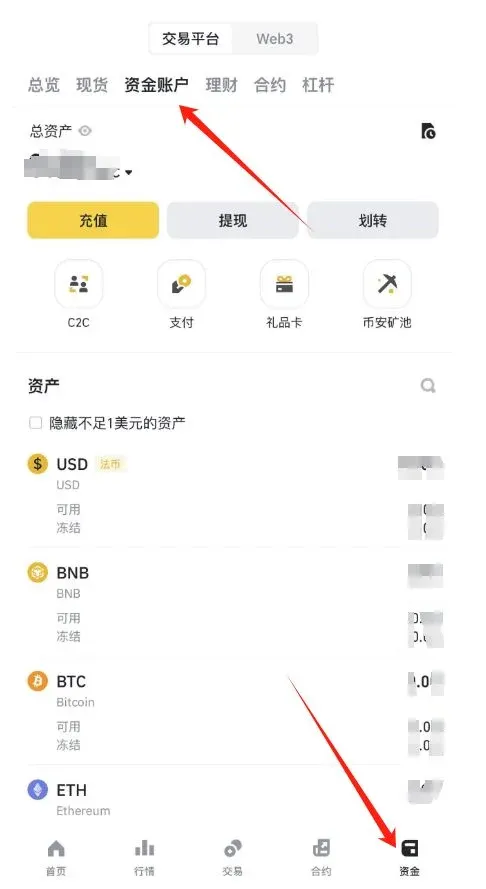
Common Actions After USDT Arrival
- Hold: Keep USDT as a stable asset while you wait for a favorable entry point into other markets.
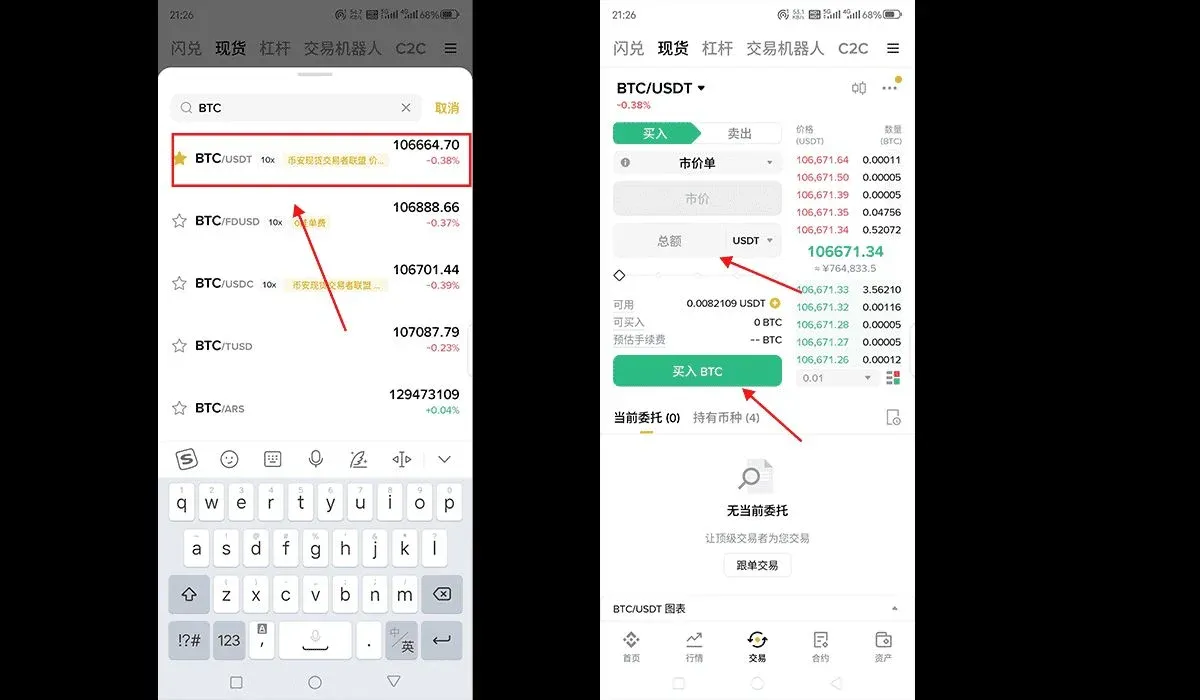
- Spot Trading: Navigate to Trade → Spot (or the “Standard” interface) and search for pairs such as BTC/USDT to swap USDT for Bitcoin or other cryptocurrencies.
- Earn Products: In the Earn section you can place USDT into Flexible Savings (e.g., Binance’s “Earn” or “BUSD Savings”) for a variable yield, or choose a Fixed‑Term product for higher rates.
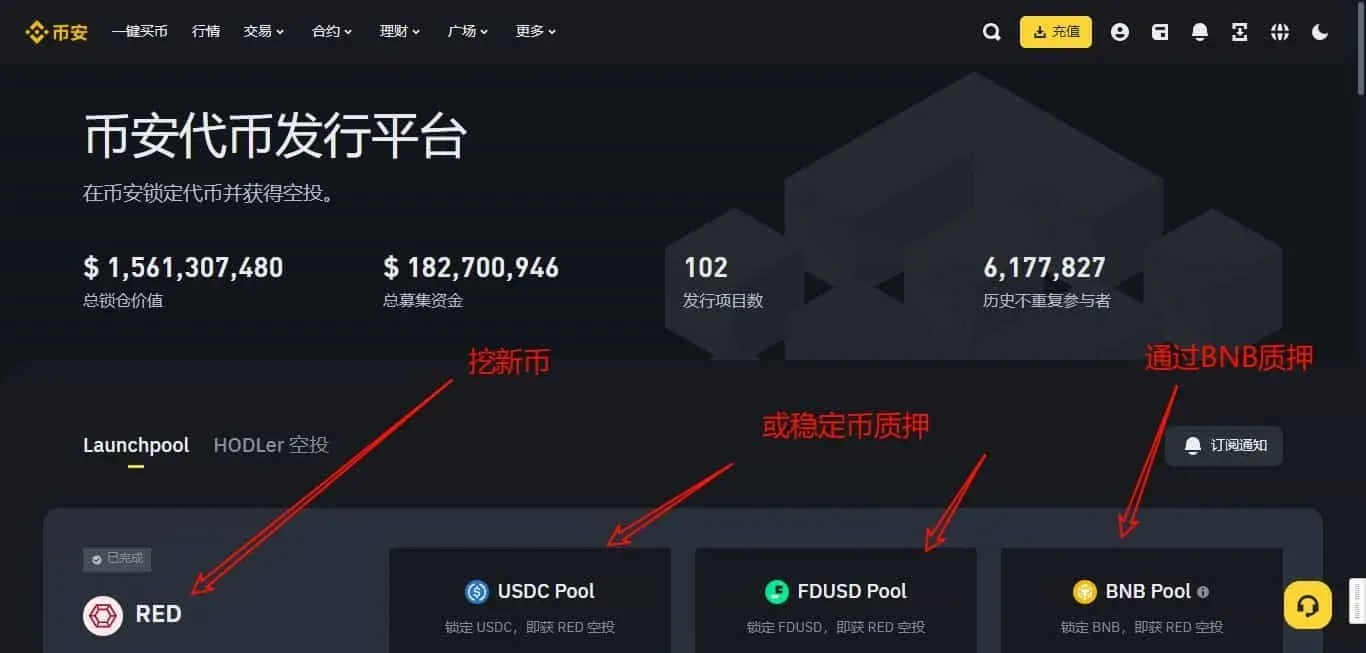
- Launchpad Participation: Some new token sales require BNB or USDT; holding USDT enables you to join those offerings.
Frequently Asked Questions and Handling Tips
Seller Doesn’t Release USDT After I Paid
- Confirm you have tapped “I have paid.”
- Use the “Contact Seller” button on the order page to attempt communication.
- If there is still no response, immediately click “Appeal” or reach out to official support, providing a screenshot of the successful transfer. Binance’s escrow mechanism will verify the proof and protect your funds.
Why Can’t I Add Crypto‑Related Information in the Transfer Remark?
Regulators in many jurisdictions require payment processors to perform risk controls on transactions involving crypto assets. Including keywords related to cryptocurrencies in the remark field may trigger a bank’s AML (Anti‑Money‑Laundering) filters and result in a frozen account. Follow the platform’s guidance: keep the remark empty or only insert the order number.
How Can I Get a Better Quote?
Different sellers may list slightly different rates. It’s often advantageous to browse ads during off‑peak hours (e.g., late night GMT) or compare several sellers side‑by‑side to capture a lower effective price.
Are There Transaction Limits?
Each seller’s ad specifies a minimum/maximum transaction amount. Additionally, your own KYC tier determines daily or cumulative fiat‑to‑crypto limits. Verify the applicable limits before placing an order.
Tax Note: Crypto gains, including profits from trading or converting USDT, may be taxable in your jurisdiction. Please consult a tax professional or local regulations to ensure compliance.
Summary
This guide covered everything from registration and preparation, through the distinction between C2C and Quick Buy, to the practical steps of placing an order, making the payment, confirming release, and finally utilizing the received USDT. By completing KYC, linking your personal payment channels, and confirming payment promptly, the whole process remains secure and efficient. We hope this tutorial enables you to acquire USDT the moment an opportunity arises.
For more practical tips on Binance C2C USDT purchases, feel free to search Bitaigen (比特根) for past articles or continue reading the related links below. Thank you for your continued interest and support!
Related Reading
- Binance Review 2024: Register, Download & Trade Bitcoin, Ethereum, USDT, USDC
- Binance Event Contracts Explained: Benefits, Risks & How to Trade
- Download Binance Android App in Mainland China – 2026 Guide
💡 Register on Binance with referral code B2345 for the maximum trading fee discount. See Binance complete guide.