
Gate.io is a globally recognized digital‑asset trading platform. By simply downloading the official APP and completing real‑name verification, users can purchase cryptocurrencies and withdraw fiat funds. The whole workflow covers app download, account registration, identity verification, C2C (peer‑to‑peer) buying, and withdrawal to Alipay or WeChat Pay.
We have prepared a step‑by‑step hands‑on guide for newcomers, covering everything from APP download and account verification to C2C purchases and withdrawals to Alipay or WeChat Pay. The instructions are clear, illustrated with screenshots, and designed to help you get started quickly and manage your assets safely. Continue reading for the full details.

How to Install the Gate.io Android App
Gate.io APP exclusive download link: Click to download
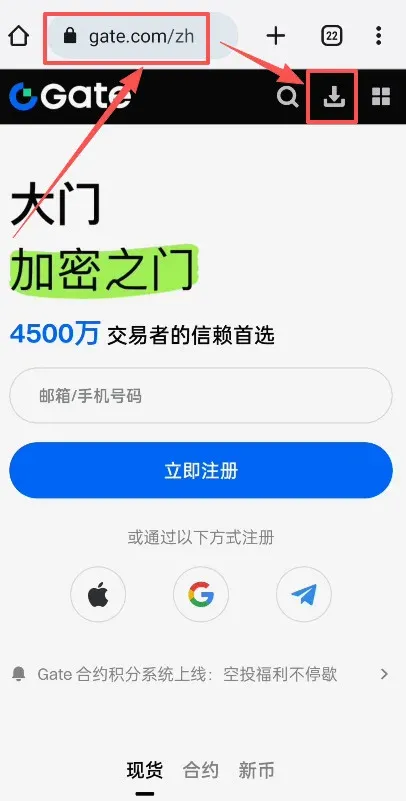
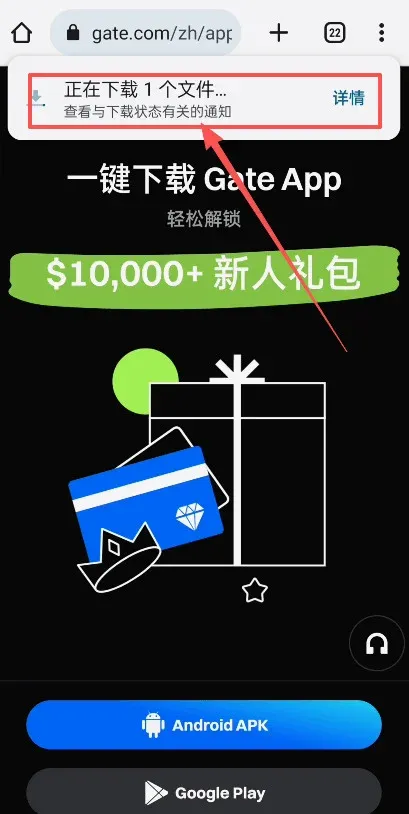
Open a web browser and navigate to gate.com. After the official site loads, click the Download button on the page.
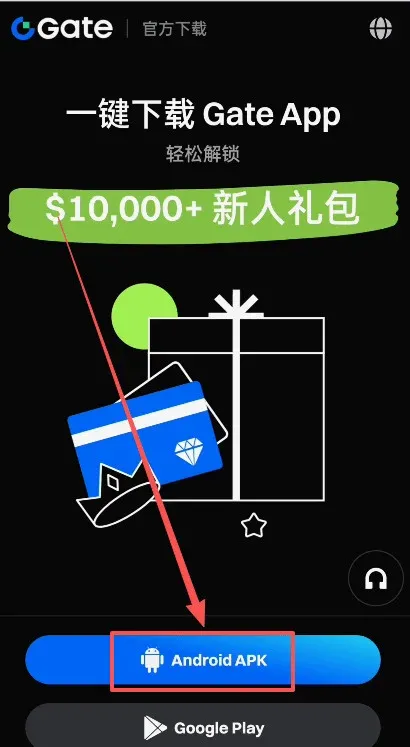
Select the first APK package for download.
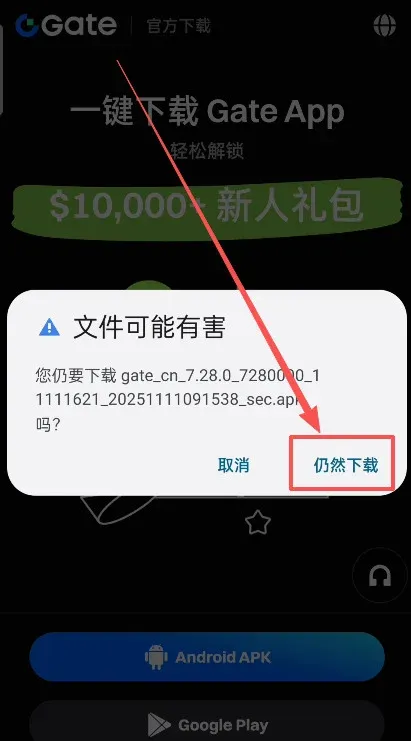
The system warns that the file might be harmful; tap Continue Download.
View the file details if you wish.
When the download finishes, tap Open to launch the installer.

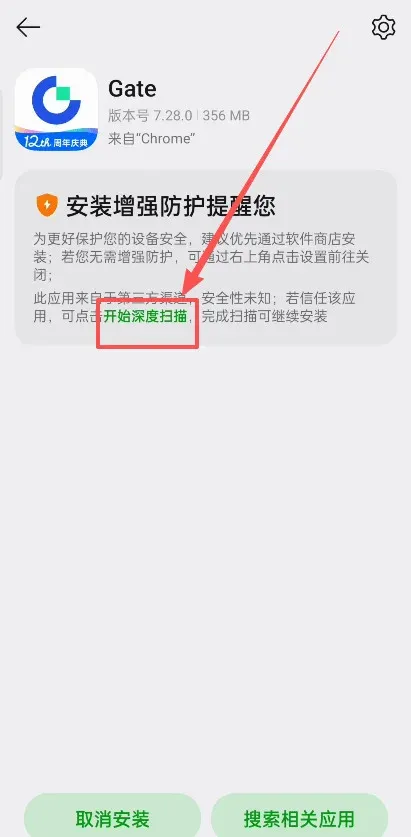
Check the box Allow this installation.

Tap Start deep scan.
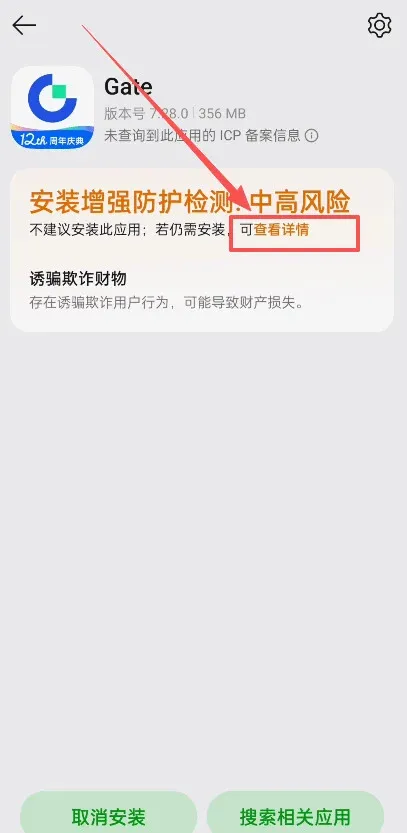
The system flags the software as high‑risk; choose View details.
Select Install anyway.
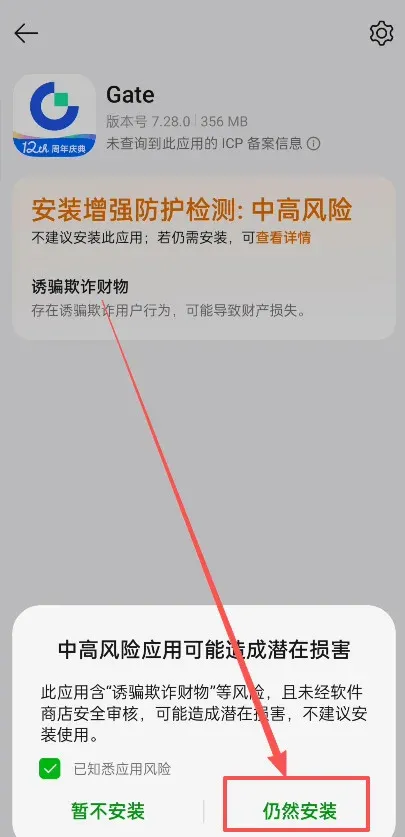
After installation, you will see the Gate.io Android app listed on your device.

How to Register on Gate.io?
Gate.io APP Registration Steps
Gate.io exclusive registration link: Click to register
Open the freshly installed APP and tap the Login / Register button on the home screen.

On the login page, choose Free Registration.

Enter either a frequently used email address or mobile number, set a password, and select your country of residence (the country that issued your ID) to facilitate later verification.
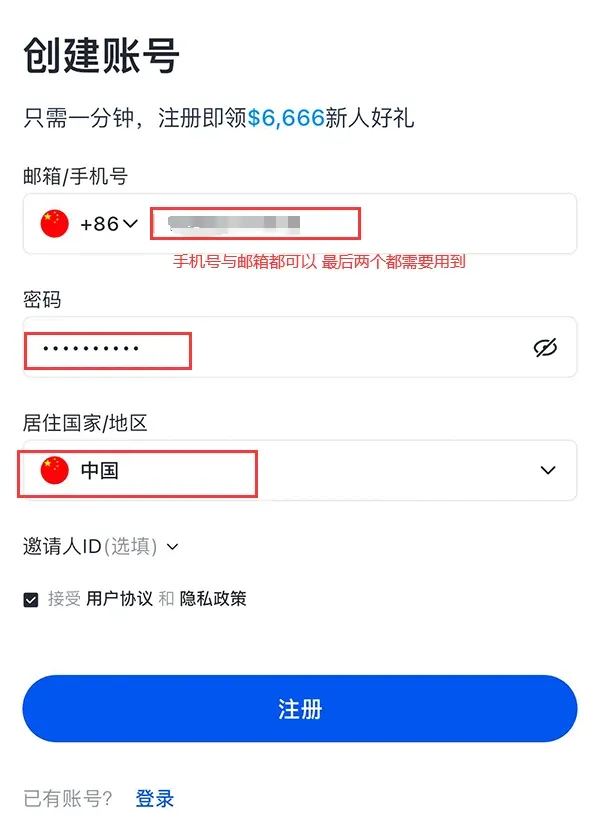
After filling in the details, tap Register.
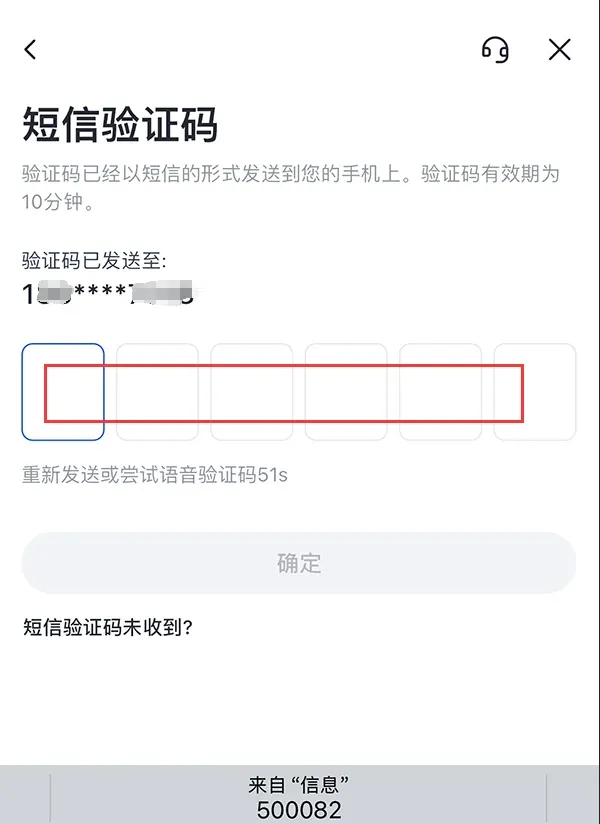
If registration succeeds, the system will send a verification email. Click the link inside the email to confirm your address. If you used a phone number, simply enter the SMS code you receive.
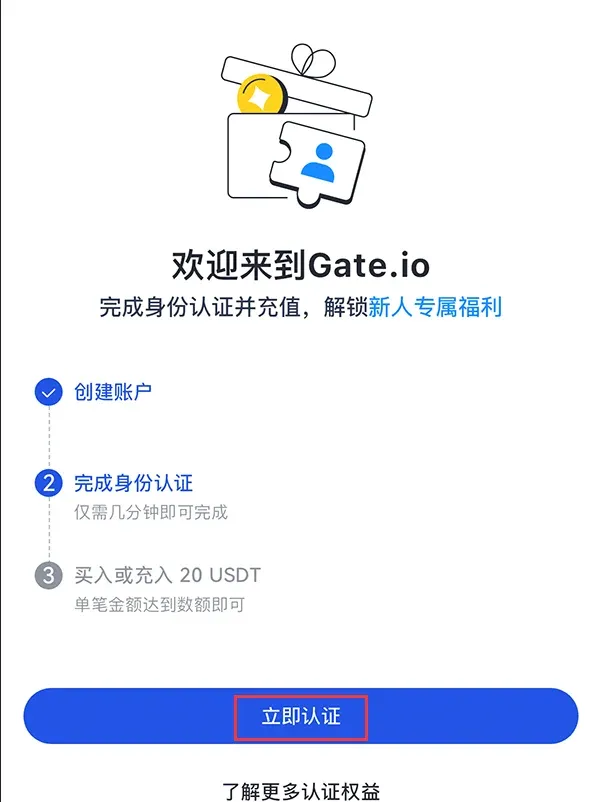
Once the account is created, you must complete identity verification before you can access the full suite of Gate.io features.
Identity Verification Process
Open the APP; a banner will indicate that real‑name verification is pending. Tap Go Verify to start. Follow the on‑screen prompts, provide accurate personal information, and upload clear photos of your identification document and a selfie.
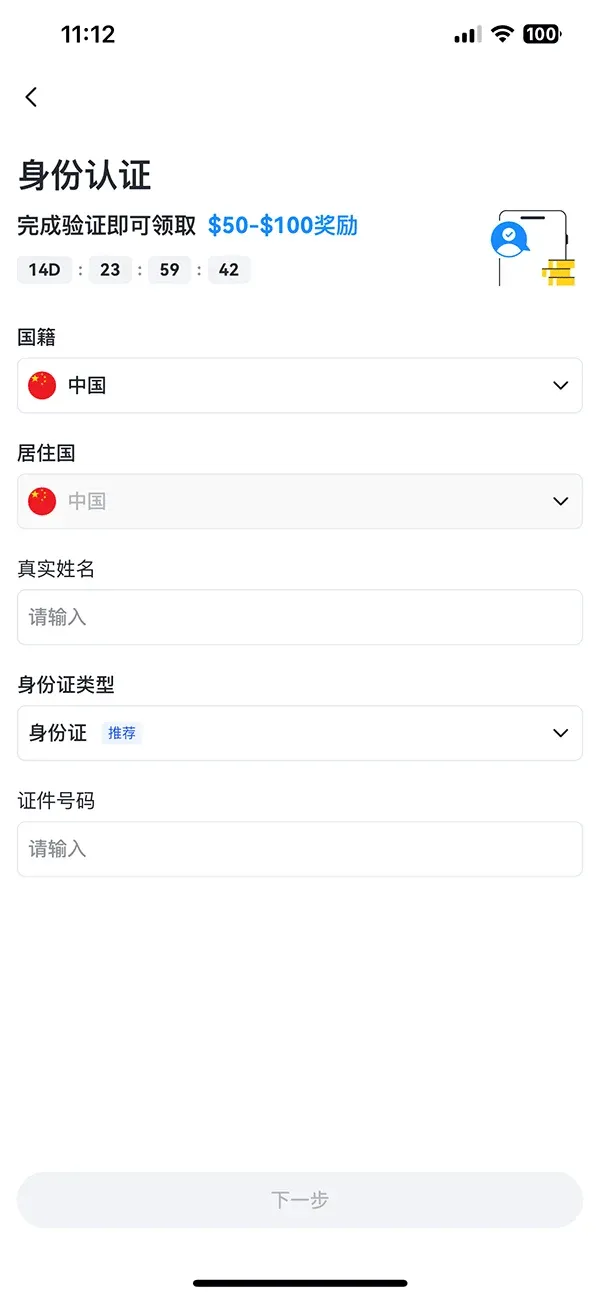
After the verification is approved, your account gains full trading privileges. Please note that Gate.io primarily lists altcoins and other smaller‑cap tokens; some of these assets carry higher risk. Conduct your own due diligence before trading.
Security Settings
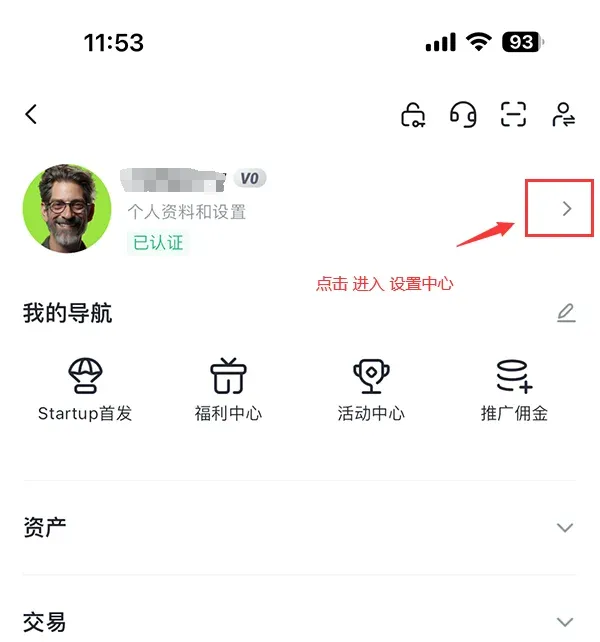
- Tap the User Center icon in the top‑left corner.

- In the right‑hand pane, open Settings Center.
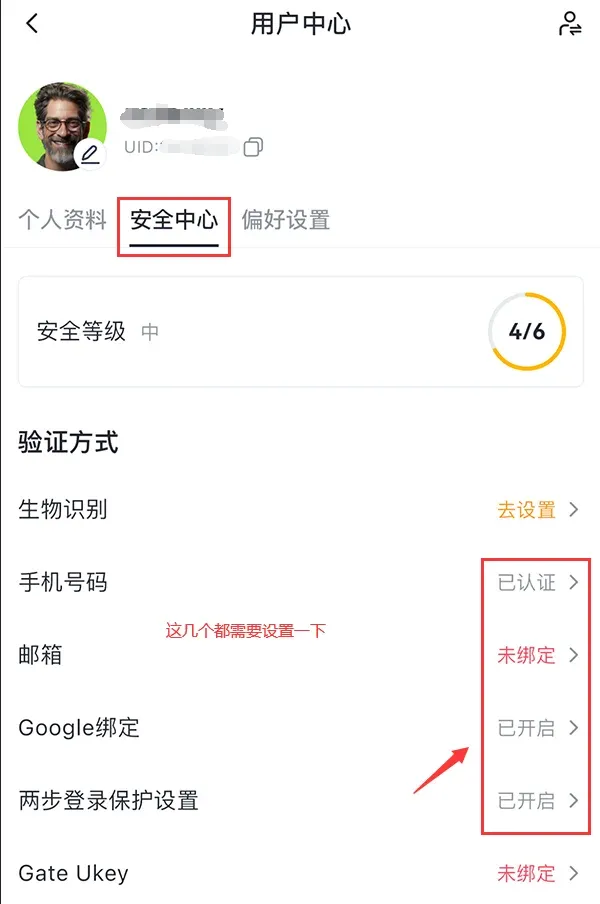
- Within the Security Center, enable the four recommended safeguards: Google Authenticator binding, email binding, and the other two security options provided.
Funding / C2C Buying Steps
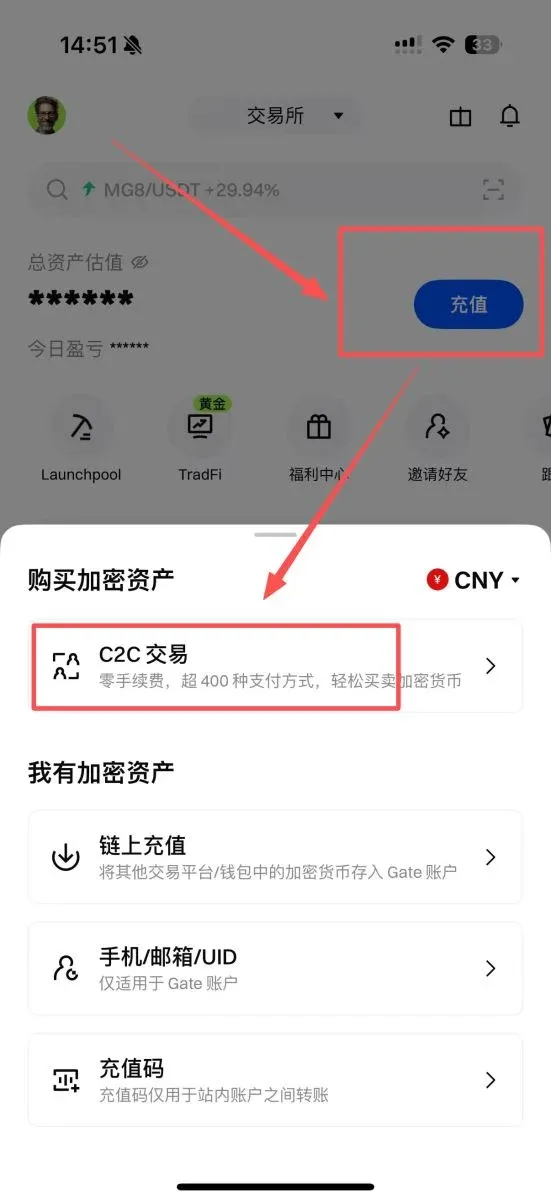
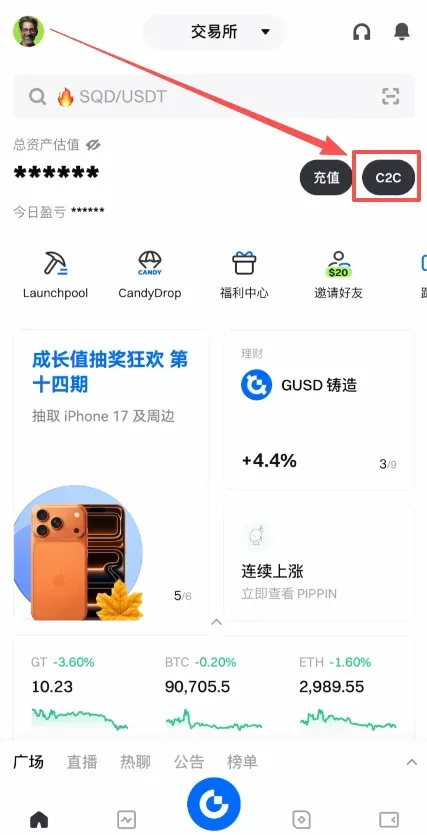
After configuring the security options, you can start purchasing crypto. From the APP home screen, tap Deposit, then select C2C Trading.
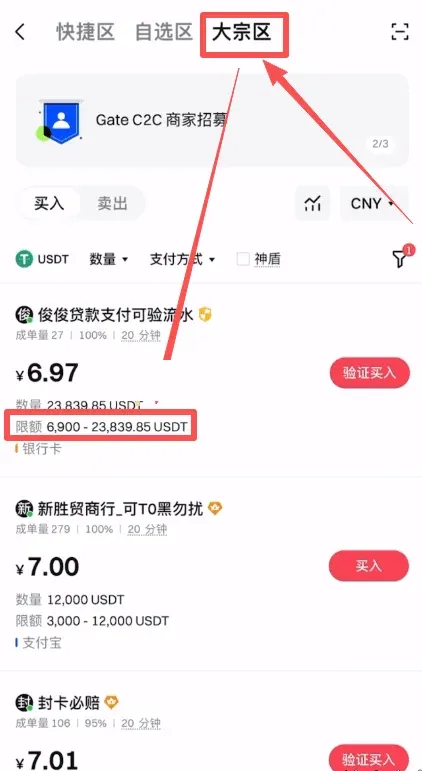
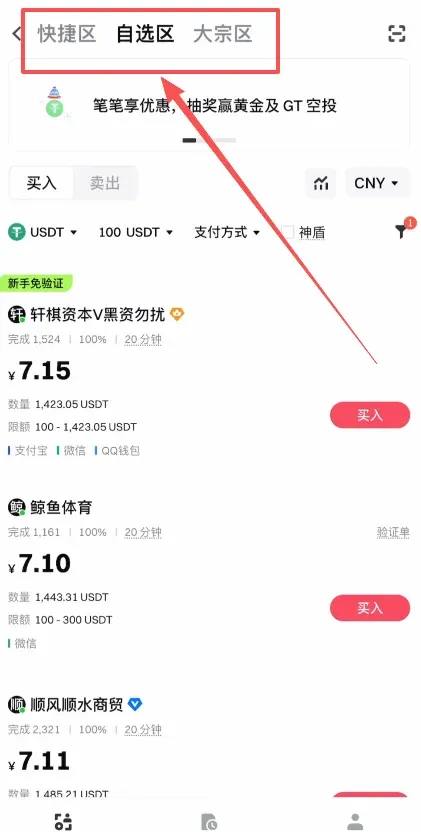
The C2C interface is divided into three sections: Quick Zone, Custom Zone, and Bulk Zone.
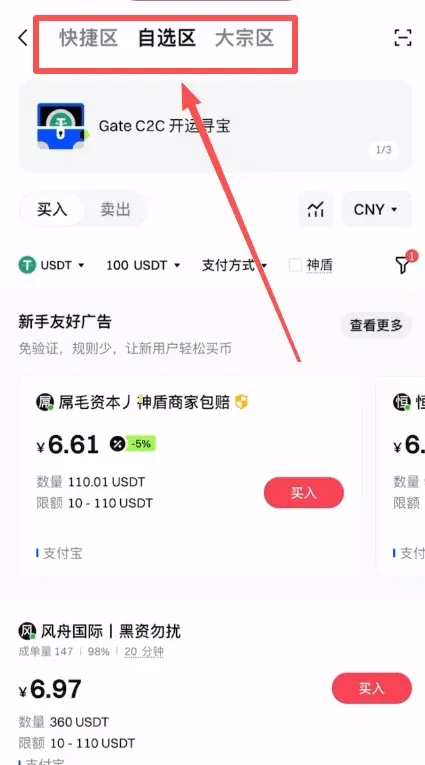
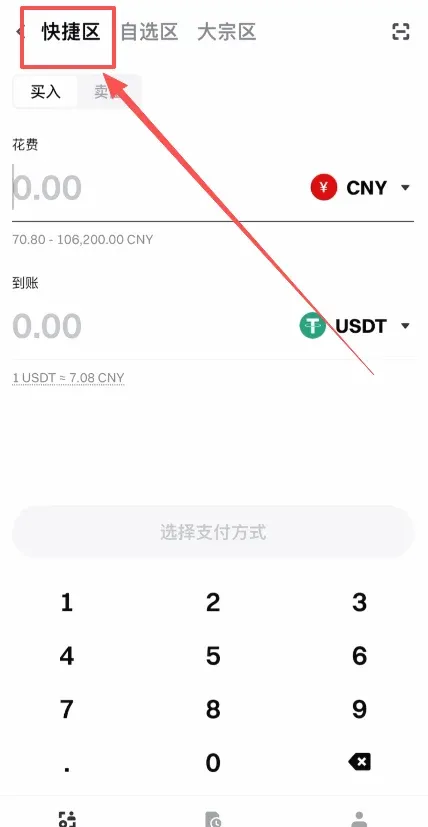
- Quick Zone – The system automatically matches you with merchants based solely on price. The matching logic is simple, and the risk level is comparatively higher.
- Custom Zone – Allows you to manually filter merchants; this is the recommended choice for most users.
- Bulk Zone – Designed for large‑volume trades; casual users can generally ignore this section.
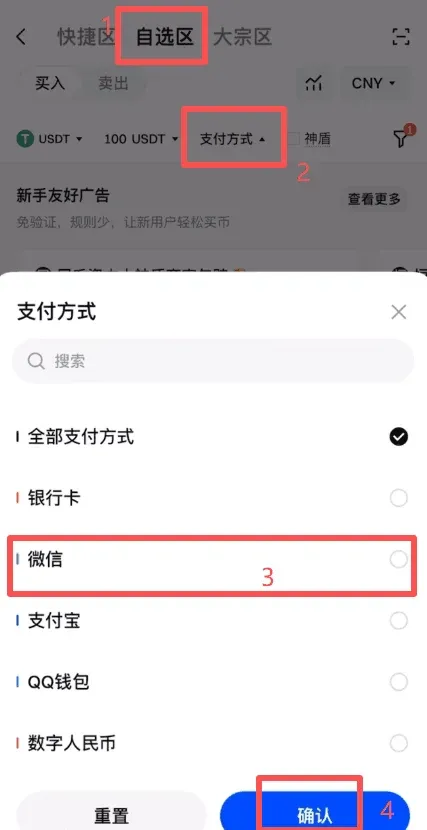
In the Custom Zone, tap Payment Method to choose from bank card, WeChat Pay, Alipay, QQ Wallet, digital RMB, etc. In the example below, WeChat Pay is selected, then tap Confirm.
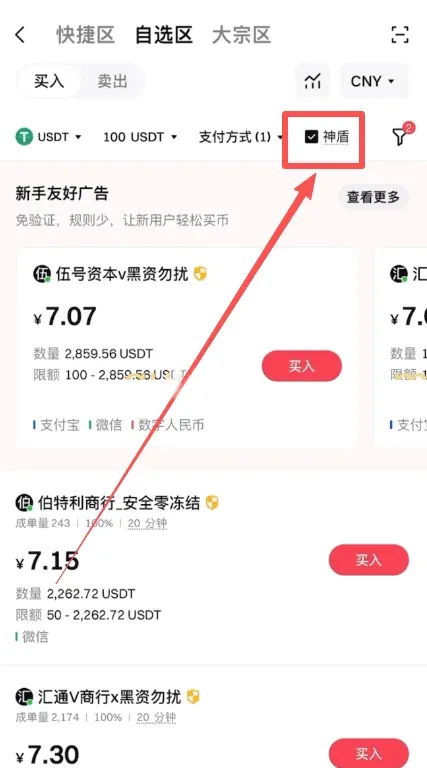
Check the Shielded Merchant box (the platform has posted a large amount of margin on behalf of these merchants) to obtain platform compensation in case of disputes.
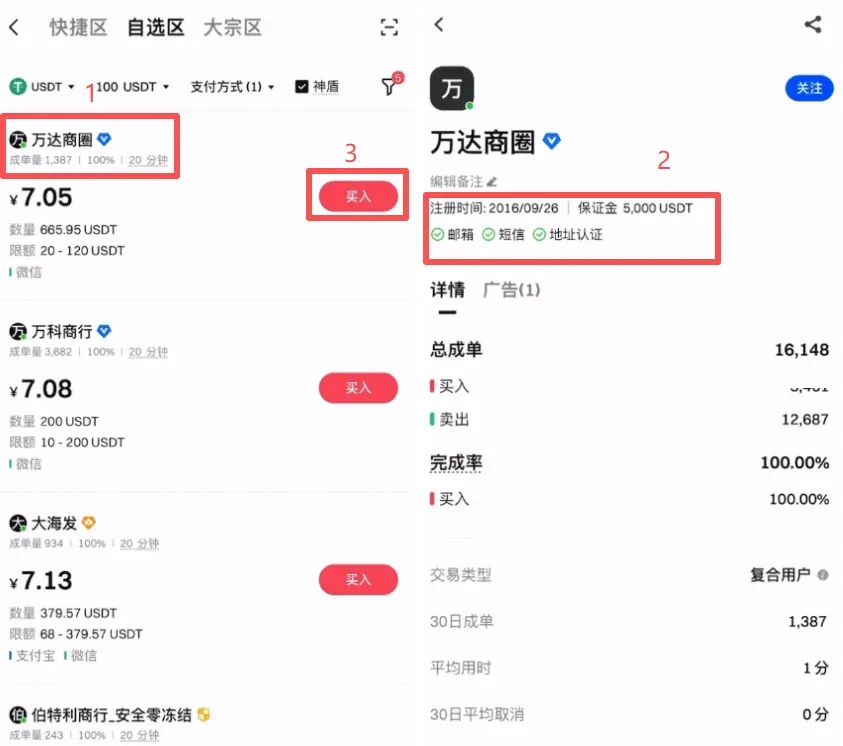
Open the small funnel icon on the right, enable No Verification Required, and tick the Crown and Blue V filters to surface high‑quality merchants.
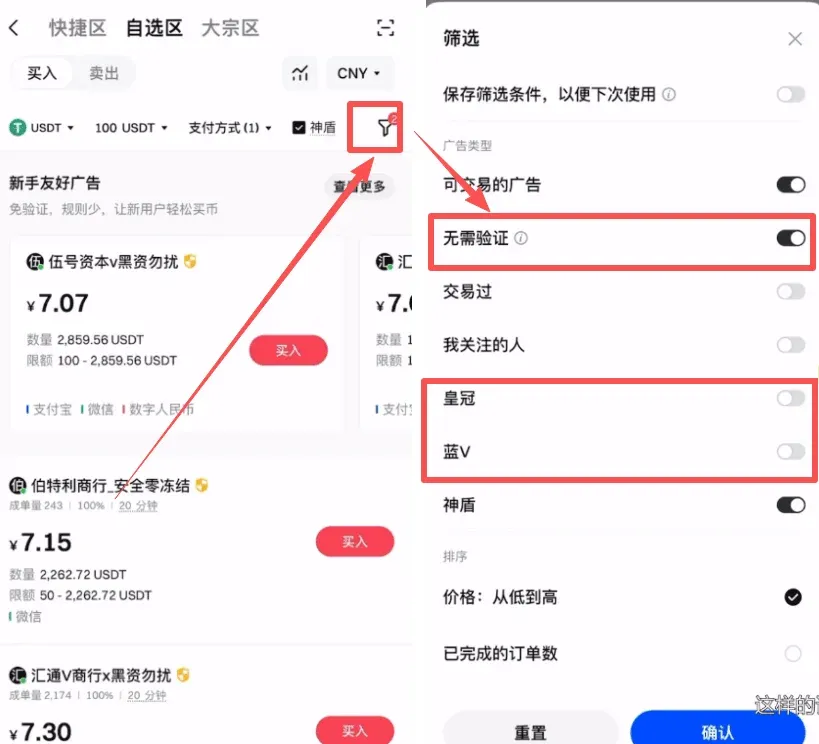
After filtering, pick merchants with large trade volumes, high completion rates, and a long registration history (e.g., registered in 2016 with a 5,000 USDT margin). Tap their profile and then click Buy.
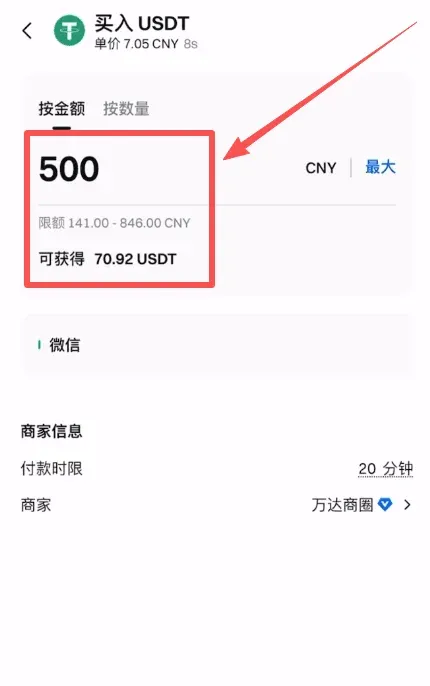
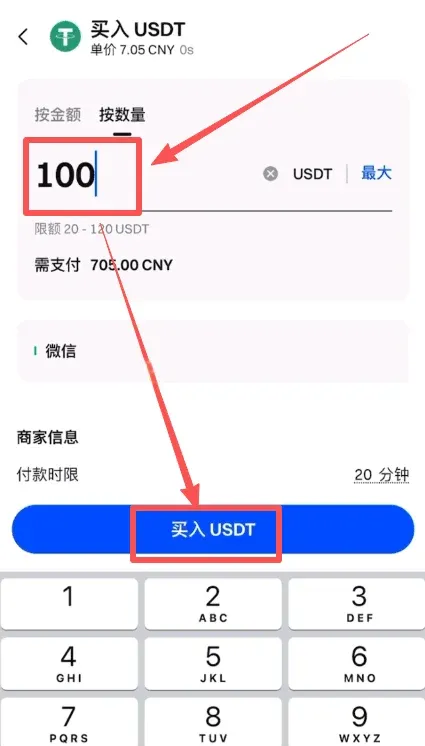
On the buying page you can specify the order by amount (in your fiat currency, e.g., CNY) or by quantity (in the crypto, e.g., USDT). In the example, the user buys USDT worth 500 CNY.
After confirming the details, tap Buy USDT; the system will generate an order.
A chat window opens showing the merchant’s payment information (WeChat ID, QR code, etc.). Complete the transfer, then must click I have paid on the platform. Once the merchant acknowledges receipt, the USDT will be credited to your Gate.io wallet.

Tip: When using WeChat Pay, always verify the merchant’s identity to avoid impersonation scams that could result in loss of funds.
Selling and Withdrawing to Fiat (CNY)
- Open the Gate.io APP home screen and select C2C.
- Inside the C2C section you will again see the Quick Zone, Custom Zone, and Bulk Zone panels.
- To reduce counter‑party risk, it is advisable to use the Custom Zone or Bulk Zone when placing a sell order.
- In the Custom Zone, tap Sell, enter the amount you wish to sell (e.g., 1,000 CNY worth of USDT), select the receiving method (example: Alipay), and press Confirm.
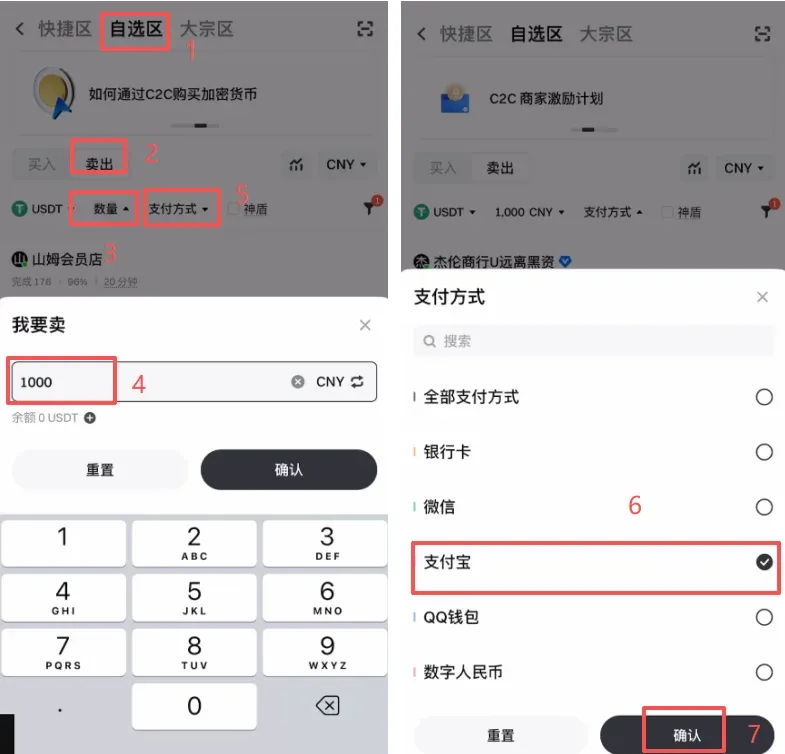
- Tick the Shielded Merchant option, enable No Verification Required, and activate the **Crown
Related Reading
- Binance Alpha Airdrop: How to Claim & Earn Free Crypto
- OKX: Register, Verify, Buy USDT & Bitcoin, Withdraw Fiat
- HashKey Exchange Guide: Register, Fund & Withdraw
💡 Register on Binance with referral code B2345 for the maximum trading fee discount. See Binance complete guide.


