
The MetaMask “fox” wallet is a Google Chrome browser extension that supports networks such as Ethereum, Binance Smart Chain, and the Huobi Eco‑Chain. It runs DApps directly in Chrome and provides identity‑verification features, delivering a smooth user experience.
Recently, rumors have circulated about a possible token issuance, making the installation and usage procedures a hot topic—especially for users who cannot access the internet through a VPN or other “scientific” means.
This article compiles the most common questions about using the MetaMask “fox” wallet on a computer. It focuses on two installation methods and offers an alternative solution for users who cannot bypass regional internet restrictions. Step‑by‑step screenshots and safety notes are included to help you get started quickly, avoid pitfalls, and understand the potential impact of a token launch. Keep reading for the full guide.
1. Installing the MetaMask “fox” wallet
Two installation methods are provided below. Users who can access the global internet (i.e., have VPN or similar tools) should choose Method 1. Users who cannot should follow Method 2.
Method 1: Online installation (requires unrestricted internet access)
- Visit the official Chrome Web Store link
https://chrome.google.com/webstore/detail/metamask/nkbihfbeogaeaoehlefnkodbefgpgknn
- Click the ADD TO CHROME button in the top‑right corner.
- In the pop‑up window, click Add extension.
- When the process finishes, a fox icon will appear in the upper‑right corner of the browser, indicating a successful installation.
Method 2: Local package download and manual installation (no need for unrestricted internet)
- Go to the GitHub releases page:
https://github.com/MetaMask/metamask-extension/releases
- In the Assets list, locate `metamask-chrome-8.1.10.zip` (or the newest version), download it, and unzip the archive.

- Open Chrome and navigate to `chrome://extensions`, then enable Developer mode.

- Click Load unpacked and, in the dialog that appears, select the folder you just extracted.
- The page will redirect to a new screen; click Get Chrome Extension.
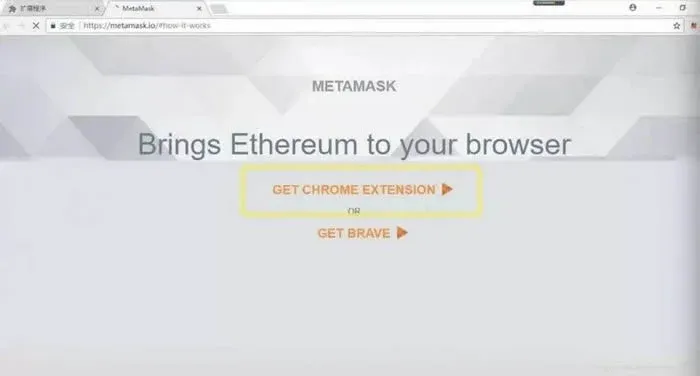
- Once the process completes, the fox icon will appear in the browser’s upper‑right corner, confirming a successful installation.

2. Connecting the fox wallet to various blockchains
1. Import an existing wallet or create a new one
Click the fox icon in the top‑right corner of the browser to open the wallet interface.
- If you already have a wallet, click Import, check the I agree box, enter your seed phrase, and set a password (this password encrypts the wallet locally and can be the same as or different from any on‑chain password you use).
- If you do not have a wallet, click Create and follow the on‑screen steps to generate a new one.
2. Switching and adding networks
After import, the wallet defaults to the Ethereum Mainnet, allowing immediate interaction with Ethereum DApps such as Uniswap. To connect to Binance Smart Chain (BSC), add a custom RPC as follows:
| Parameter | Value |
|--------------------|-----------------------------------------------------------------------|
| Network name | Binance Smart Chain |
| New RPC URL | https://bsc-dataseed2.binance.org/ (you can also use dataseed1/3/4) |
| Chain ID | 56 |
| Symbol | BNB |
| Block explorer URL | https://bscscan.com/ |
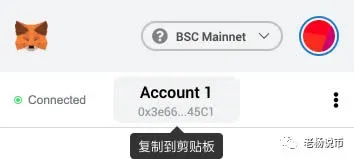
After filling in the fields, click Save; the wallet will now switch to the BSC Mainnet.
If you wish to add the Huobi Eco‑Chain (HECO) network, use the parameters below:
- Network name: HECO Mainnet
- New RPC URL: `https://hecorpc.anyswap.exchange` (the alternative `https://http-mainnet.hecochain.com` may be unstable)
- Chain ID: 128
- Symbol: HT
3. Common operations with the fox wallet
1. Binance Smart Chain BEP‑20 tokens
Transferring assets on BSC requires BNB to pay transaction fees, so keep a small BNB balance in the wallet. At present, only Binance’s exchange supports withdrawals in the BEP‑20 format; most other exchanges do not.
When withdrawing (whether BNB, USDT, or BUSD), use the ETH address displayed in MetaMask as the destination address.
Note for U.S. users: If you reside in the United States, you must use Binance.US instead of the global Binance platform for any fiat‑on‑ramp or off‑ramp services. Transactions involving USD, SEPA, or SWIFT should be routed through Binance.US or another regulated service that supports those methods.
2. Adding a token the first time you use BSC
- Visit https://bscscan.com/, search for the desired token, and copy its contract address.
- In MetaMask, select Add Token → Custom Token, paste the contract address, and the wallet will automatically display the token symbol and decimals.
For example, the contract address for ETH on BSC is `0x2170ed0880ac9a755fd29b2688956bd959f933f8`, and the contract address for BETH is `0x250632378e573c6be1ac2f97fcdf00515d0aa91b`.
3. Managing multiple accounts
After importing or creating a wallet, you can generate additional accounts via Wallet → Top‑right icon → Add Account; there is no limit to the number of accounts.
All accounts are recovered with a single seed phrase. When you restore the wallet using the phrase, two accounts appear by default (if you originally created more, you can add them one by one using the same method). This makes backup and recovery straightforward.
---
Tax considerations
Cryptocurrency transactions may be subject to capital‑gain tax in many jurisdictions. Users should consult local tax regulations or a qualified tax professional to determine reporting obligations for any gains or losses realized when using MetaMask.
---
That concludes the compilation of common questions and procedures for using the MetaMask “fox” wallet on a desktop computer. For more MetaMask‑related resources, please follow other articles from Bitaigen (比特根).
💡 Register on Binance with referral code B2345 for the maximum trading fee discount. See Binance complete guide.


