
In this guide we walk beginners and intermediate users through the entire TokenPocket workflow, from installation to wallet creation, import, and cross‑chain operations, all accompanied by clear screenshots. By following the illustrated steps, you can quickly master multi‑chain management and DApp interaction, saving you the time spent fumbling around. If you want to start using this lightweight wallet with confidence, keep reading for practical tips.
TokenPocket is a well‑known multi‑chain lightweight wallet within the cryptocurrency community. Since its launch in 2018, it has supported ten major token standards and is compatible with DApps. Its cross‑chain capabilities and straightforward user experience have attracted many investors. Below, illustrated step‑by‑step instructions will help you get up to speed with all of TokenPocket’s features.
How to Use the TokenPocket Wallet?
2. After Installation, Create a Wallet
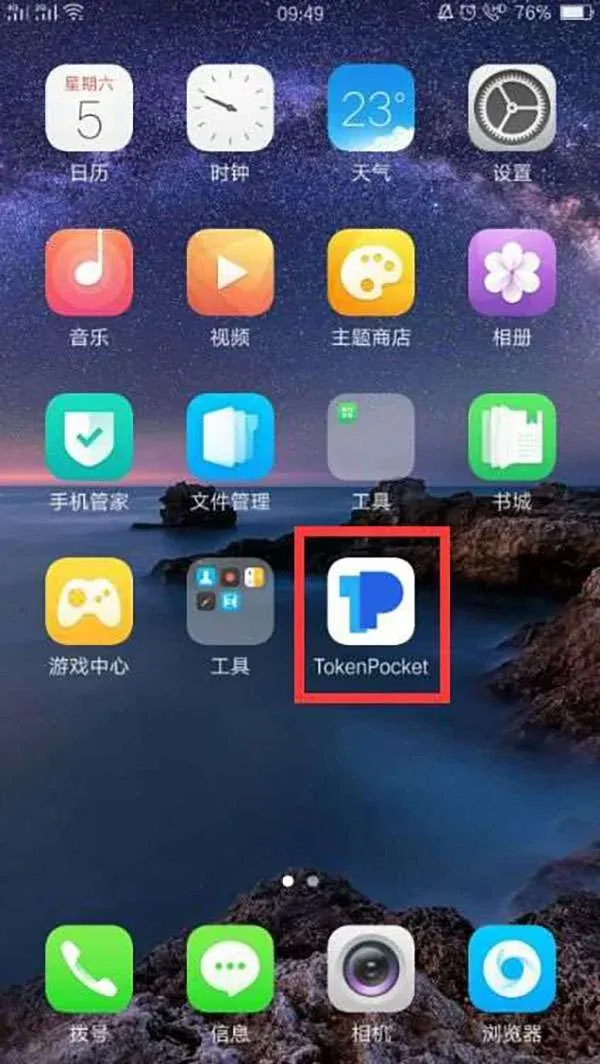
- After the download and installation are complete, the TokenPocket icon will appear on your phone’s home screen; tap it to open the app.
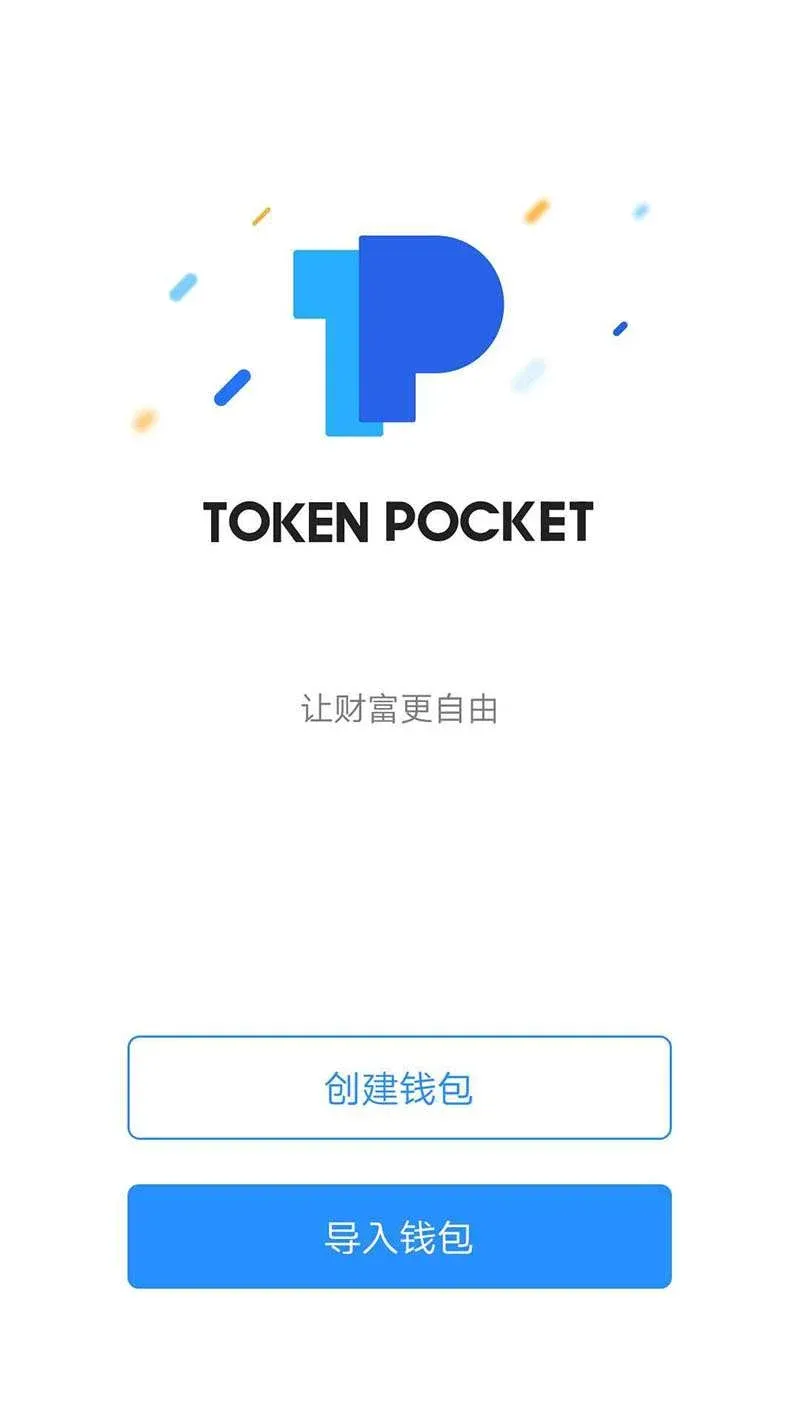
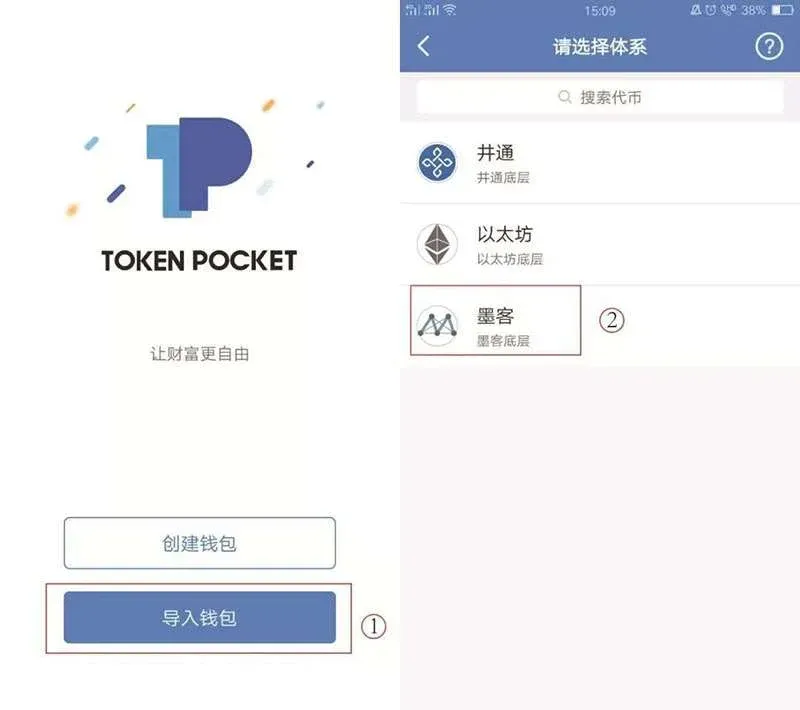
- On the first launch you will see two options: “Create Wallet” and “Import Wallet”. Choose the former to start the creation process.
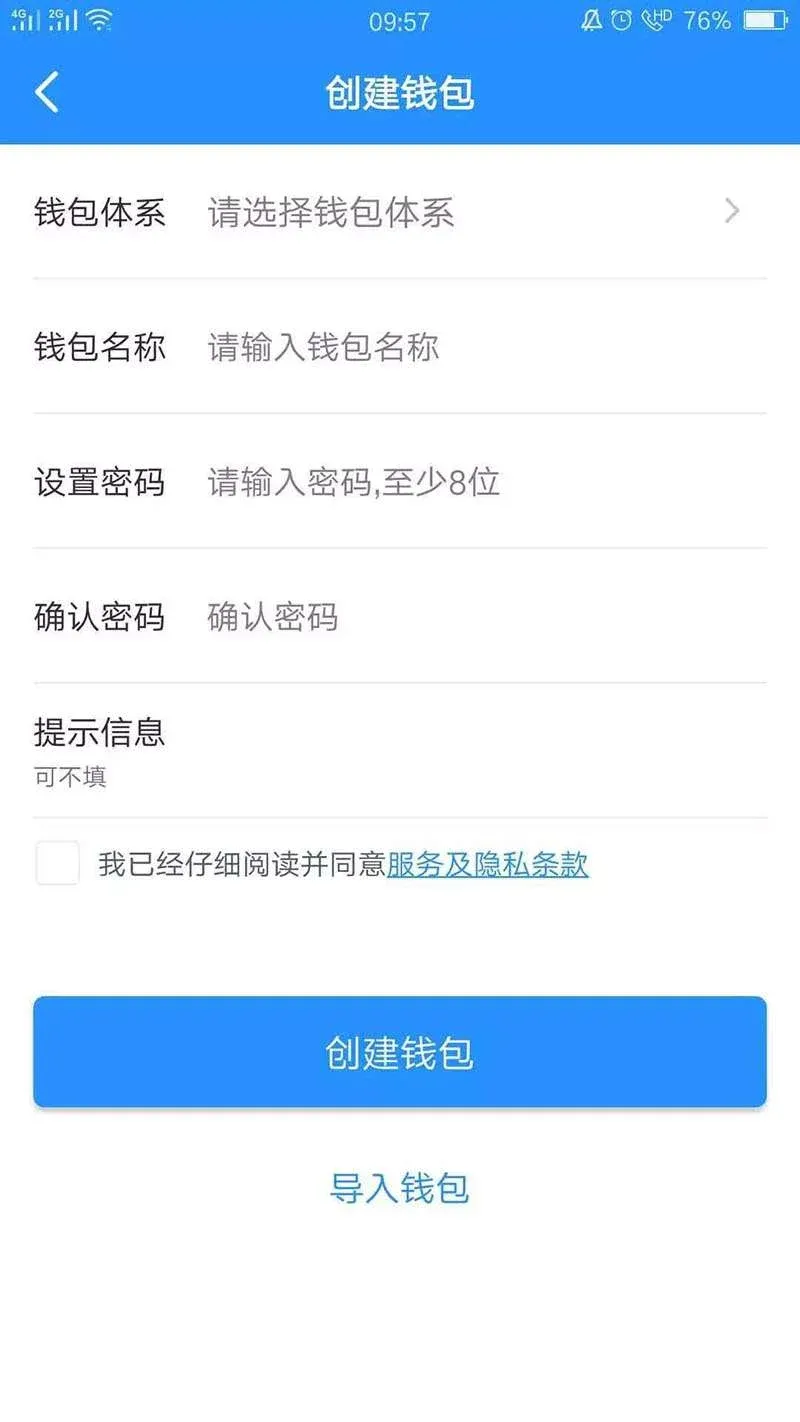
- On the creation page fill in the following fields in order:
- Wallet System: Select “MoKe – MoKe Underlying”.
- Wallet Name: Give it a name of your choice, similar to a WeChat nickname.
- Set Password: This password unlocks the wallet; a combination of letters and numbers is recommended.
- Confirm Password: Re‑enter the password to ensure it matches.
- Check the box “I have carefully read and agree to the Terms of Service and Privacy Policy”.
After completing the fields, tap Create Wallet; the system will generate a new wallet for you.
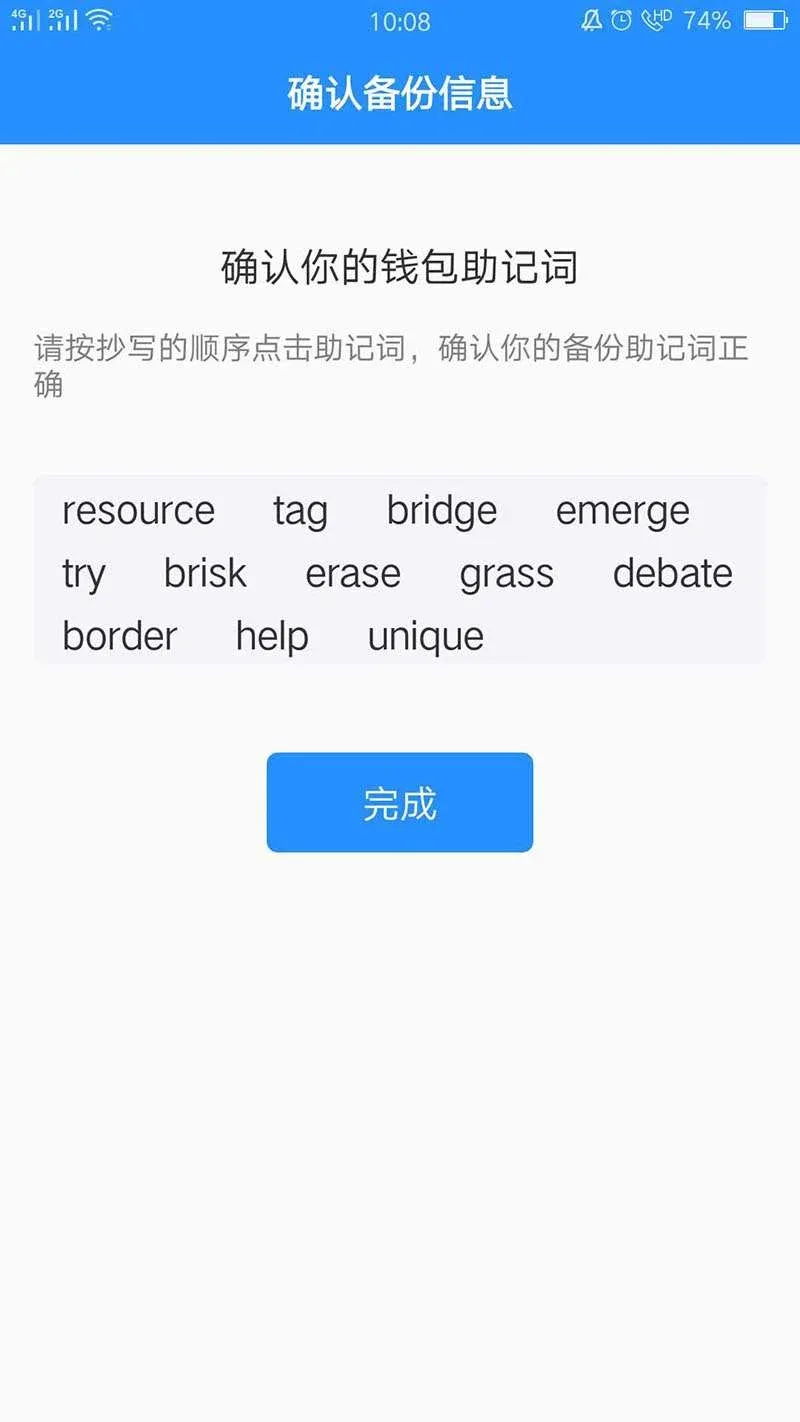
3. Back Up the Wallet
- Once the wallet is created, the app automatically redirects to the backup page; tap Back Up Wallet.

- Record the mnemonic phrase provided by the system. Write it down on paper and store it securely; do not keep it on any online service or cloud storage.
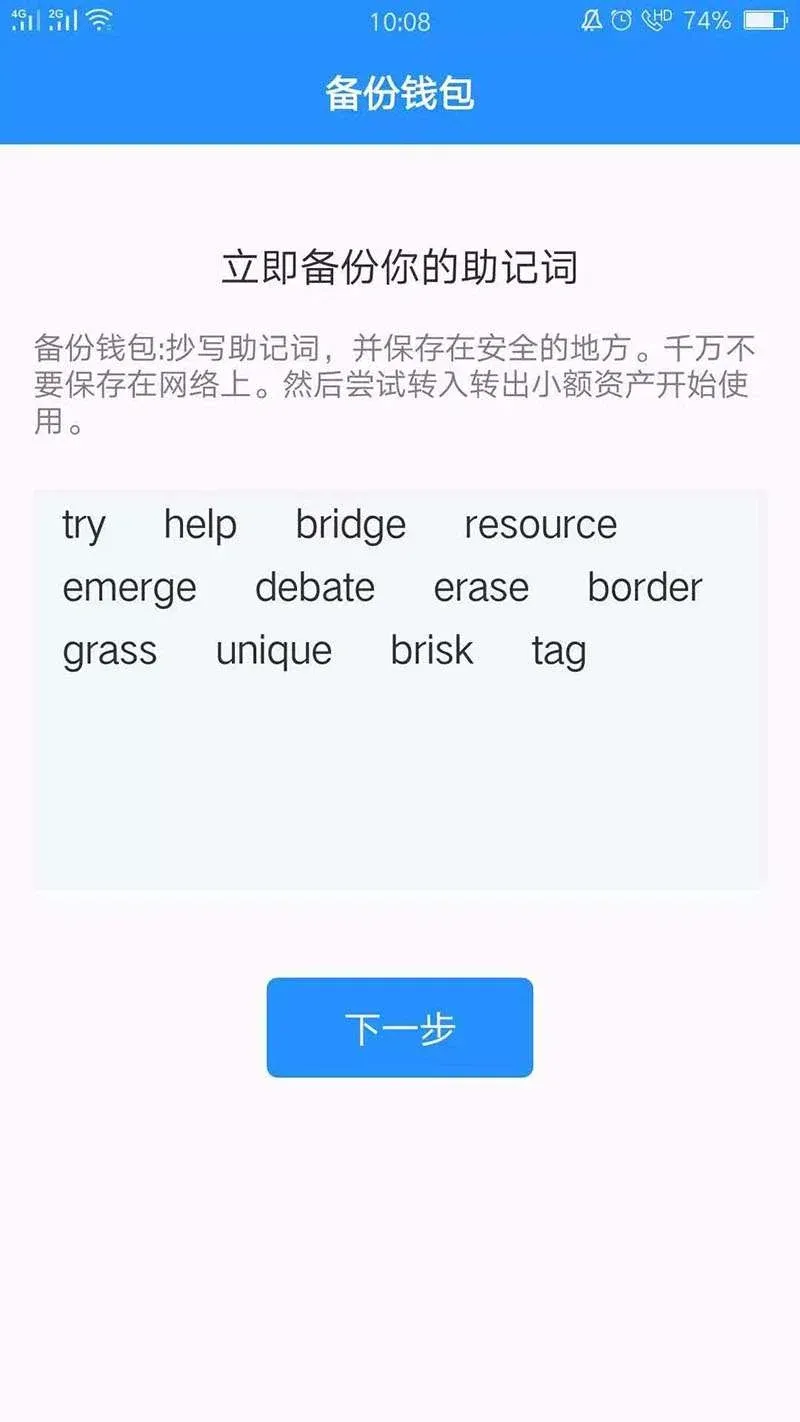
- Re‑arrange the shuffled words back into their original order and submit to confirm the backup is correct.
4. Wallet Address, Changing Password, Private Key & Keystore
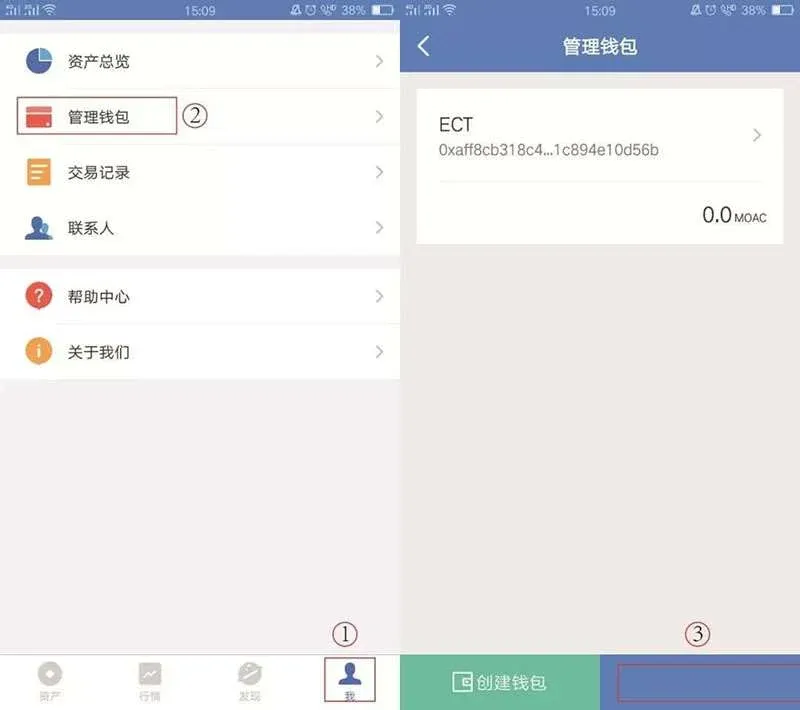
- After backing up, go to the bottom navigation bar, tap Me, then Manage Wallets. Locate the wallet you just created (named ECT or whatever custom name you chose).
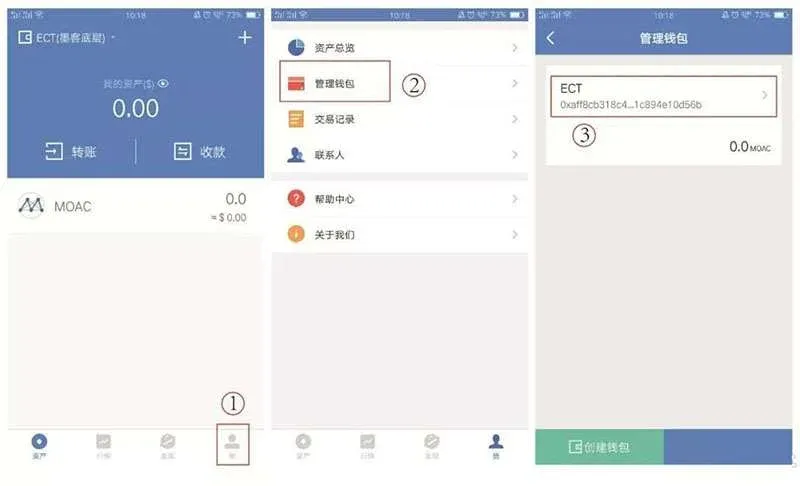
- On the wallet detail screen you will see four key pieces of information:
- Wallet Address: The unique identifier used for receiving or sending funds.
- Change Password: Allows you to modify the login password set during creation.
- Private Key: Can be exported using the wallet password.
- Keystore: Also exportable with the password.
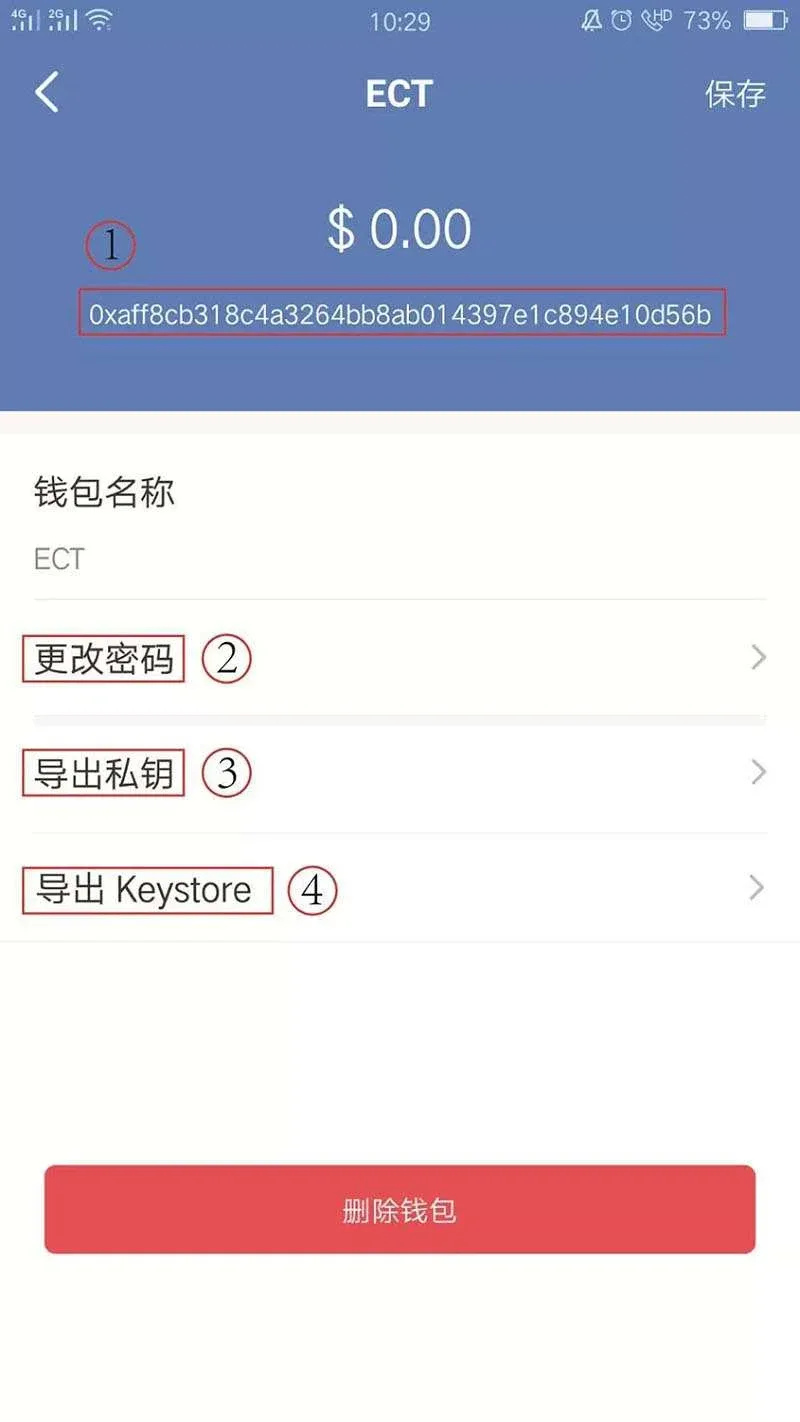
- For easier understanding, these items correspond to traditional banking concepts as follows:
- Wallet address ↔ Bank account number
- Password ↔ Bank card PIN
- Private key ↔ Combination of account number + PIN (unencrypted)
- Mnemonic phrase ↔ Combination of account number + PIN (more memorable)
- Keystore + password ↔ Encrypted version of account number + PIN
Important: Store all of the above information offline. If any of it is exposed, your assets could be stolen.
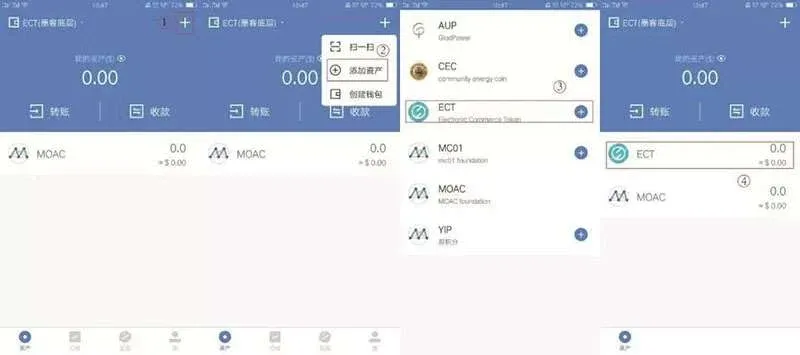
5. Viewing Digital Assets in the Wallet (Using ECT as an Example)
- On the Assets page, tap the “+” icon in the upper‑right corner to open the add‑asset interface.
- Select ECT, then tap the “+” next to it to confirm.
- Return to the asset list; you will now see the holdings details for ECT.
6. How to Import a Wallet
If you accidentally delete the app, uninstall it, or lose your phone, you can recover your wallet using the following steps:
- Fresh Download & Import: Open a newly installed TokenPocket and tap Import Wallet.
- Import Within an Already‑Installed App: In the running app, go to Me → Manage Wallets → Import Wallet.
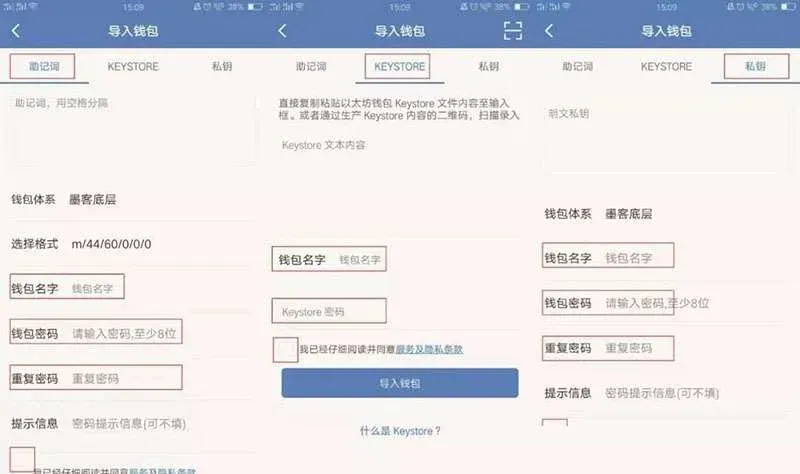
- The import screen offers three methods: Mnemonic Phrase, Keystore, and Private Key. The procedures are:
- Mnemonic Phrase Import
- Manually type the phrase, separating each word with a space.
- Set a new wallet name and password (they can differ from the original). Confirm the password again.
- Agree to the terms and complete the process. This method lets you set a new password.
- Keystore Import
- Paste the original wallet’s Keystore JSON into the provided field.
- Enter the password that was originally used to encrypt the Keystore, then set a new wallet name and a new password.
- Accept the terms and submit. This method requires knowledge of the original Keystore password.
- Private Key Import
- Manually type the private key.
- As with the mnemonic method, assign a new name and password, then confirm. This also allows you to reset the password.
After a successful import, again back up the new wallet’s password, private key, mnemonic phrase, and Keystore to avoid future loss.
1. Download & Install
- Official Channels: Visit the TokenPocket official website (copy the URL into your browser) and download the latest version for your operating system.

- Important Notes: The iOS version can only be obtained via direct browser download and must be re‑installed every seven days; the Android version is more suitable for long‑term use, so we recommend downloading the Android build first.
---
This completes the full TokenPocket wallet usage guide with screenshots. For additional information on TokenPocket downloads or related tutorials, follow future articles on the Bitaigen platform.
Note: Crypto transactions may be subject to taxes in your jurisdiction. Please consult a tax professional to understand your obligations, especially when converting to fiat currencies such as USD via SEPA or SWIFT transfers. In the United States, users should use Binance.US rather than the global Binance platform.
💡 Register on Binance with referral code B2345 for the maximum trading fee discount. See Binance complete guide.


