
<article>
TokenPocket wallet is a popular multi-chain self-custody wallet that supports Ethereum, BNB Chain, Polygon and other EVM-compatible networks, as well as Bitcoin, TRON, Solana, Dogecoin and other non-EVM chains. Users' private keys and seed phrases are stored only locally on their device, giving them full control over their assets. TokenPocket offers mobile, browser extension, and KeyPal hardware wallet forms, enabling one-click connection to thousands of chains and thousands of DApps, and includes built-in decentralized trading and market data services. As of now, over 25 million users worldwide use TokenPocket, with monthly active users exceeding 3.5 million across more than 200 countries and regions.
In this article, we will walk you through TokenPocket's full-chain features and operational details, from mobile to extension and hardware forms, step by step demonstrating how to create and import wallets, as well as configure multi-signature and hardware linkage. Mastering these practical tips will enable you to securely manage multi-chain assets; please proceed to the following sections and follow the guide to get started fully.

TokenPocket Extension Wallet Installation Guide
To use TokenPocket in a PC browser, simply add the extension. You can choose either of the two methods below to complete the installation.
Method 1: Install Directly from Chrome Web Store
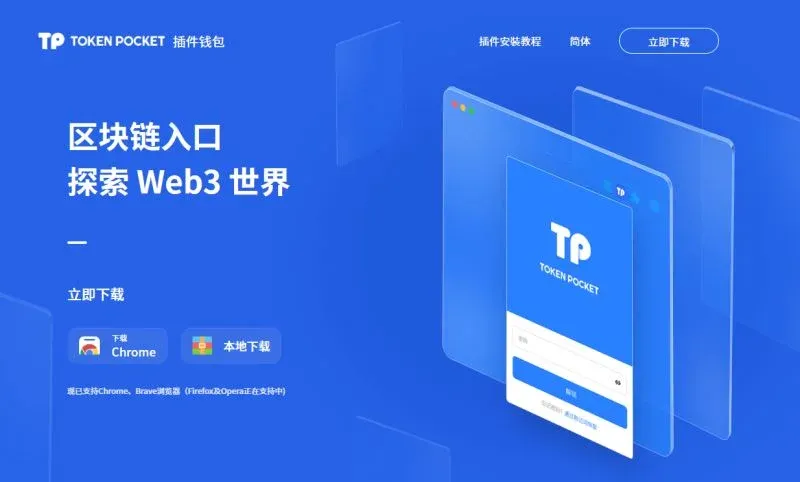
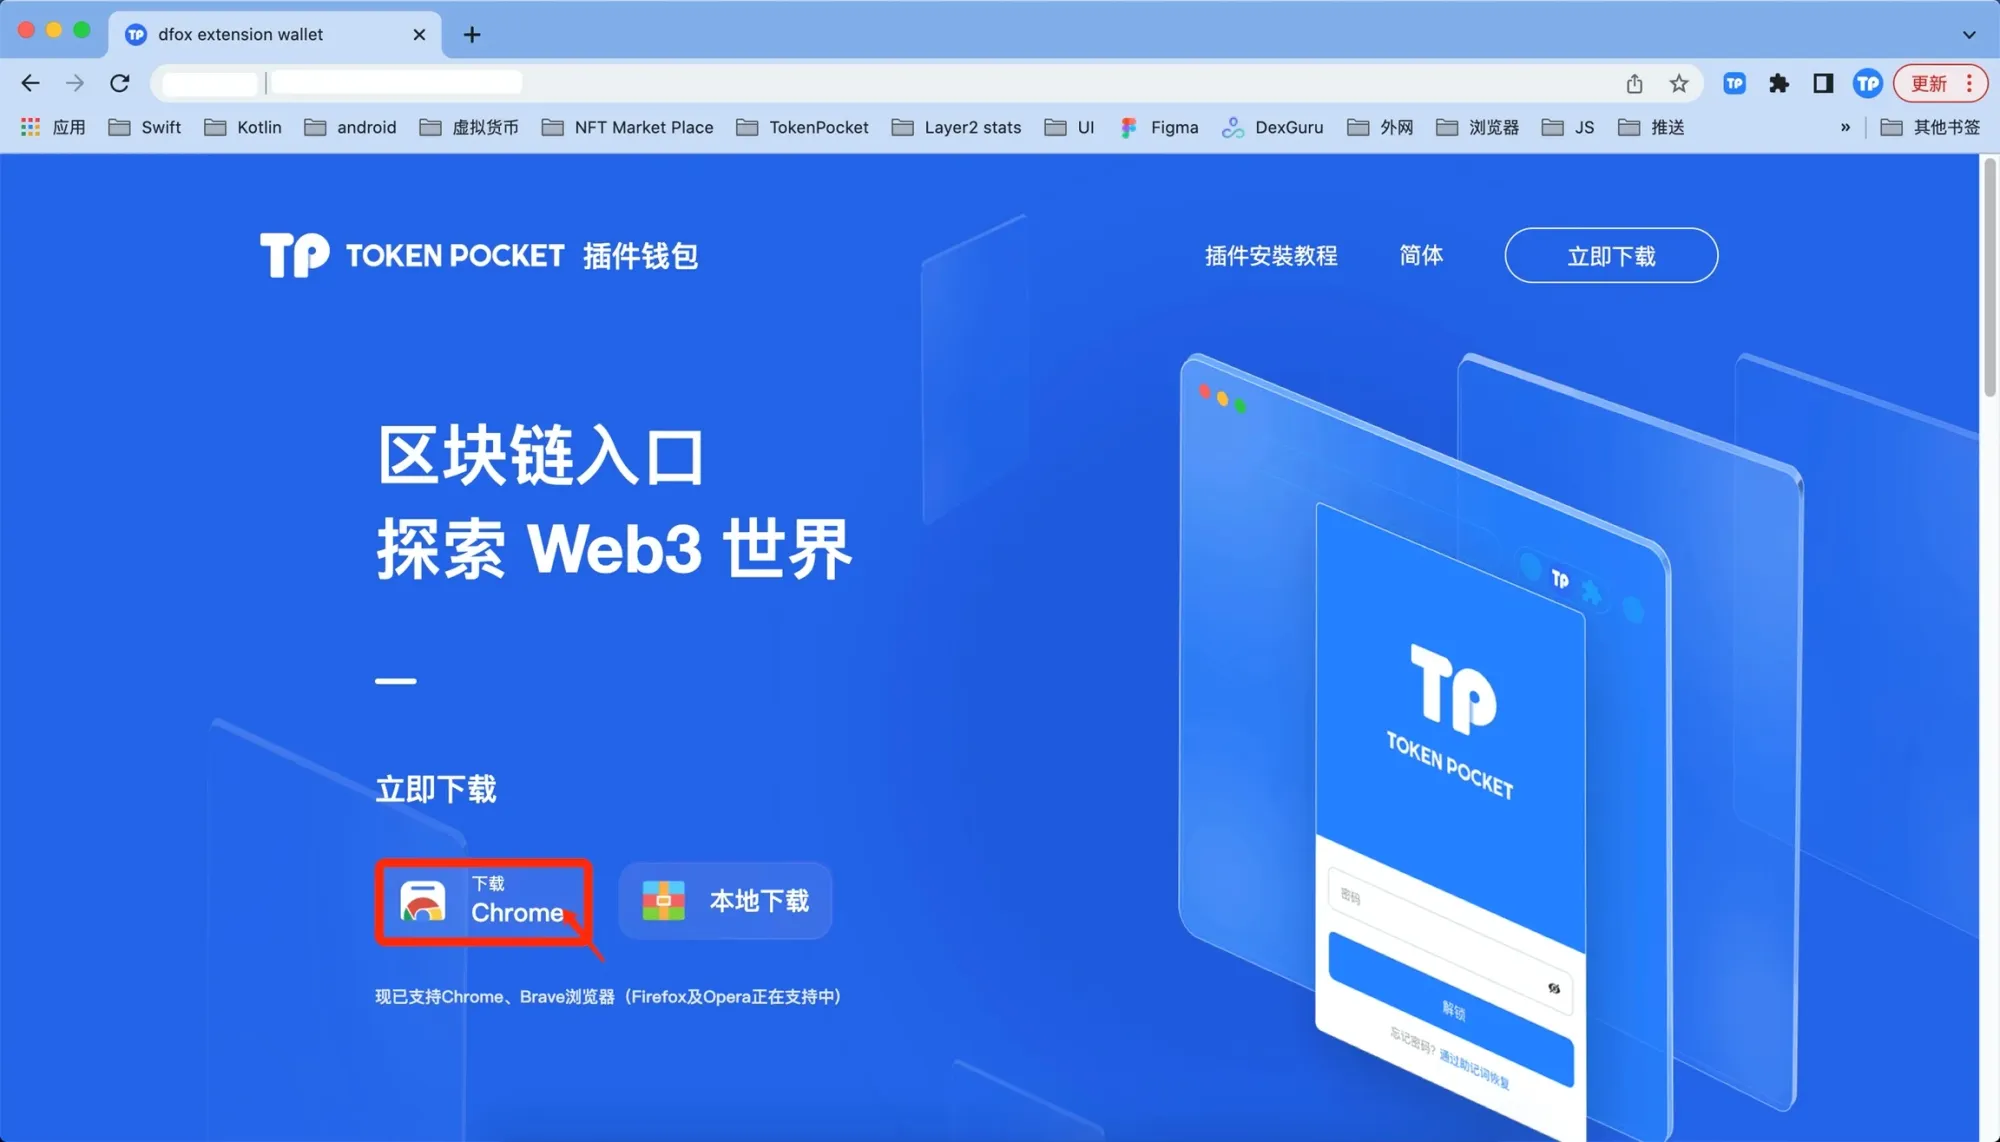
- Visit https://extension.tokenpocket.pro/#/, hover over “Extension Wallet”, and click “Download Chrome”.
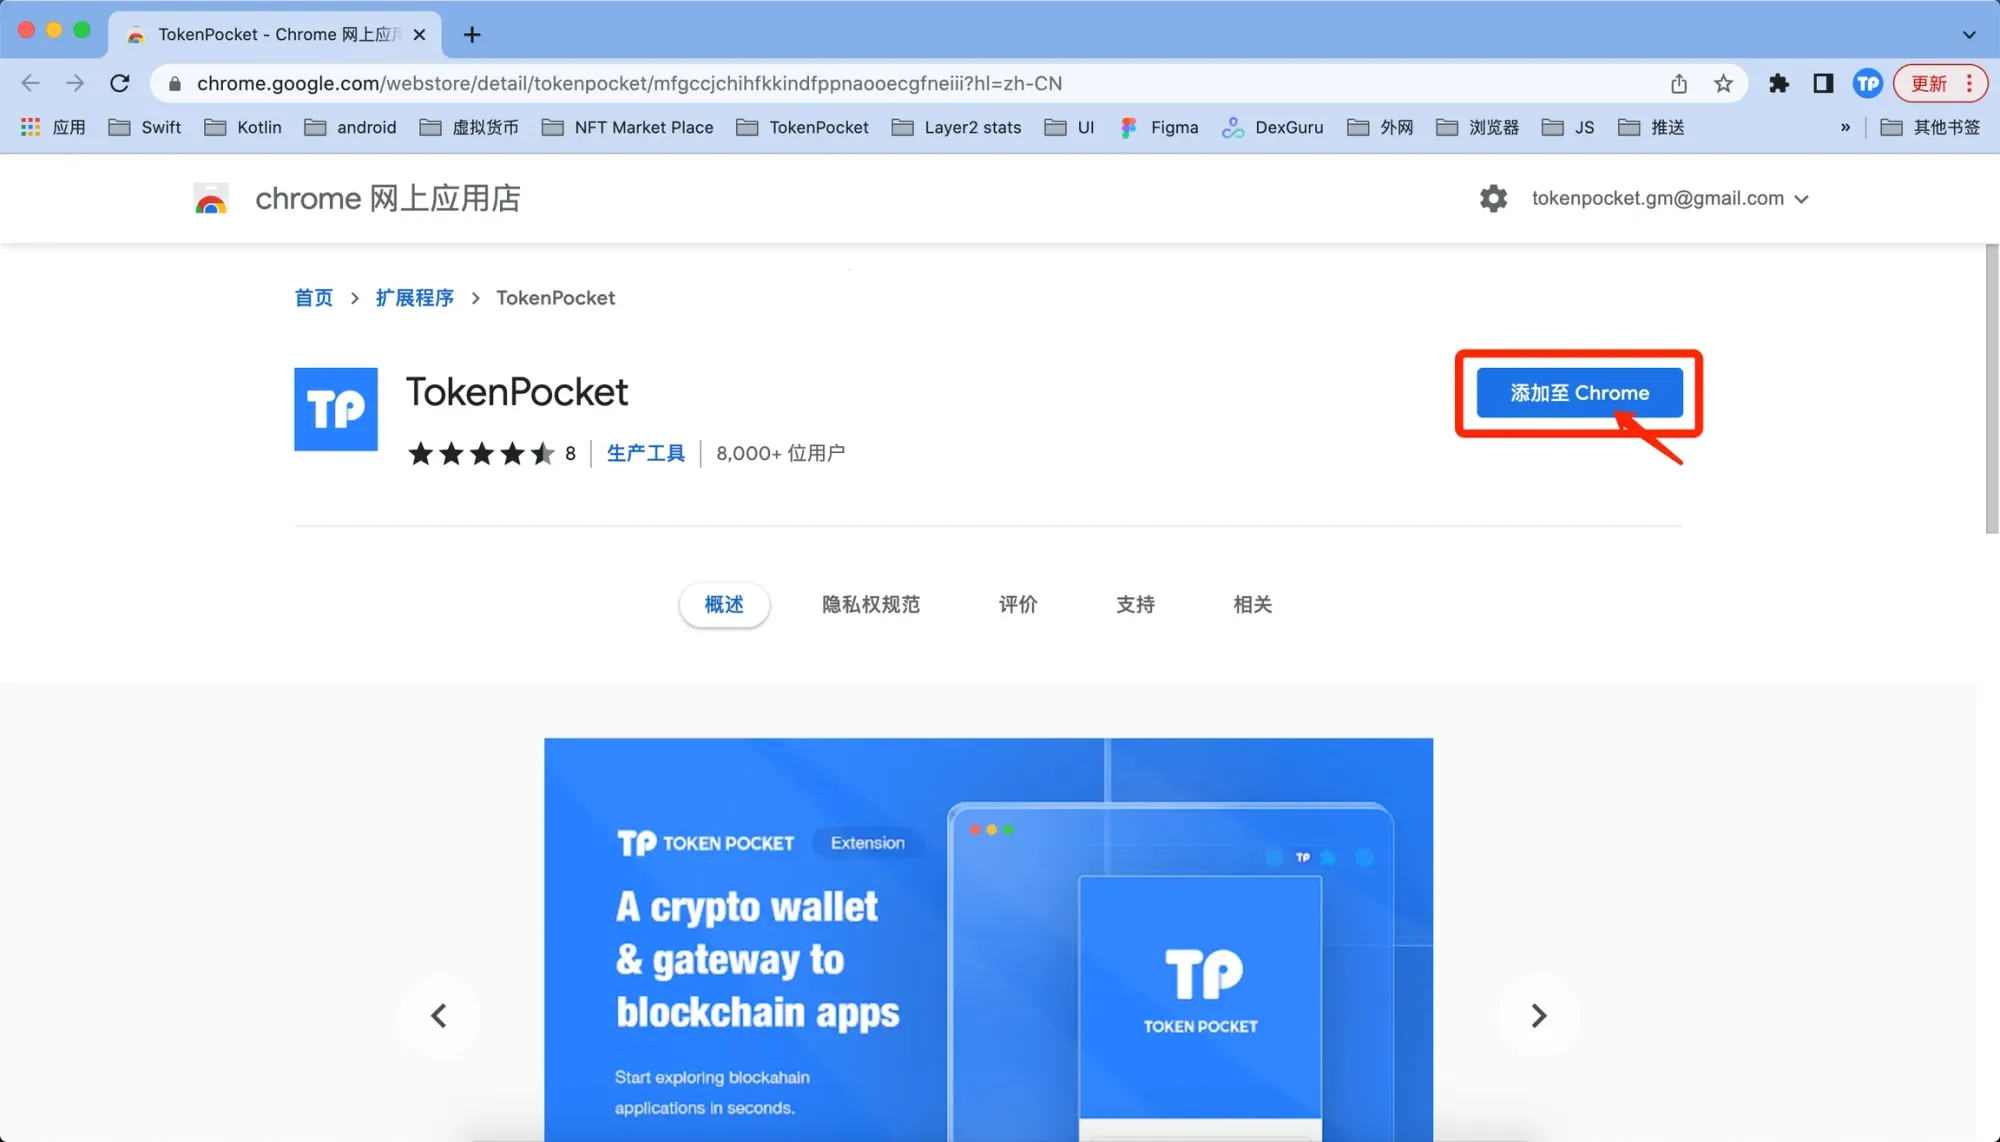
- After being redirected to the Chrome Web Store, click “Add to Chrome”.
- In the pop‑up confirmation dialog, select “Add extension”.

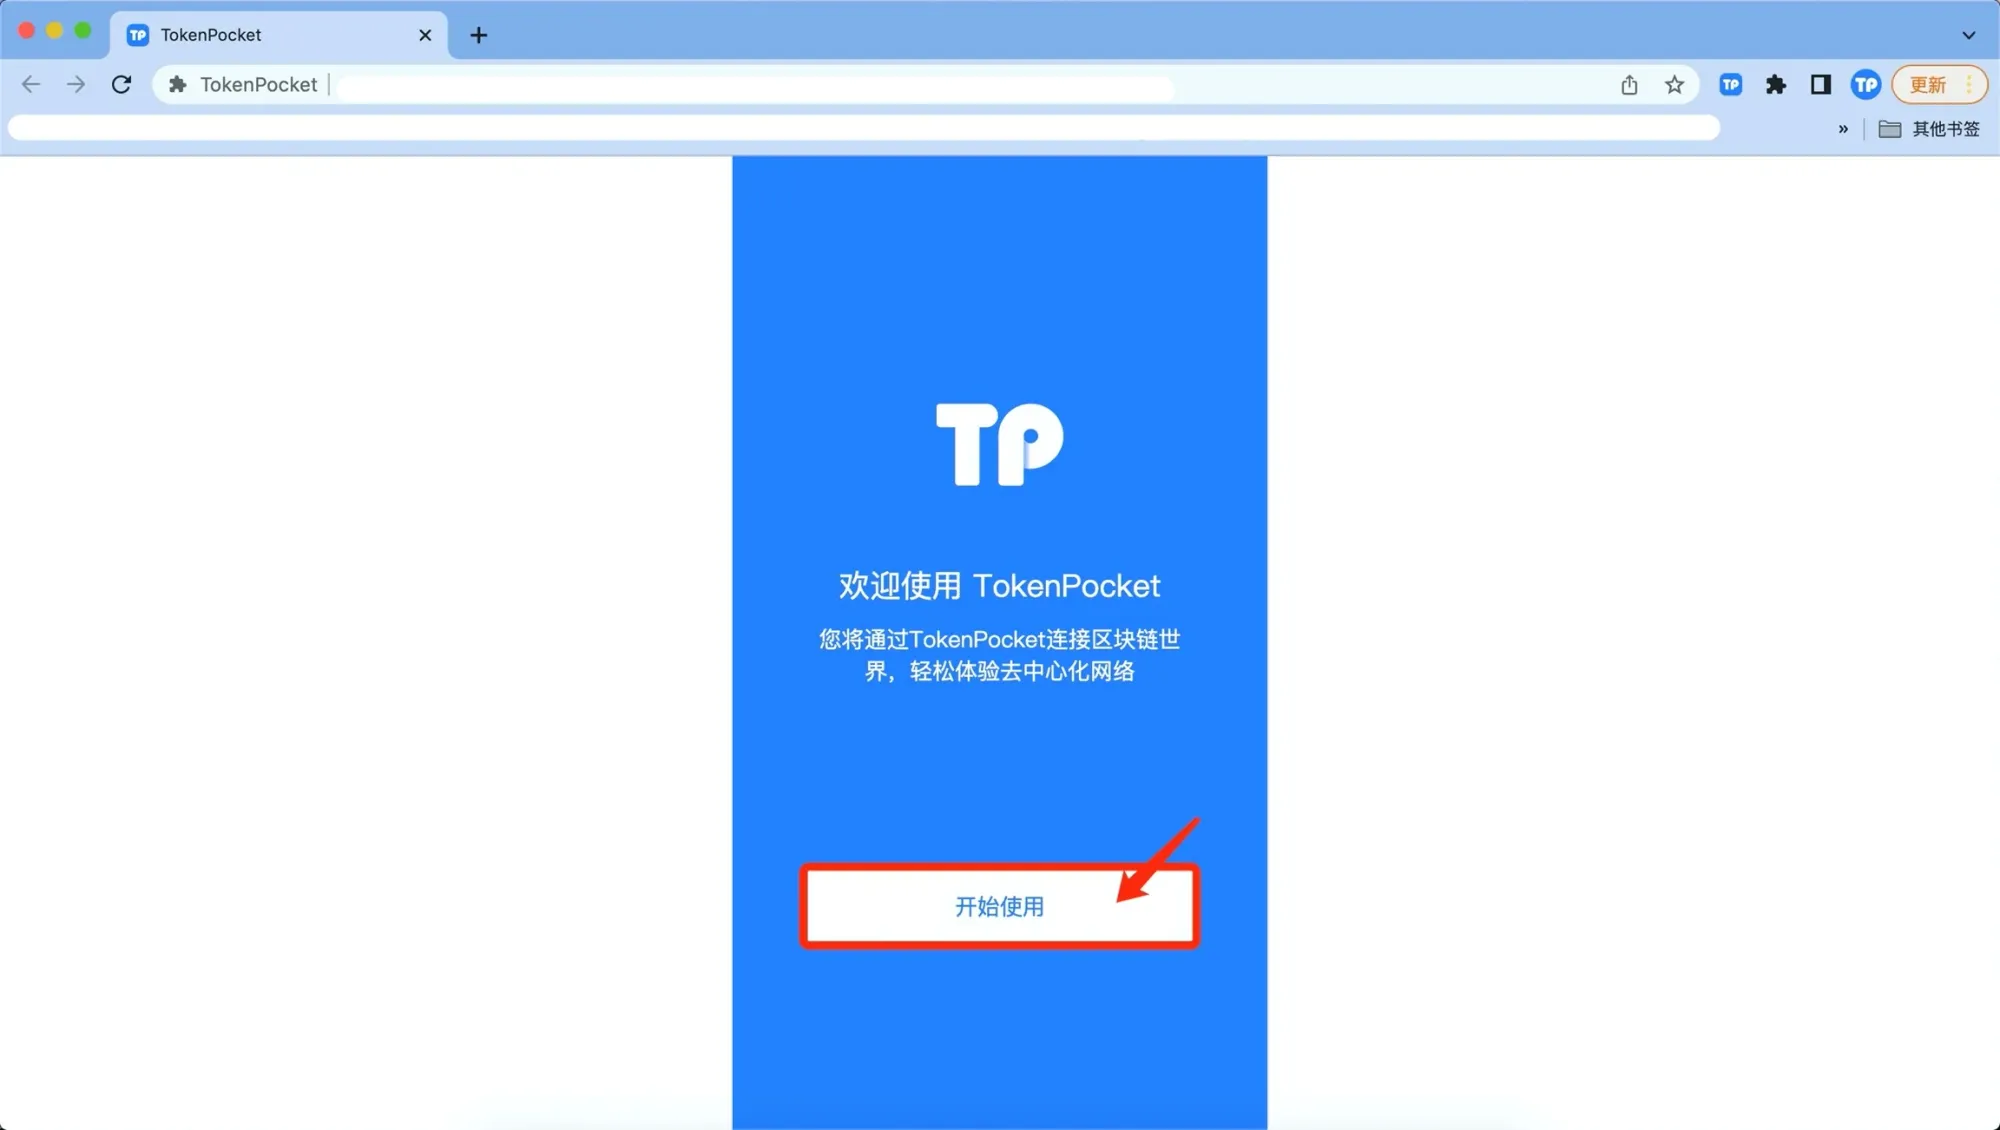
- Once installation succeeds, click “Get Started” to open the extension.

Method 2: Local Offline Installation
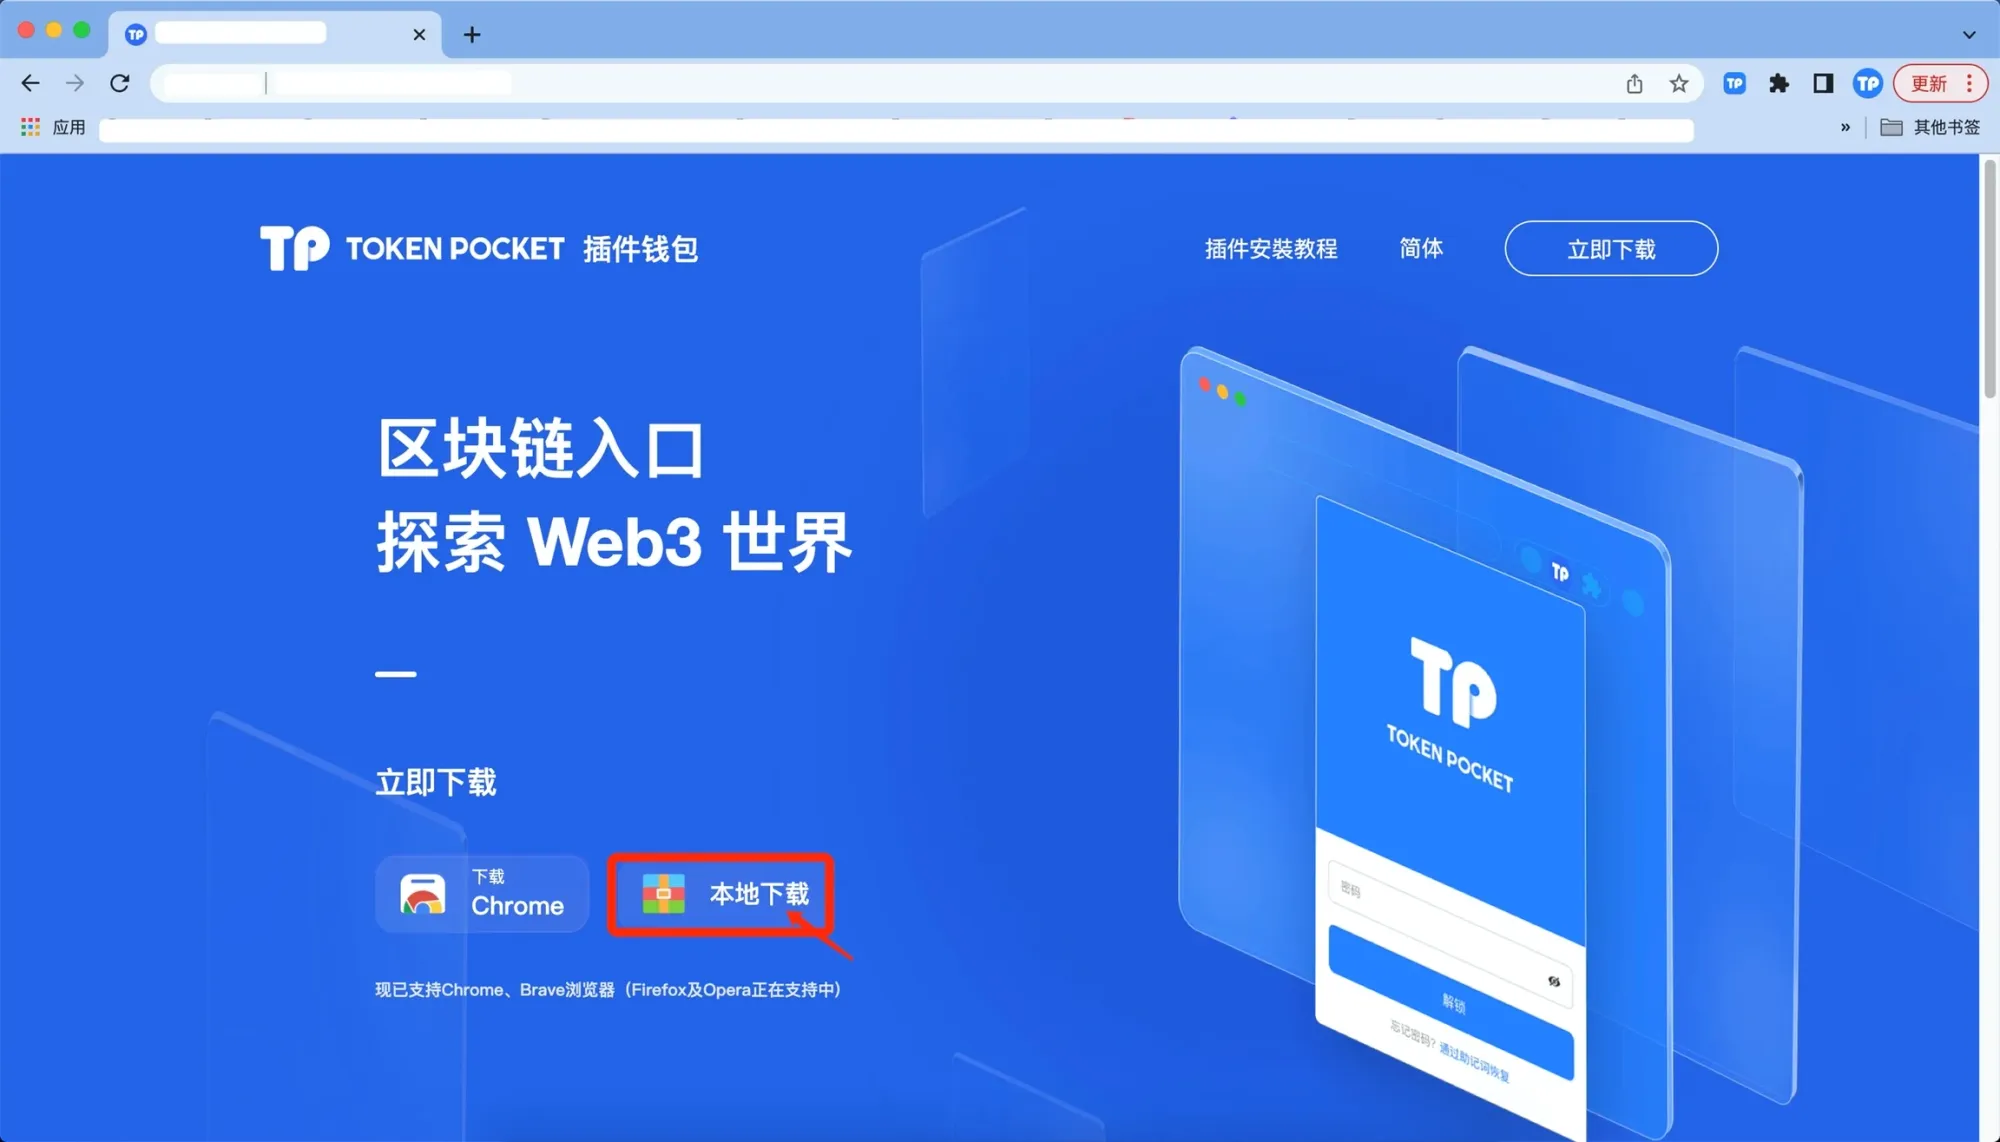
- Likewise, go to https://extension.tokenpocket.pro/#/, then in the “Extension Wallet” section click “Local Download”.
- Extract the downloaded folder.
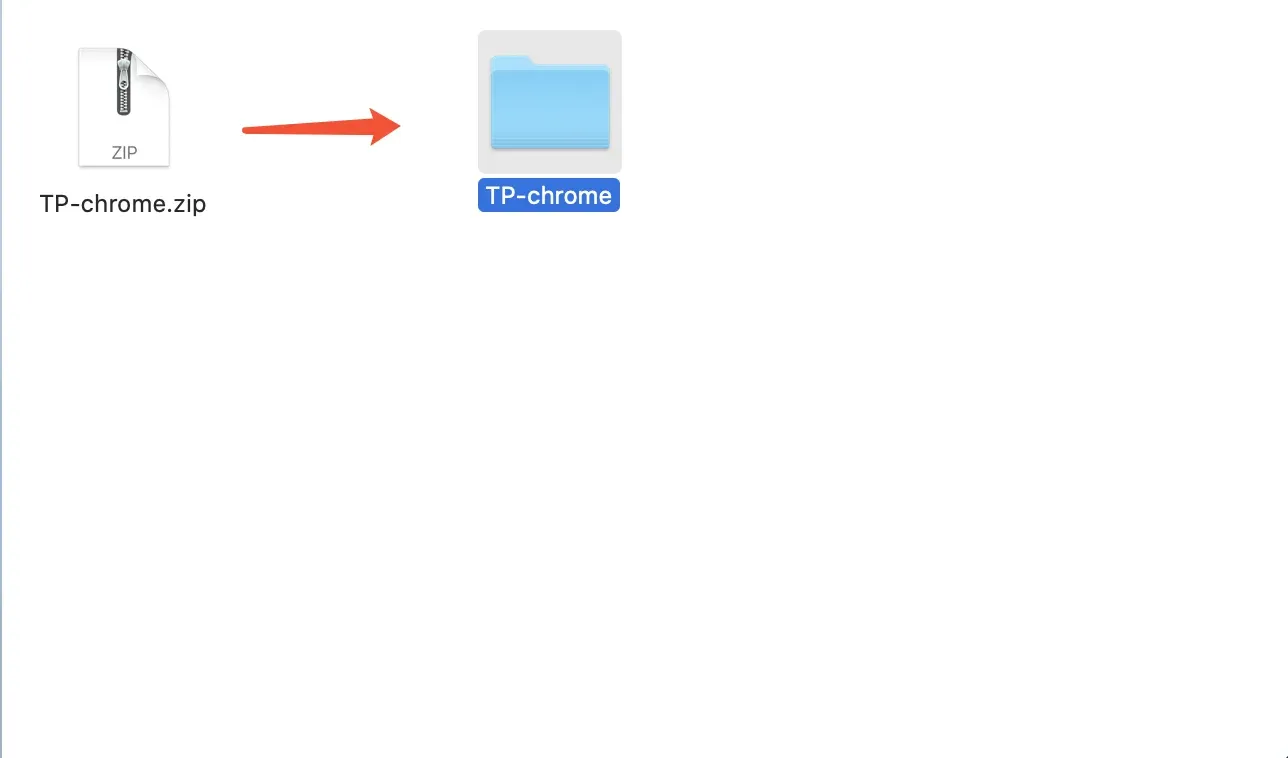
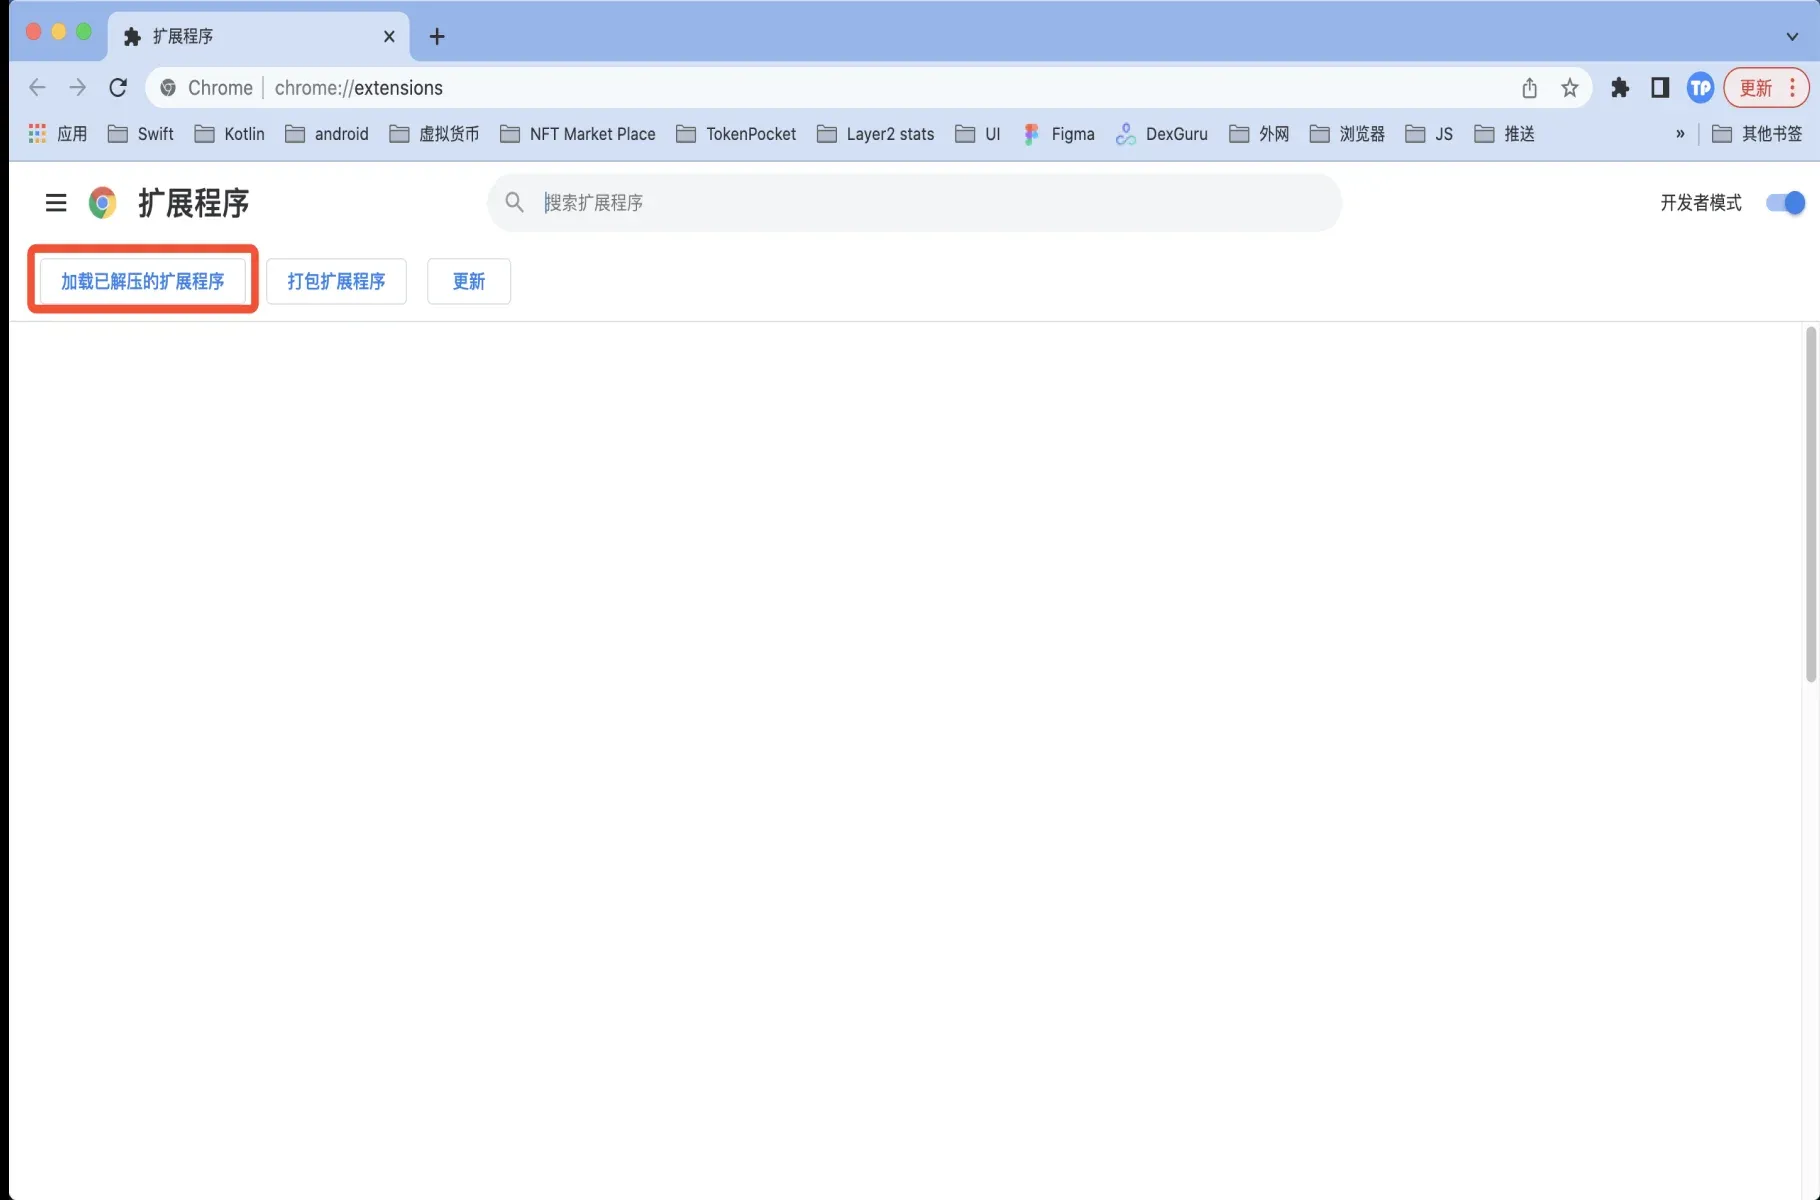
- Open Chrome, navigate to “Settings → Extensions”, turn on “Developer mode”, click “Load unpacked”, and select the folder you just extracted.
- After loading, click “Get Started” as before.
Disclaimer: This guide only provides instructions for using the TokenPocket extension wallet on PC. It does not constitute any investment advice. Investing involves risk; please evaluate on your own before making decisions.
Creating and Importing Wallets
The extension wallet supports two basic account types: seed‑phrase wallets and watch‑only wallets. The steps for creation and import are explained below.
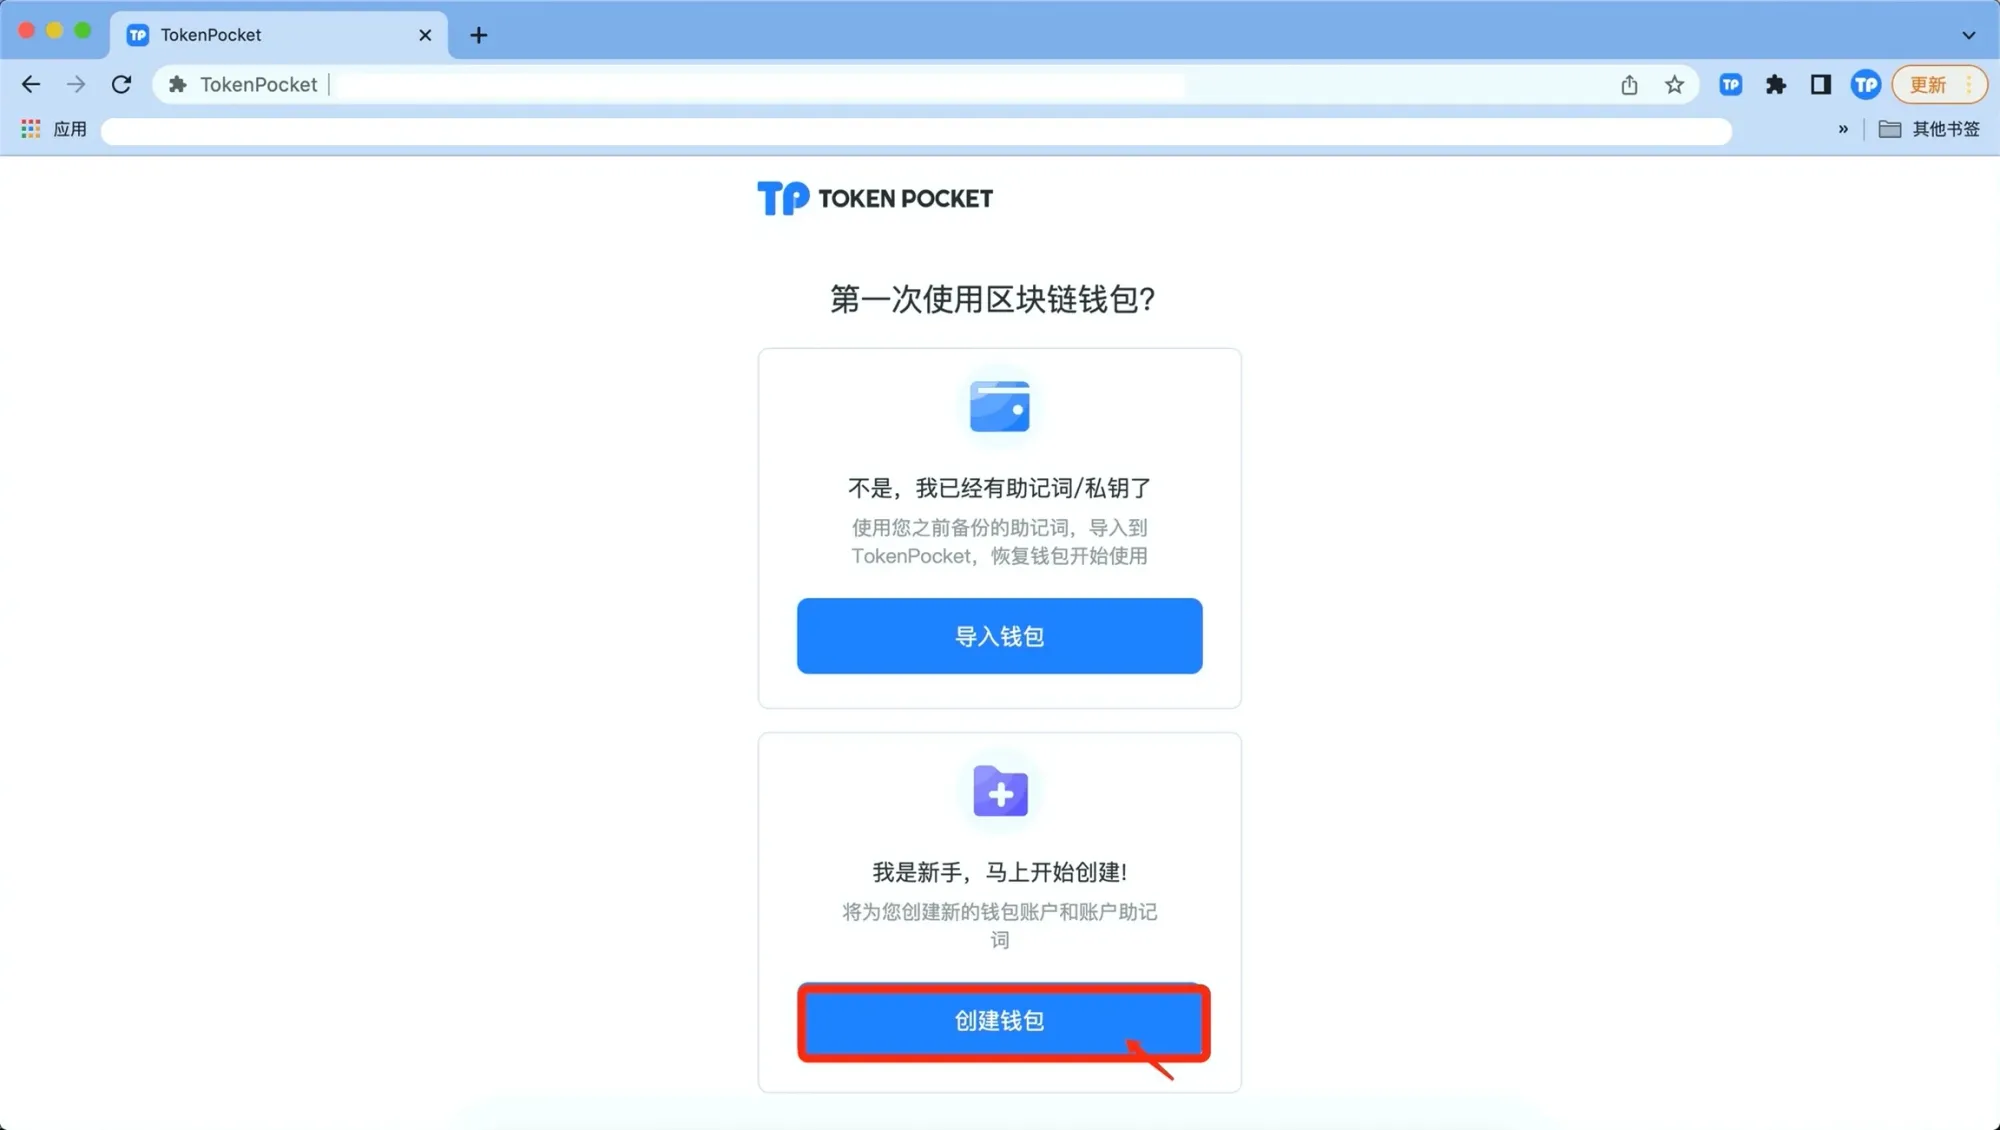
Creating a New Wallet
- On the extension homepage click “Create Wallet”.
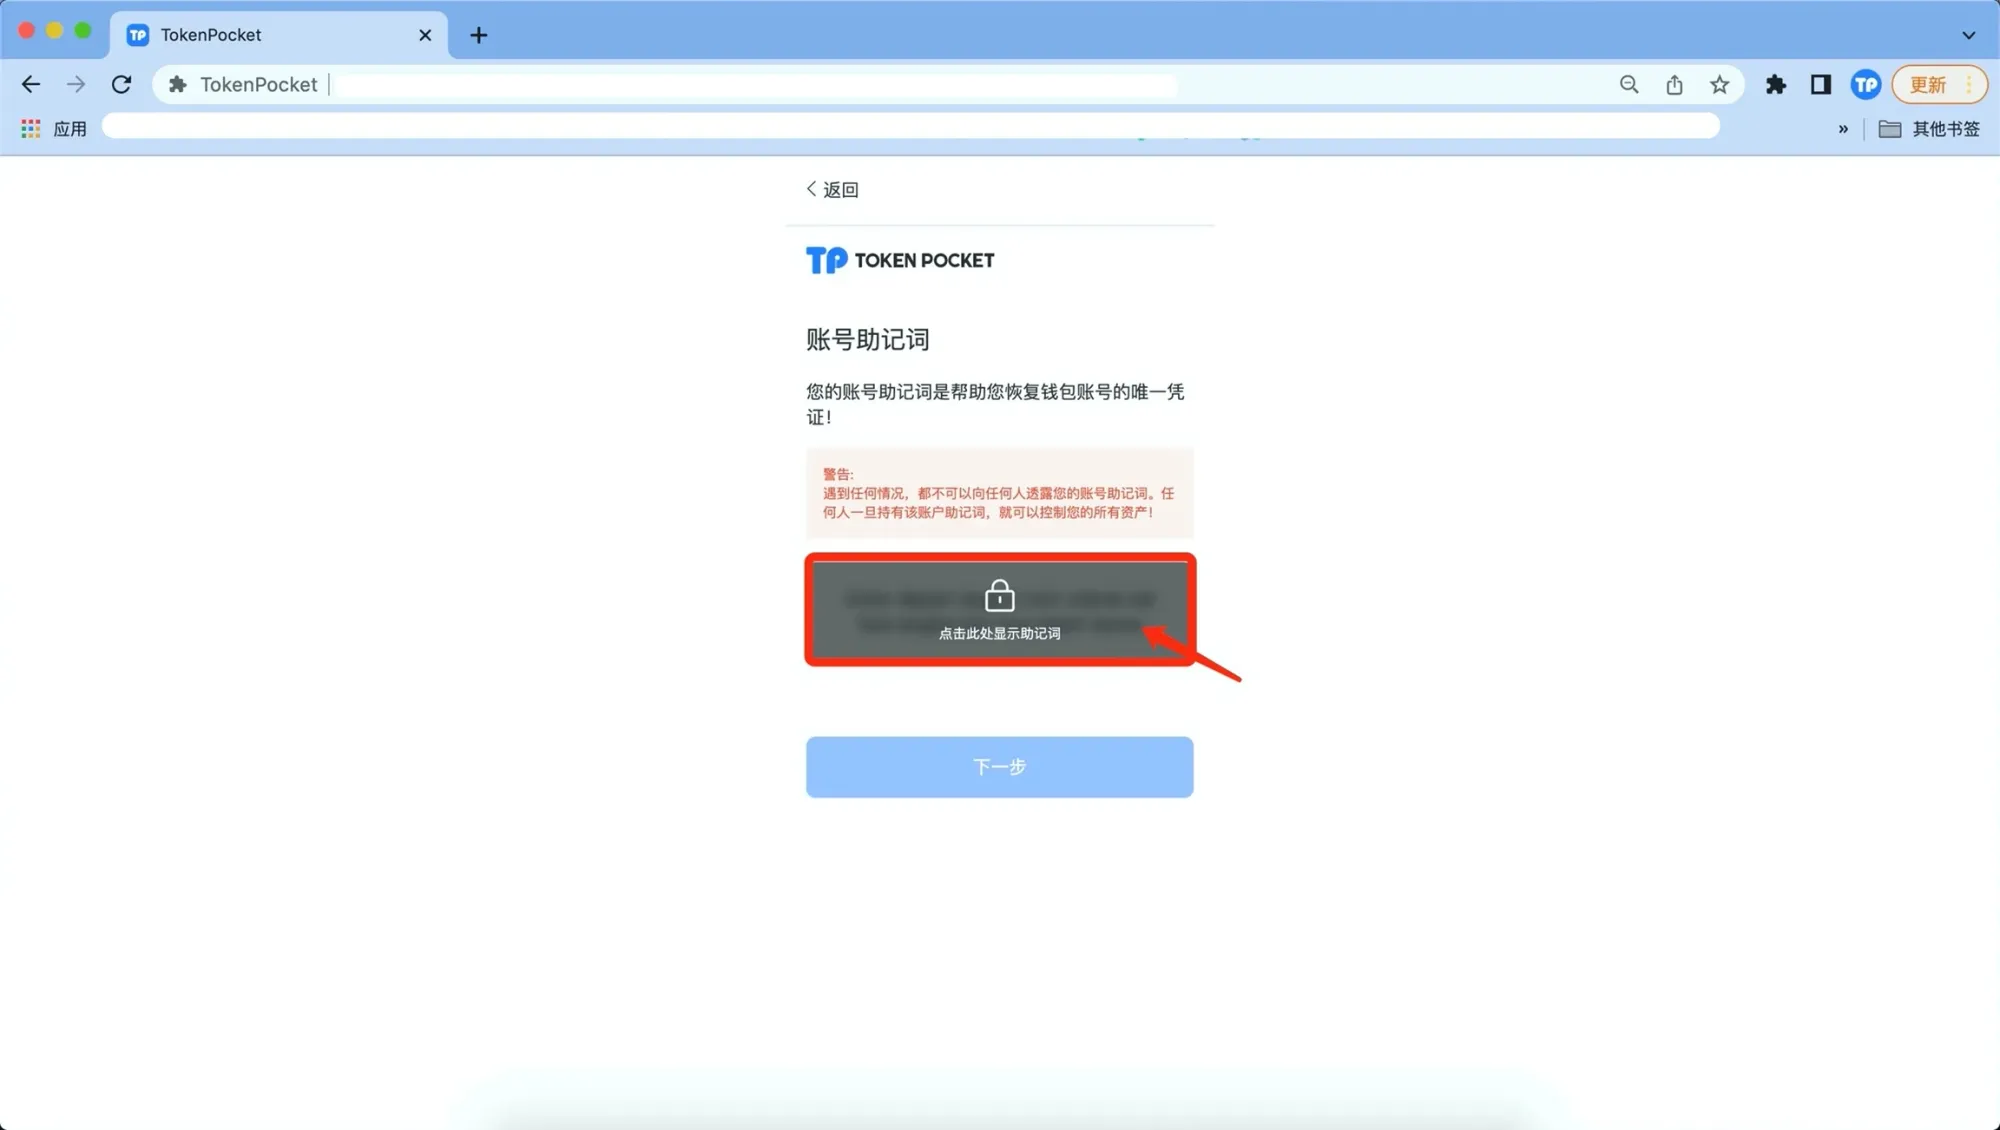
- Read the security notice, then click “Click to show seed phrase”, write it down and back it up securely, then continue.
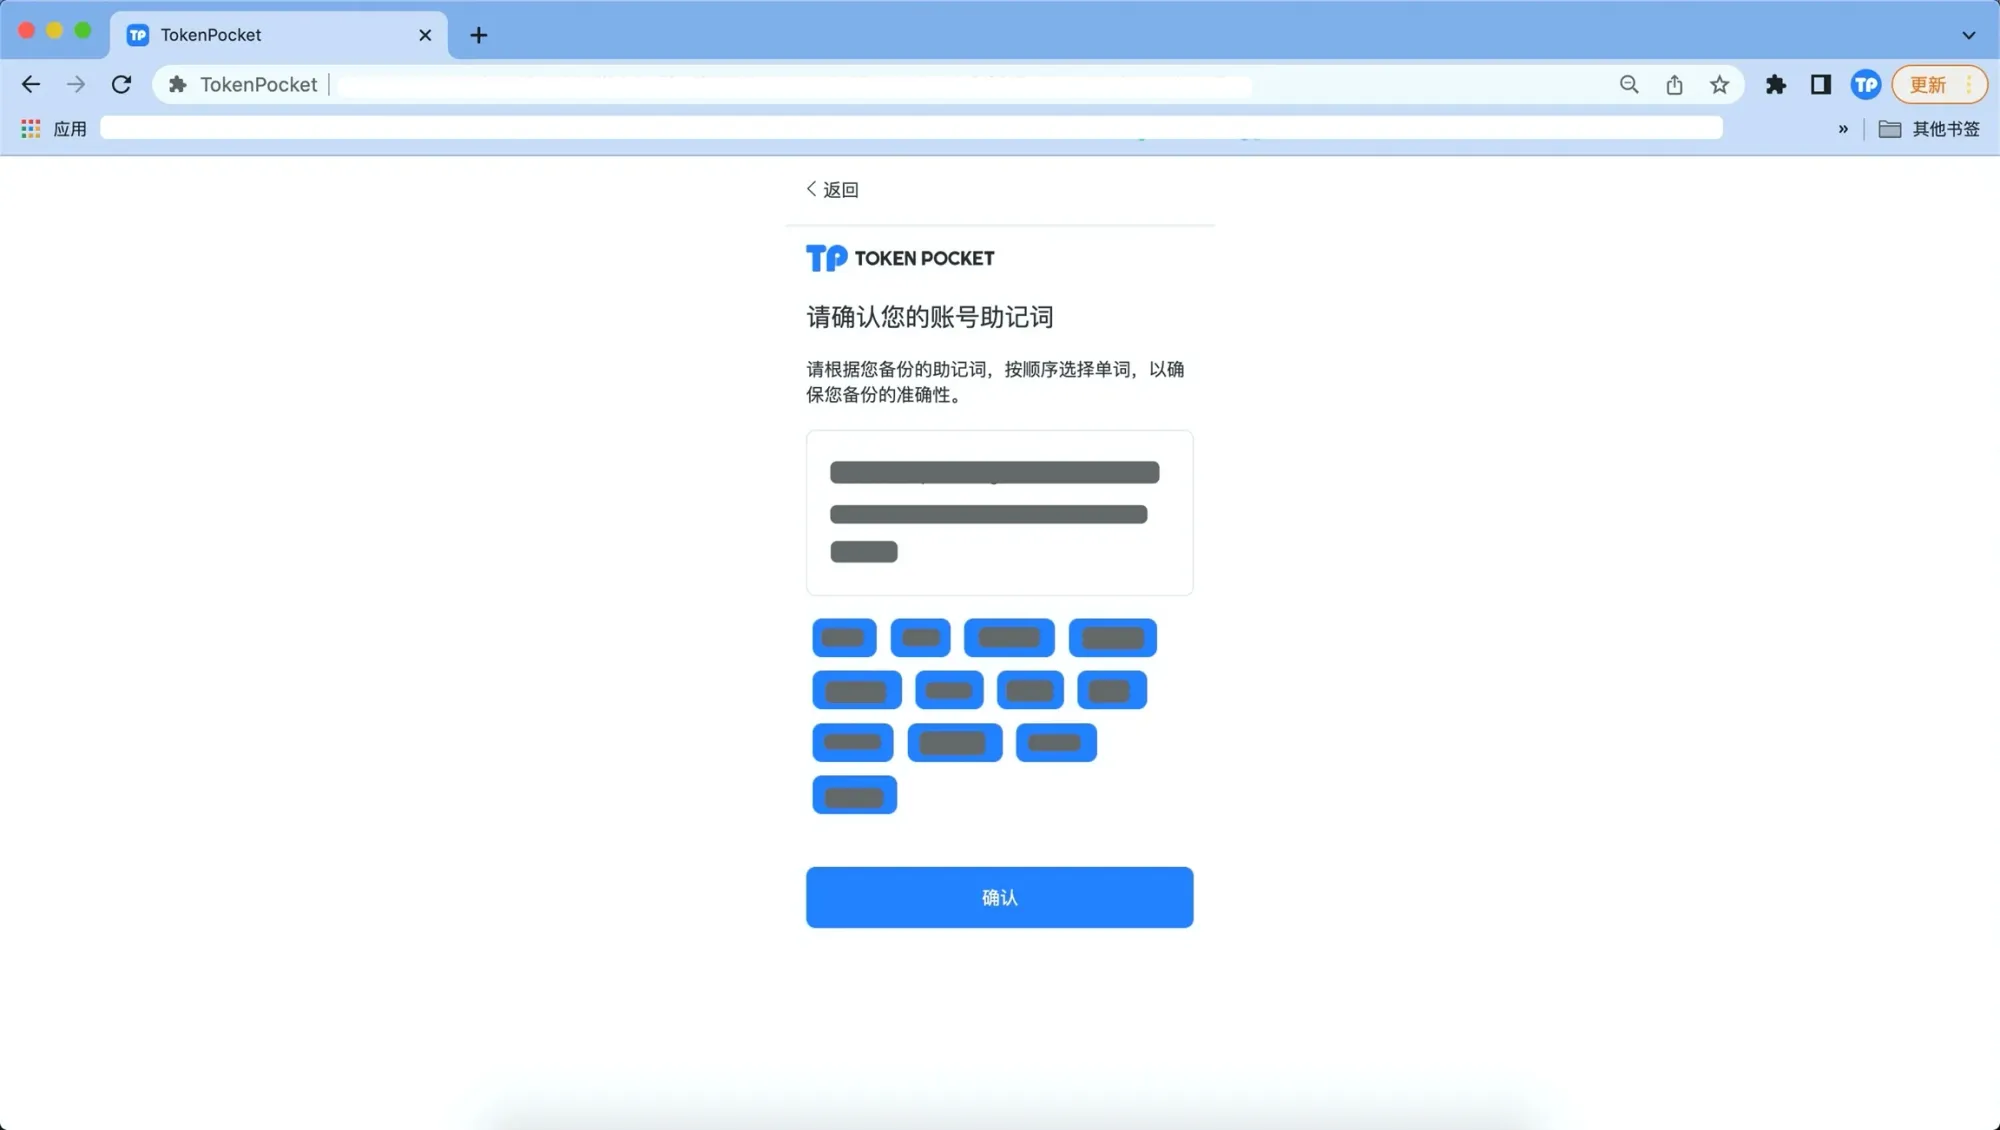
- In the pop‑up window re‑enter the seed phrase you backed up to confirm, then click “Confirm” to finish creation.
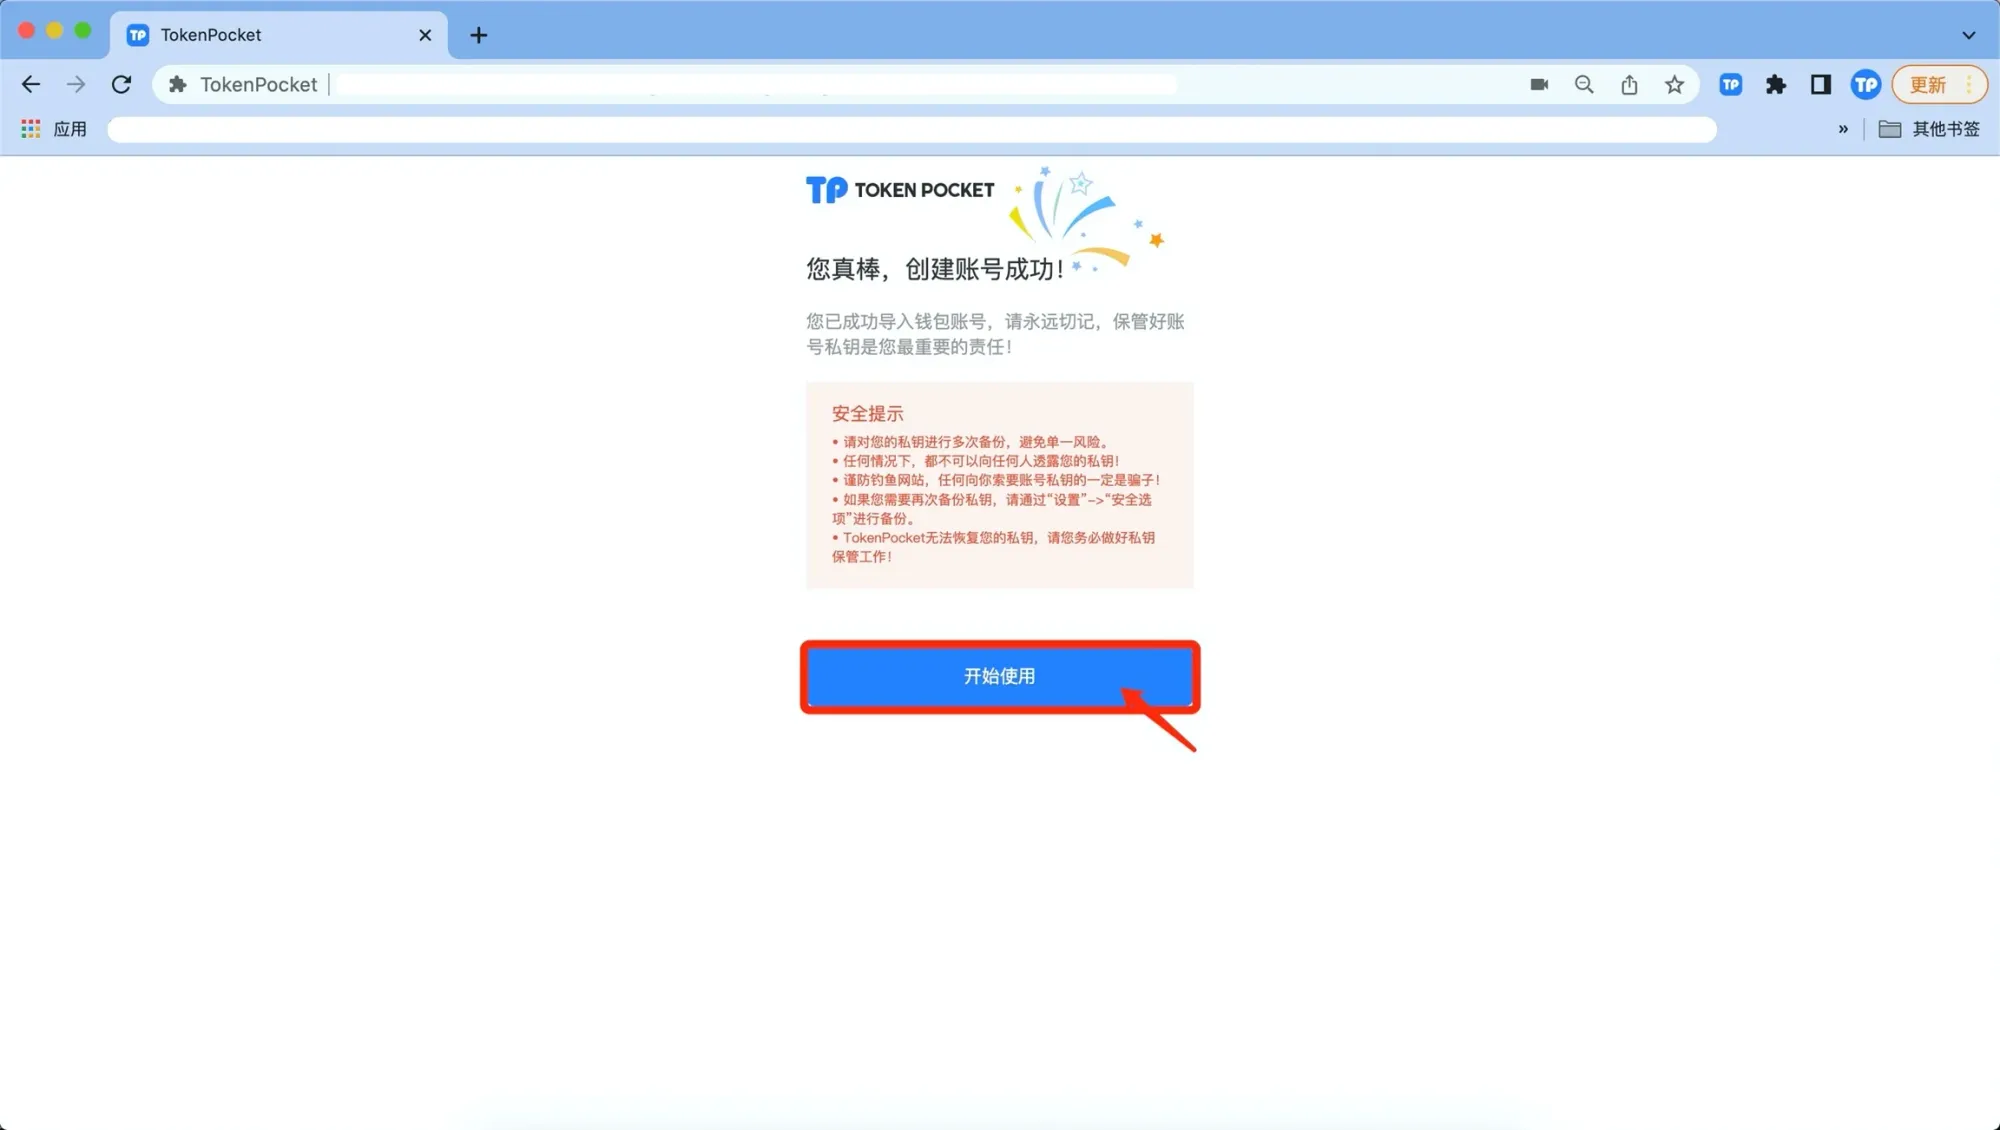
- A success prompt appears; click “Open Wallet” to start using the new wallet.
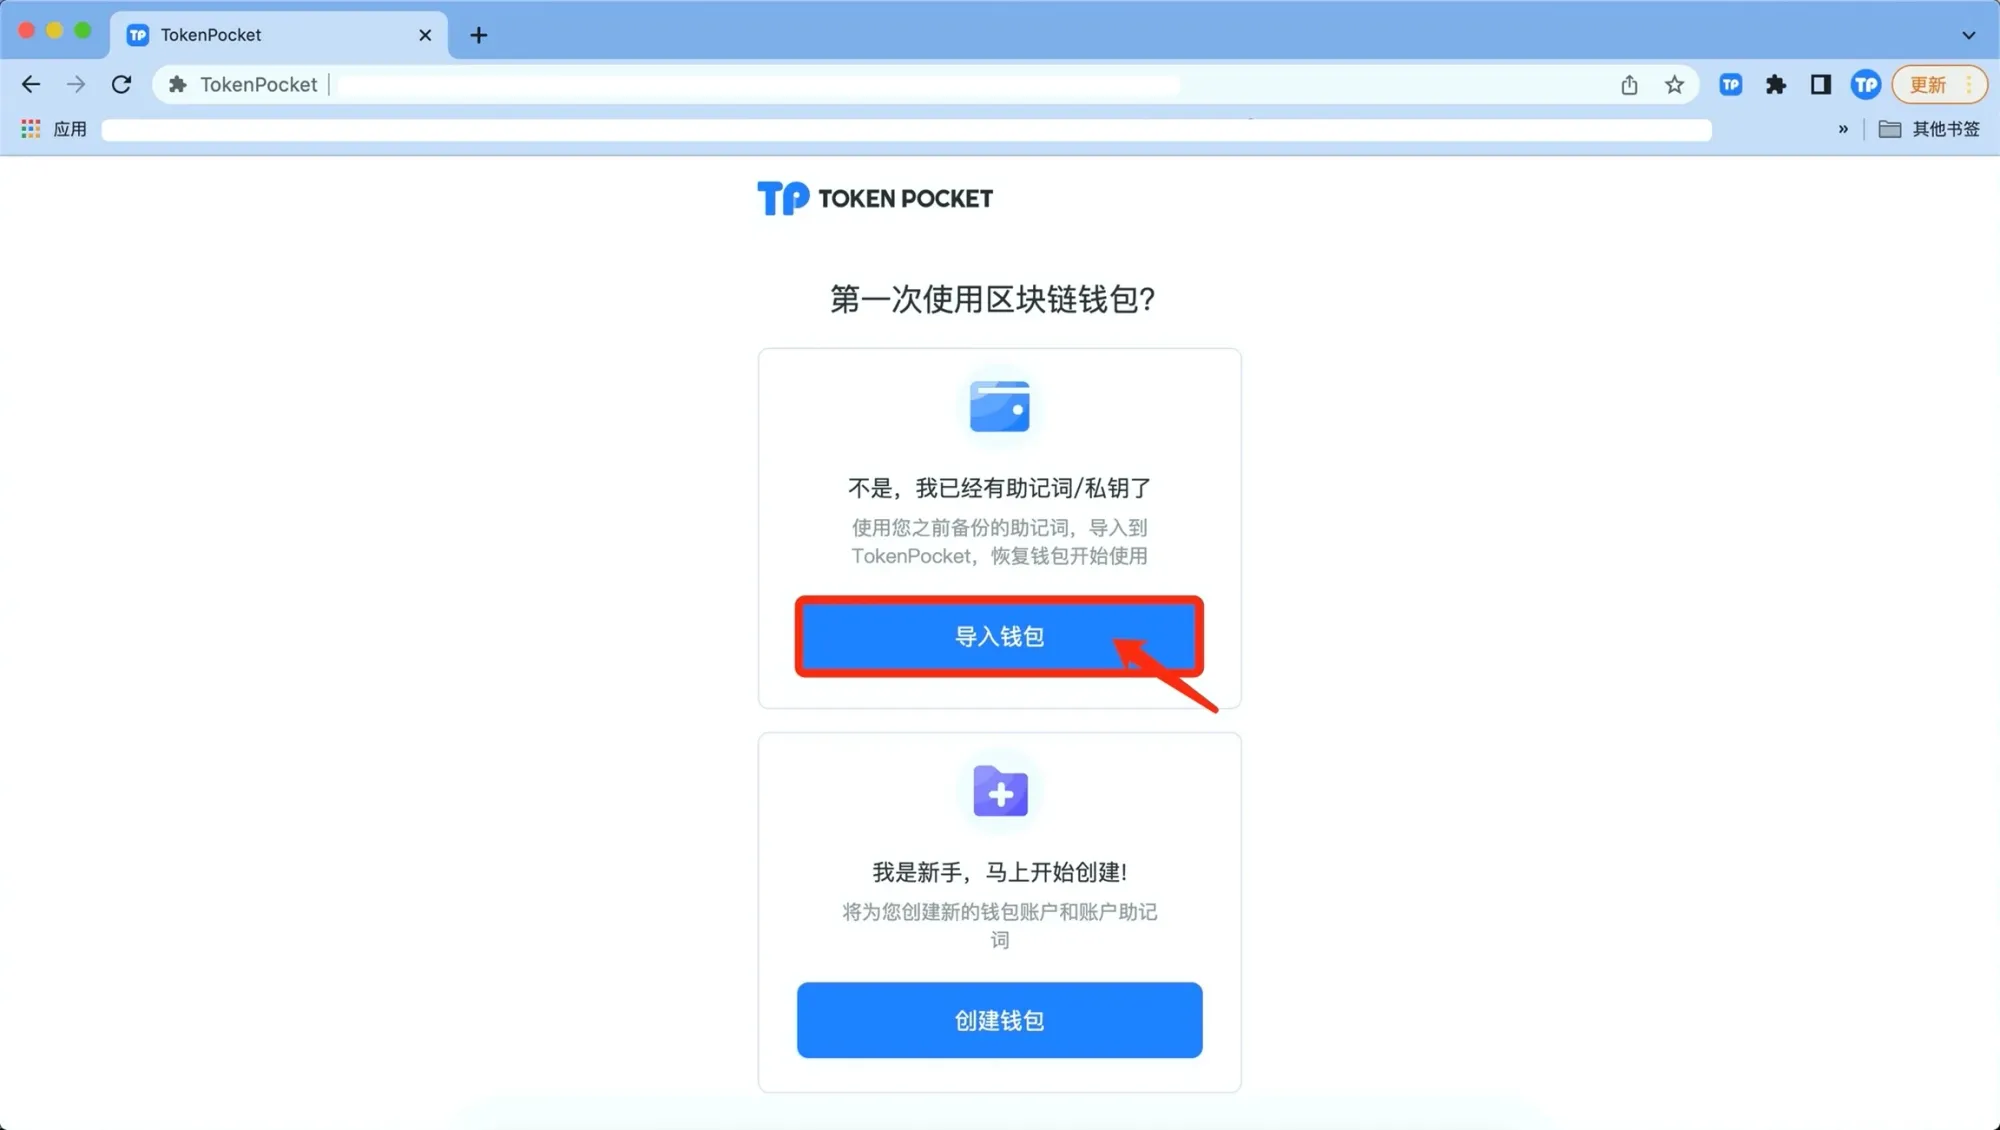
Importing an Existing Wallet
- Upon first opening the extension, click “Import Wallet”.
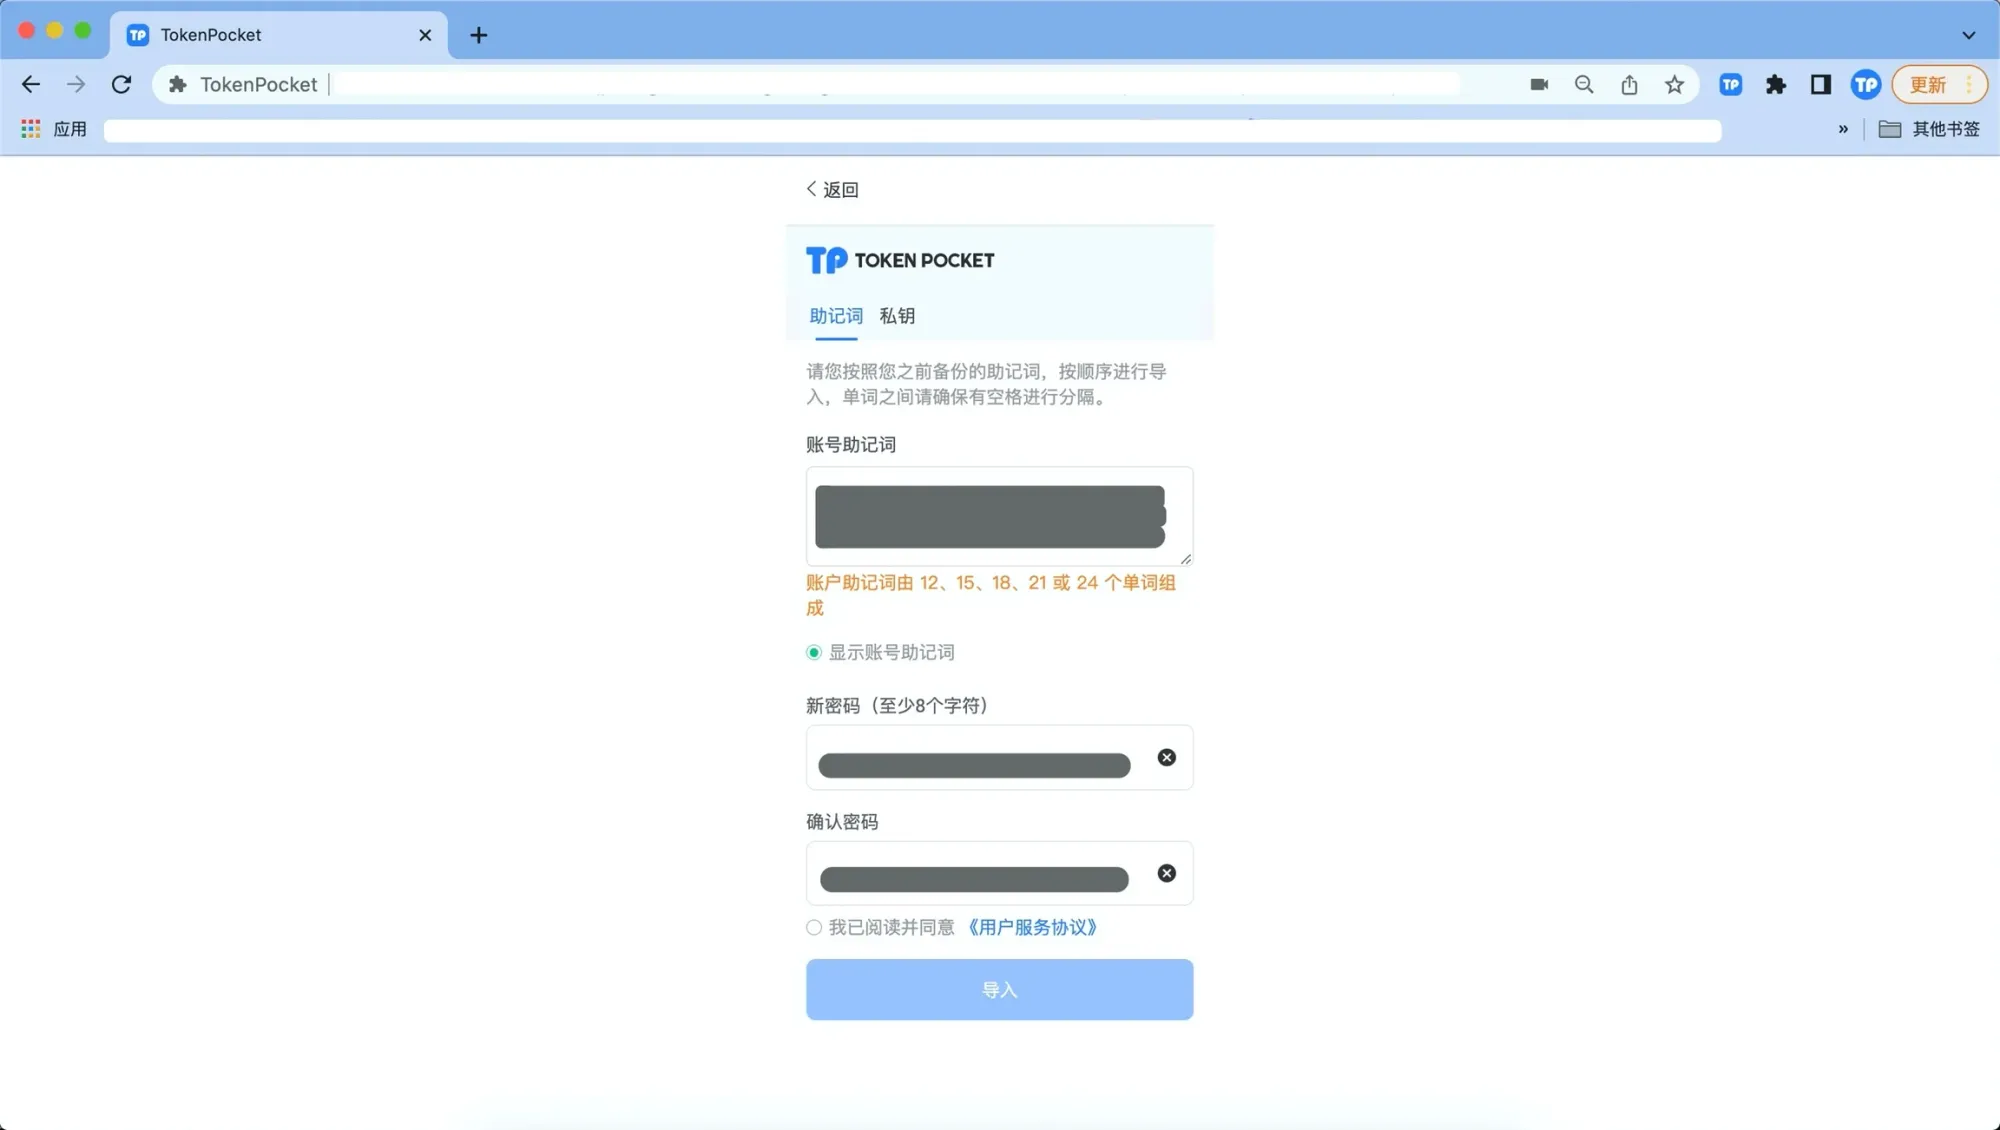
- Follow the prompts to enter your seed phrase or private key, and set a wallet password. We recommend clicking “Show wallet seed phrase” first, then typing each word separately with a space between them to ensure accuracy.
- Tick “I have read and agree to the User Service Agreement”, then click “Import” to complete.
Security Tips
• Back up your seed phrase in multiple locations to avoid a single point of failure.
• Never share your seed phrase with anyone under any circumstances.
• Beware of phishing sites; anyone asking for your seed phrase is attempting fraud.
• To back up again, go to “Settings → Security Options”.
• dfox cannot recover your seed phrase; please keep it safe yourself.
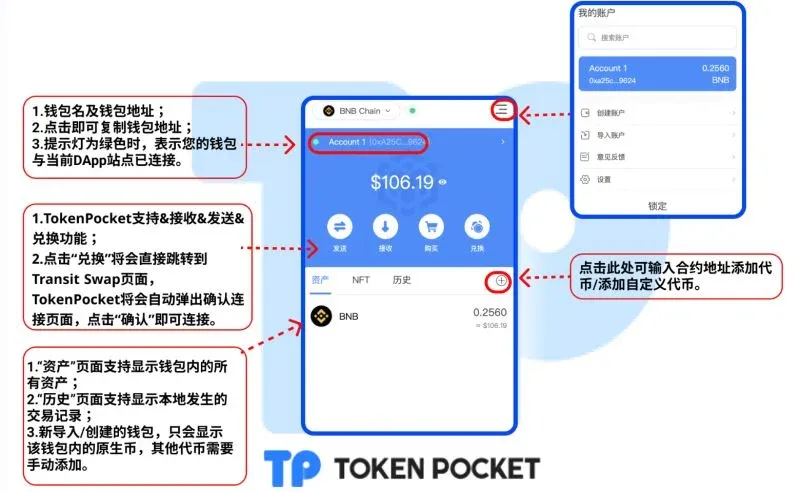
Main Page Overview
The extension wallet’s main interface is divided into Assets, DApp, Trading modules, etc. The network switch is located in the upper‑left corner, and the settings entry is in the upper‑right corner. Using the “Default Wallet” button you can set TokenPocket as the default wallet when connecting to DApps.
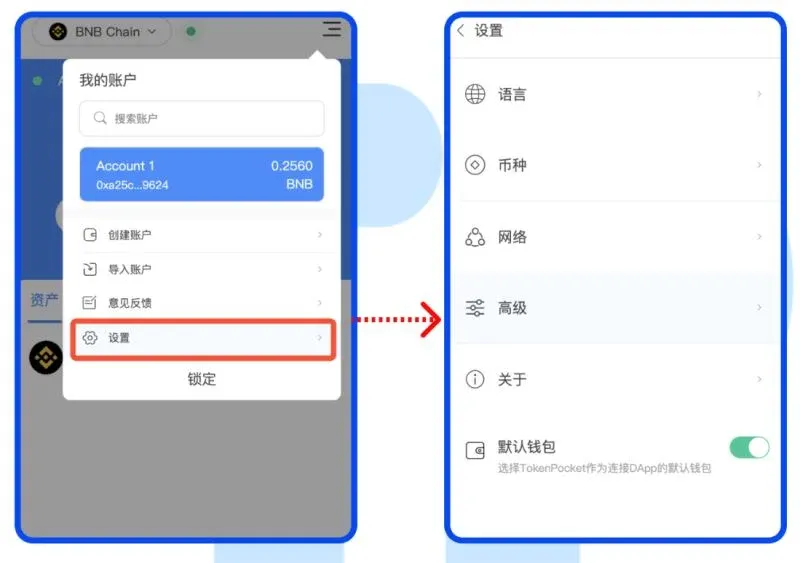
Settings and Security
On the “Settings” page you can adjust global parameters such as language, fiat currency (displayed in USD for global users), and network. Clicking “Lock” puts the account into a locked state; the next time you enter you will need to input your wallet password.

Multi‑Signature Wallet Guide
What Is a Multi‑Signature Wallet
A single‑signature wallet needs only the owner’s signature to execute on‑chain actions; a multi‑signature wallet requires at least *m* out of *n* pre‑set signers to approve a transaction before it can be executed. Common setups such as 2/3 or 3/5 enhance security for team or corporate asset management.
Creating a Multi‑Signature Wallet
- Open the menu in the upper‑right corner of the extension and select “Multi‑Signature Wallet”.
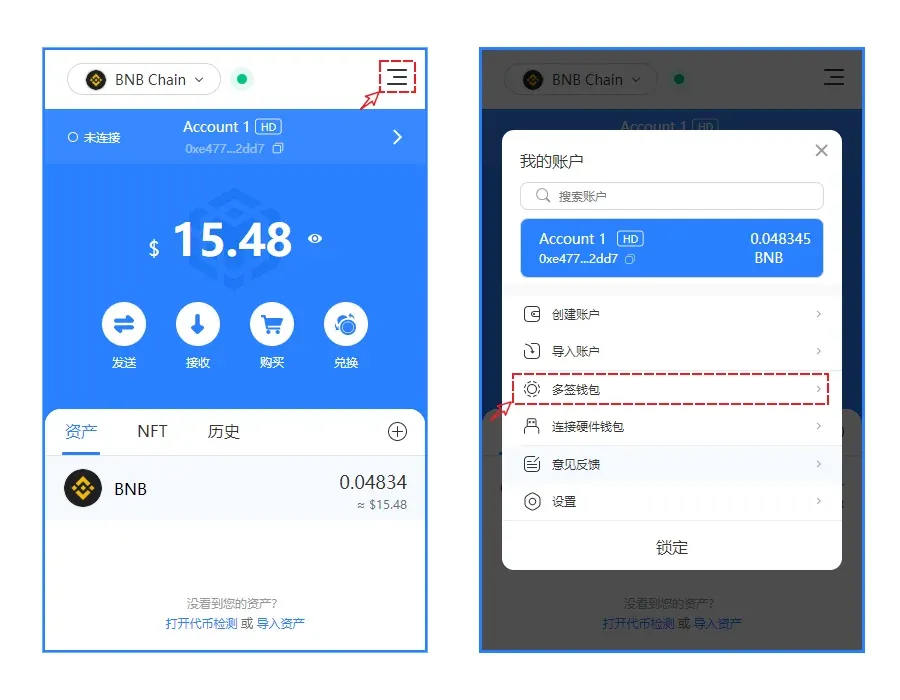
- In the popup page click “Create Wallet”.

- Fill in the following fields:
- Multi‑Signature Wallet Name: custom label used only locally for identification.
- Management Wallets: you can add up to 30 management addresses; ideal for enterprises or teams.
- Minimum Required Signatures: we recommend setting this to 2 or higher to balance security and convenience.
- Fee Information: the gas fee for creating the on‑chain contract, payable solely to the blockchain; TokenPocket itself does not charge any fee.
- Funding Wallet: select an existing wallet address to pay the gas.
After completing the fields, click “Confirm”. The system will show
Related Reading
- What Is an EVM Wallet? Definition, Features & Top Examples
- TokenPocket TP Wallet: Cold vs Hot & OKX Android Review
- KeepKey Hardware Wallet Review: Secure Multi-Chain Crypto Storage
💡 Register on Binance with referral code B2345 for the maximum trading fee discount. See Binance complete guide.


