
We have compiled a comprehensive guide to using Binance Wallet, providing an in‑depth explanation of Secure Auto Sign (SAS), its underlying mechanisms, and the convenient web‑based login method. This helps newcomers get started quickly while keeping assets secure. For detailed step‑by‑step instructions, keep reading.
What Is Secure Auto Sign (SAS)?
Secure Auto Sign (SAS) is a technology that makes transaction signing faster. The signature is generated inside a Trusted Execution Environment (TEE), keeping the private key in the user’s possession and isolated by hardware. This achieves self‑custody while allowing authorizations without opening the mobile app each time.
- Rapid authorization: No mobile‑device confirmation popup is required when placing a trade, improving order‑placement speed.
- Secure isolation: Only the wallet holder can delegate signing; neither Binance nor the hardware manufacturer can read the private key.
- Verifiable self‑custody: Third parties can audit the isolation and authorization process, confirming that the user retains full control over their assets.
SAS Authorization and Session Validity
When SAS is enabled for the first time, the system grants a default 7‑day validity period. Every time you create a new order on the web interface, the 7‑day timer automatically resets; if no qualifying transaction occurs within 7 days, the session expires automatically. After expiration you can re‑authorize in either of the following ways:
- A new order will trigger an authorization prompt, allowing you to reactivate SAS;
- Go to [Settings] → [Secure Auto Sign] and manually enable it again.
---
Binance Wallet (Web) Overview
Binance Wallet (Web) is the official web‑based wallet launched by Binance, designed for desktop users and aimed at delivering a fast, information‑rich on‑chain trading experience. Leveraging SAS technology, it provides a “one‑click login – no‑signature” flow: users simply scan a QR code with the Binance app to log in, with no additional registration required.
Core Features at a Glance
| Feature | Description |
|------|------|
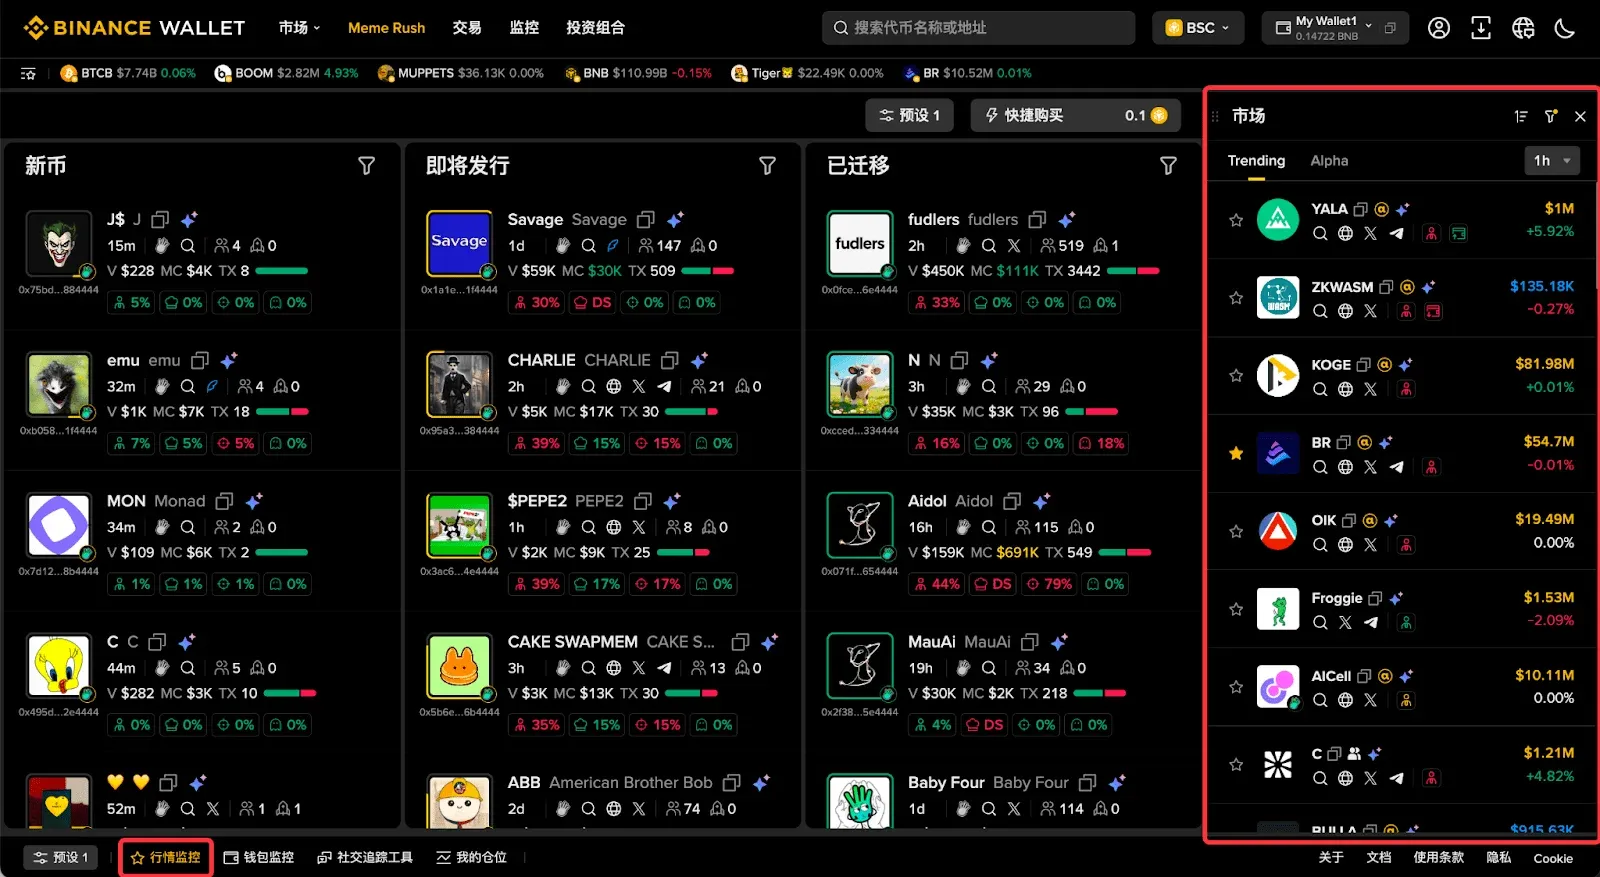
| Hot Token Leaderboard | Real‑time display of on‑chain trading activity to help spot trends. |
| Alpha Leaderboard | Aggregates Binance Alpha projects, offering early‑stage opportunities. |
| Meme Rush | Previews meme tokens launched on external platforms for early positioning. |
| Token Details | Shows price, candlestick chart, holdings statistics, and narrative analysis. |
| Address Monitoring | Tracks large‑wallet (Smart Money) fund flows. |
| Social Media Monitoring | Monitors hot accounts on X (Twitter) and similar platforms. |
| Portfolio Analysis | Summarizes address earnings, trade history, and overall performance. |
| Position Management | Real‑time view of holdings and P&L for risk control. |
---
Beginner’s Walkthrough
Friendly reminder: If you do not yet have a Binance account, you can register using the links below and download the app. Following the video tutorial will make the process smoother.
- Binance official registration (global site): `https://accounts.binance.com/register?ref=B2345` – copy the URL into your browser.
Note for U.S. residents: Use the Binance.US platform (https://www.binance.us) instead of the global site.
- Binance Android App download: `https://www.bitaigen.com/binance/download`
Step 1: Log In to the Wallet (Web)
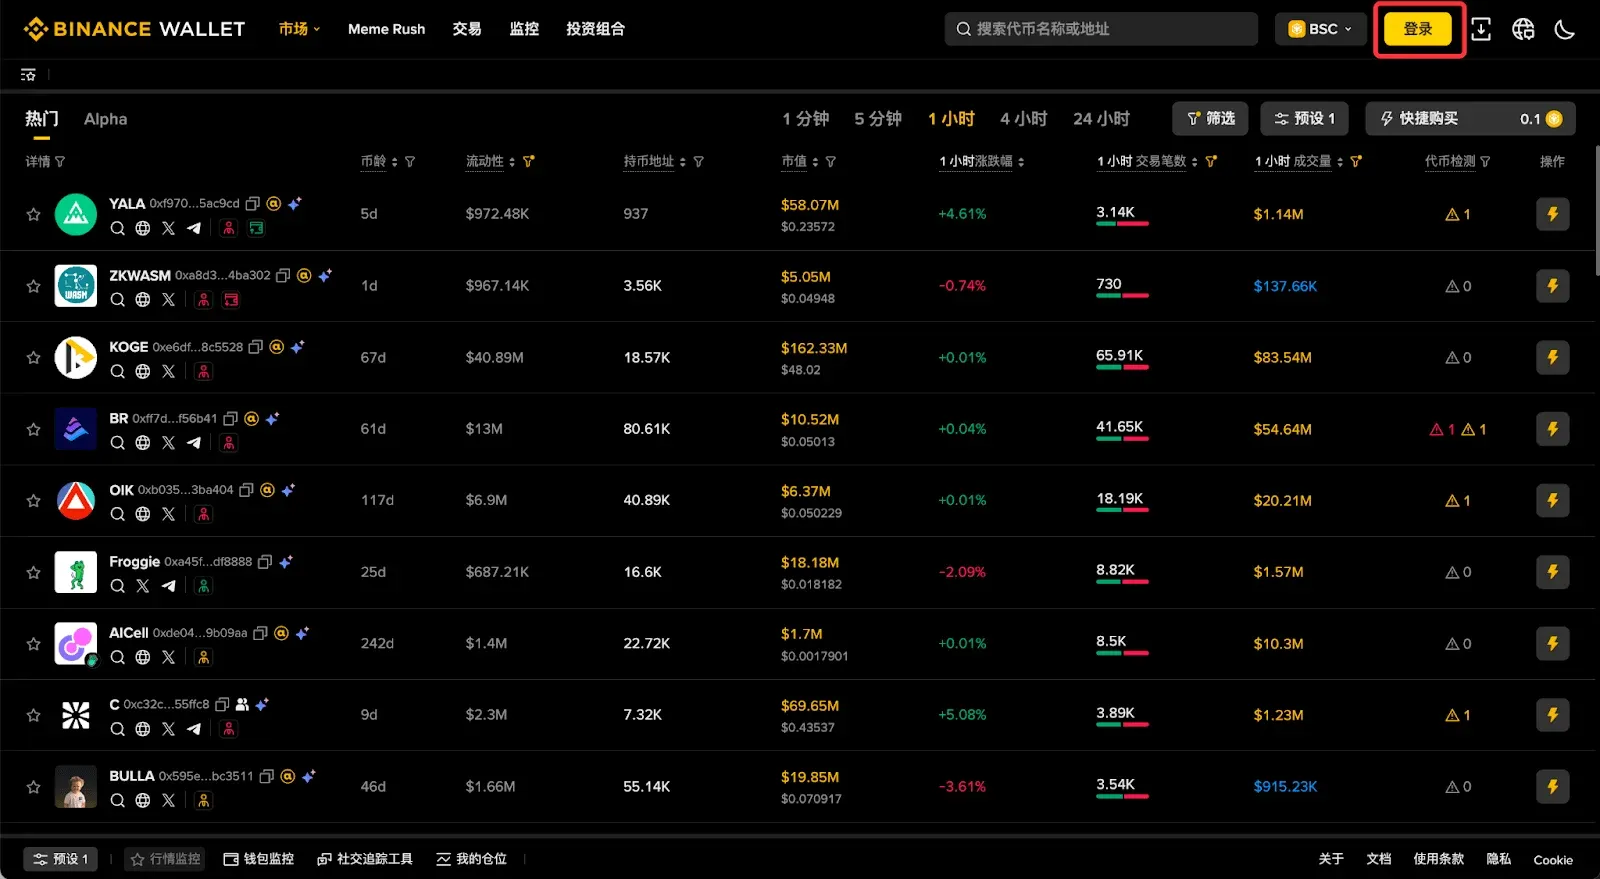
- Open the Binance Wallet (Web) homepage and click the [Login] button at the top‑right corner.
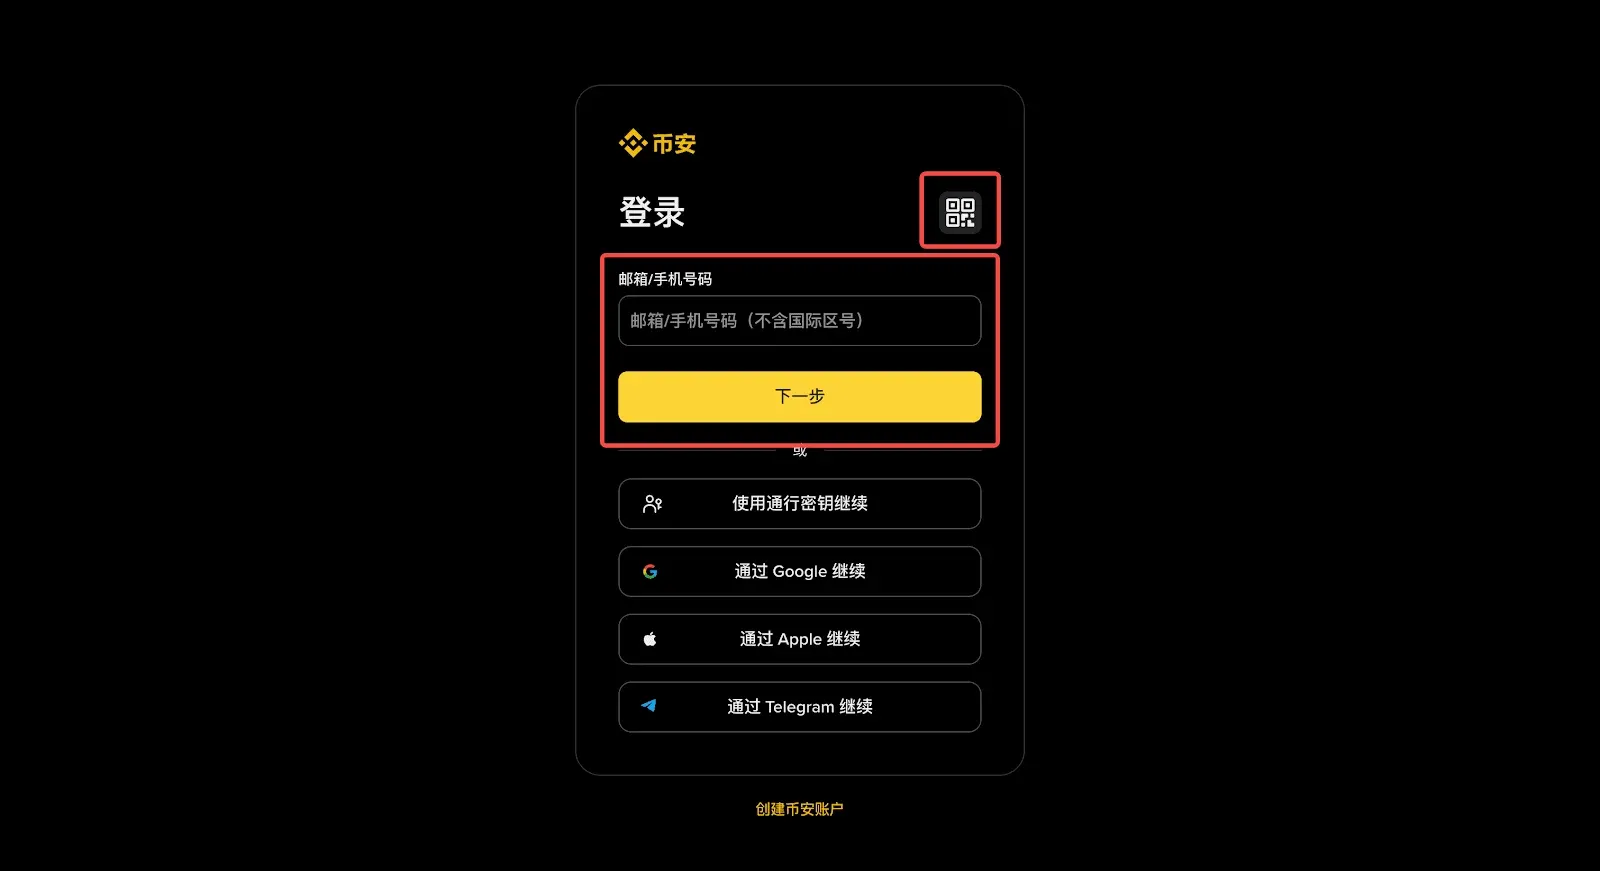
- Enter your login password, or scan the QR code with the Binance app to complete login.
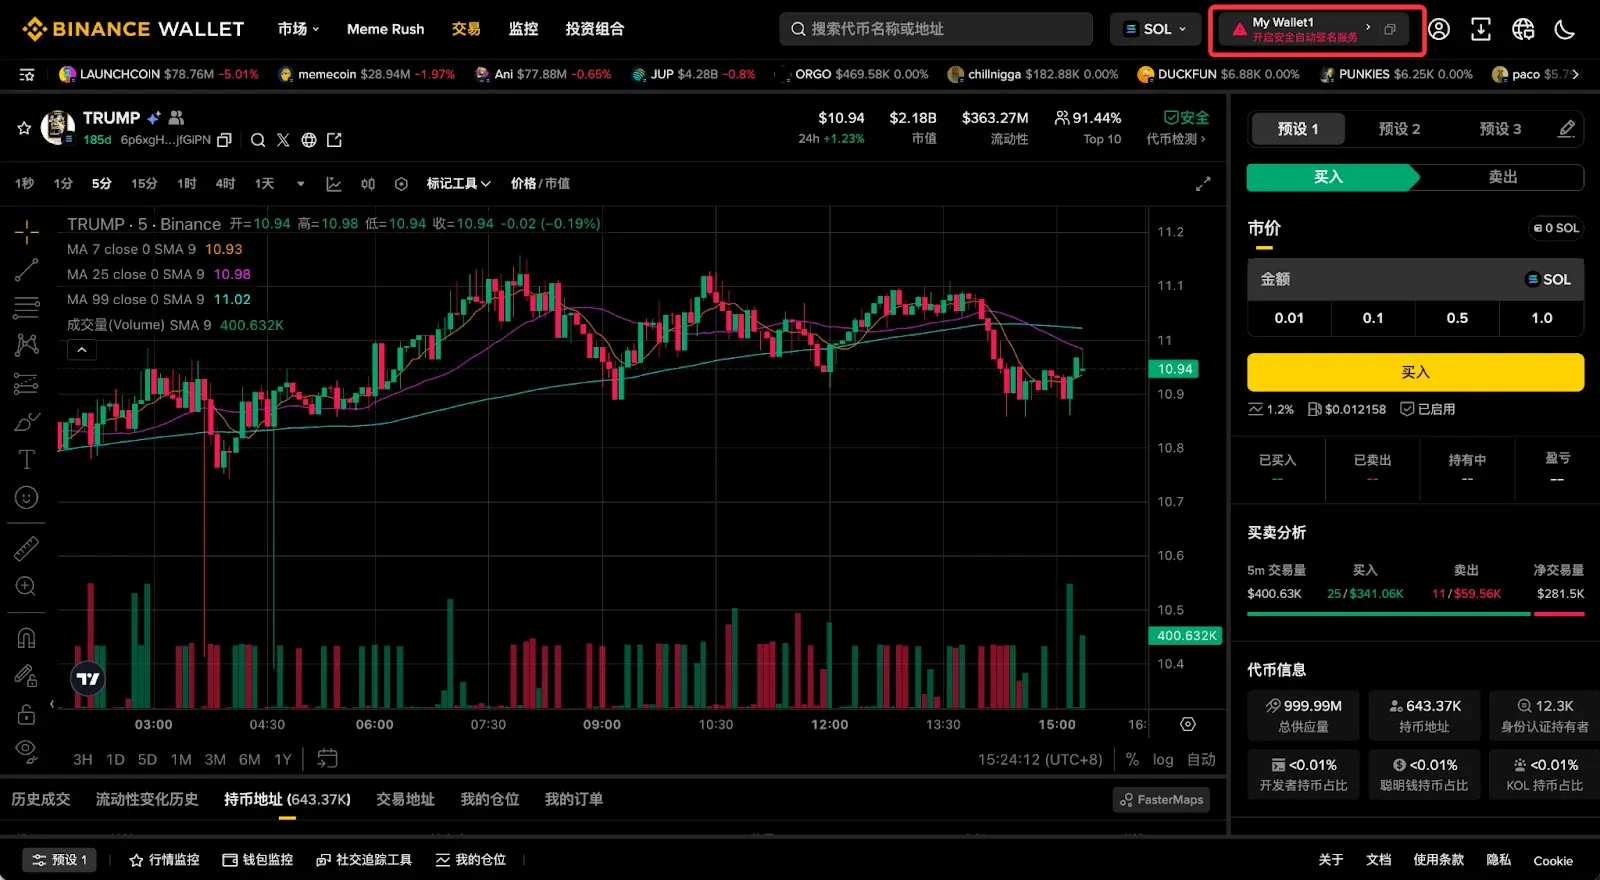
- After a successful login, a Enable Secure Auto Sign button will appear at the top‑right of the page; click it to activate SAS.
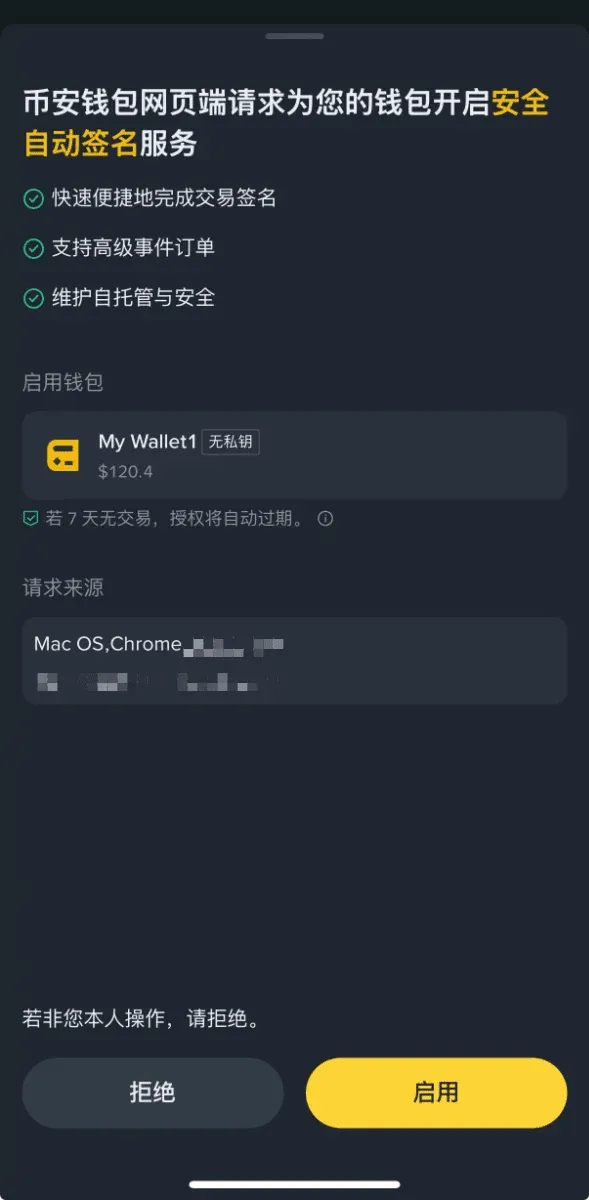
- The Binance app will pop up a [Enable] confirmation dialog; confirm to complete the authorization.
- Once enabled, all subsequent on‑chain actions will no longer trigger a secondary signature request. To disable, go to the [Settings] page or simply wait for the authorization to expire naturally.
Step 2: Search for and Purchase a Token
- Enter the token name, contract address, or symbol into the search bar at the top of the page.
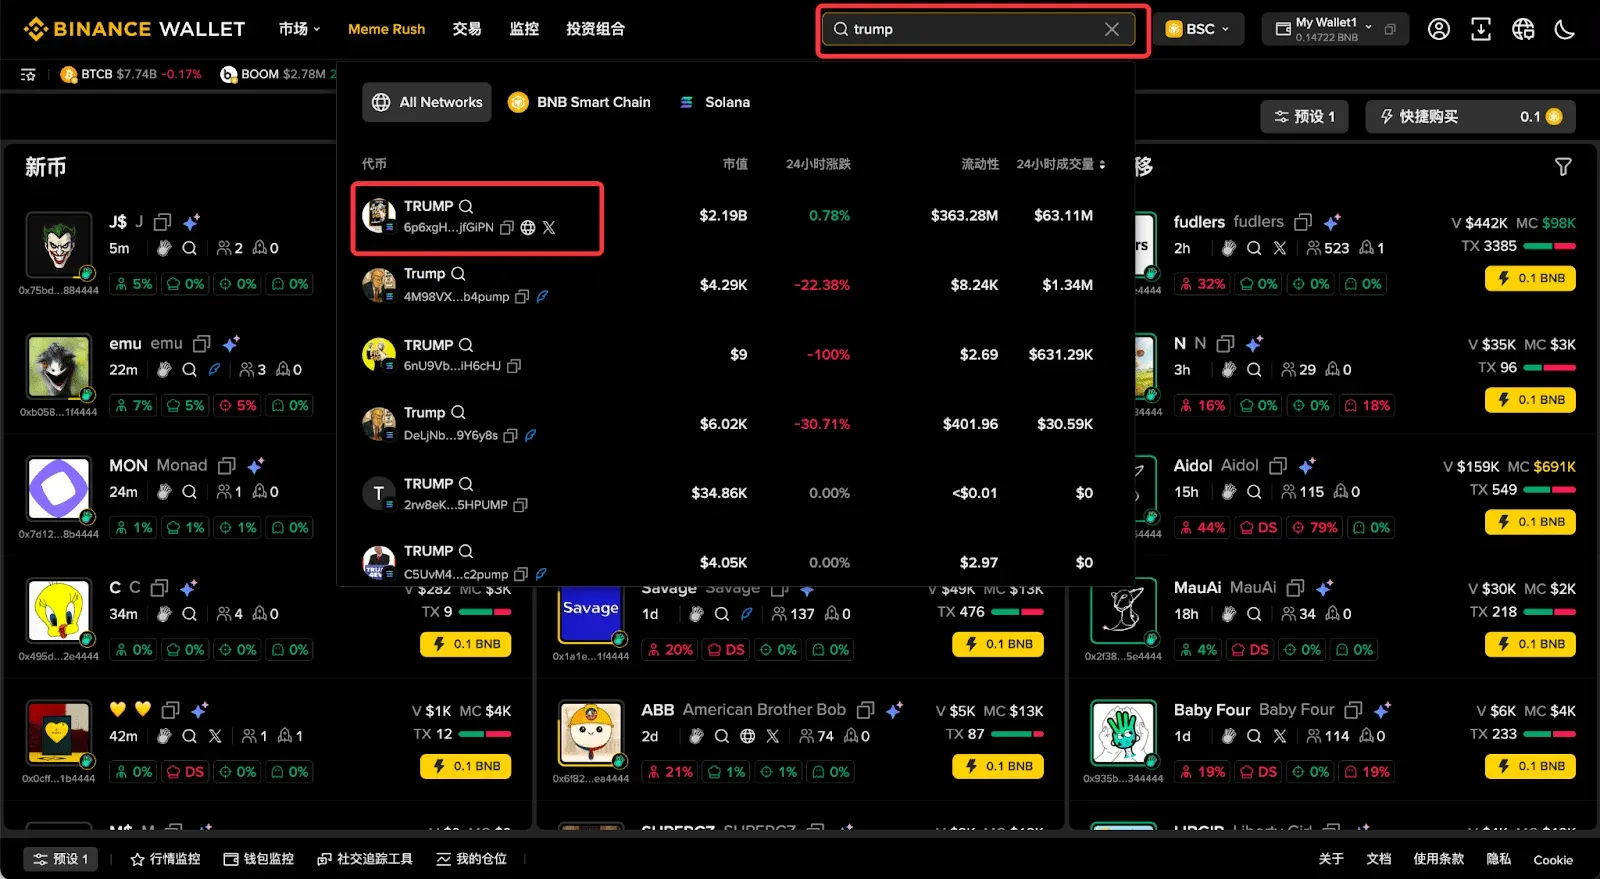
- The system will auto‑match relevant projects; click a result to open the token detail page or place an order directly.
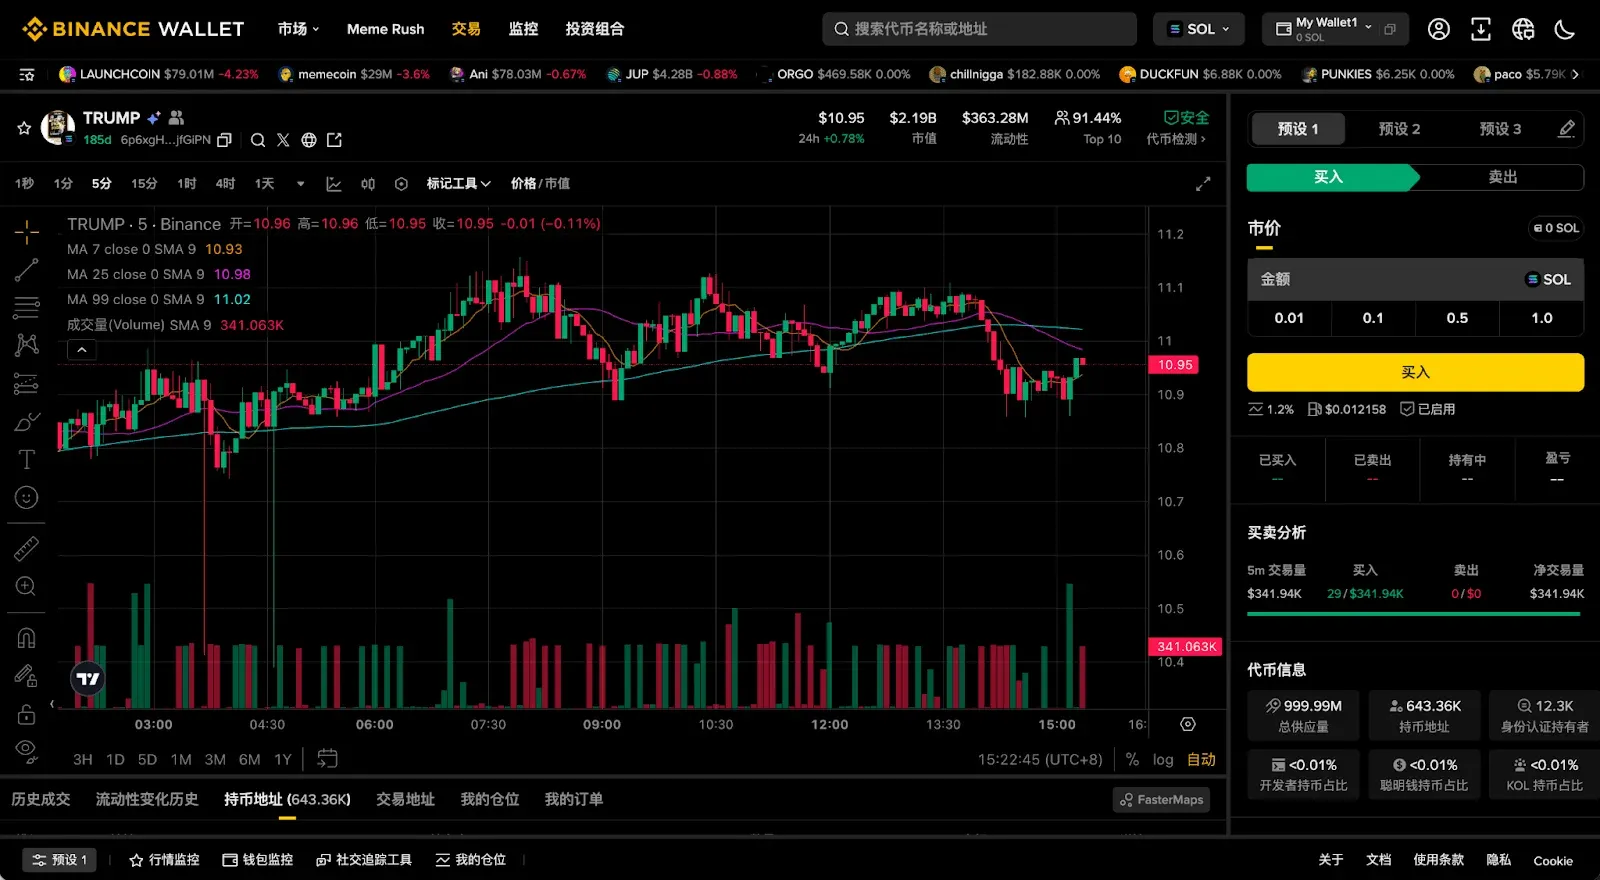
Step 3: Use Built‑In Security Audits to Reduce Risk
Binance Wallet (Web) includes a multi‑dimensional security audit feature that helps users quickly gauge a token’s potential risks.
- A summary of the audit report appears in the upper‑right corner of the Token Details candlestick chart.
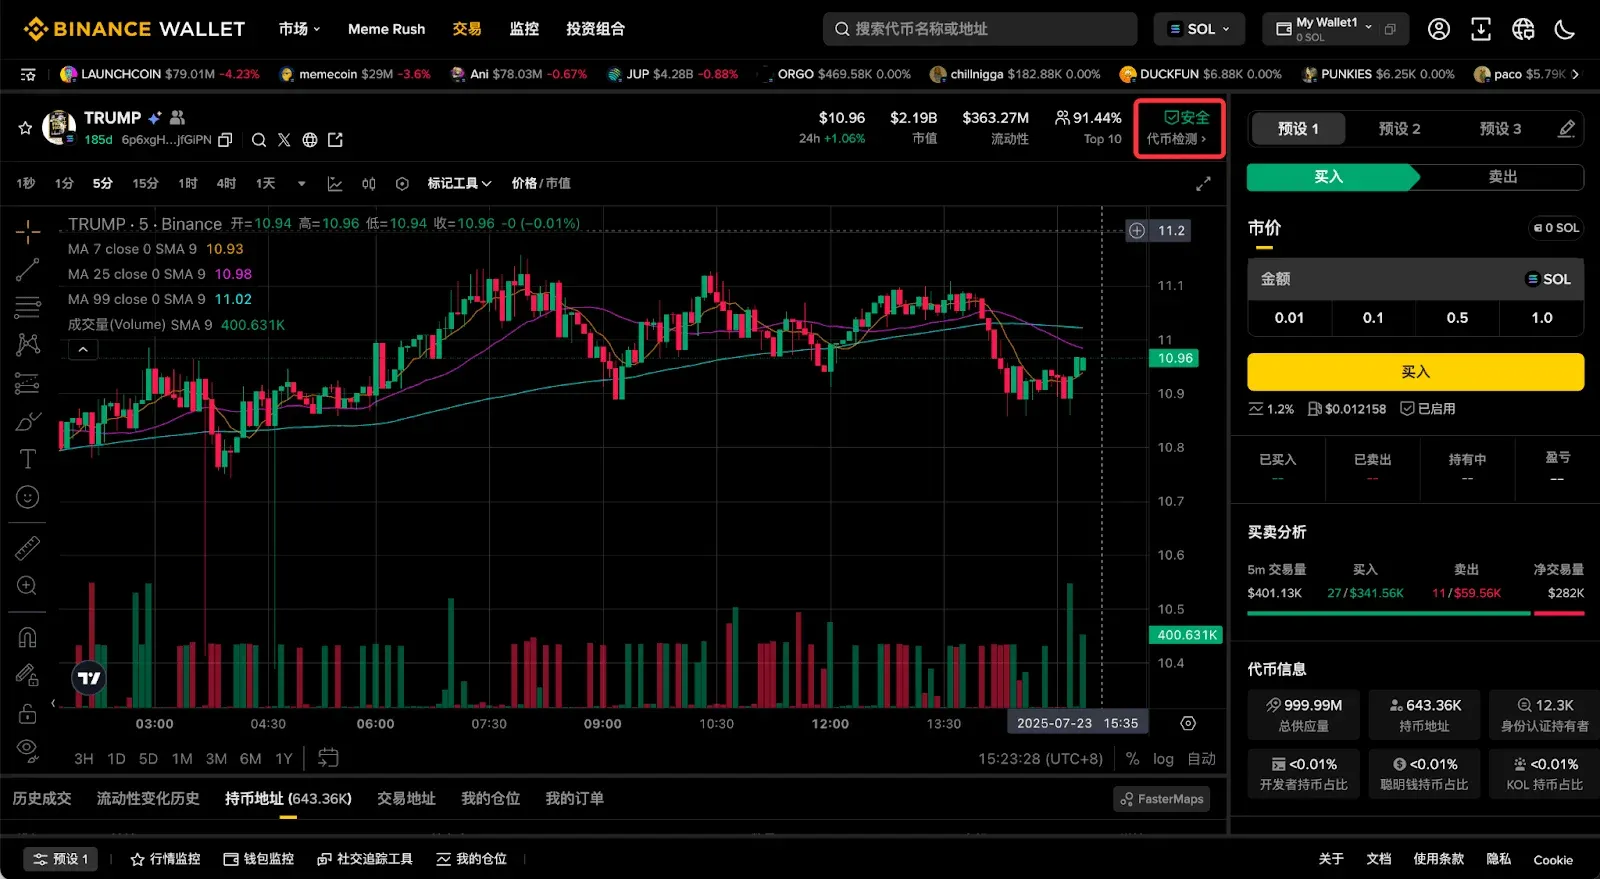
- Clicking the summary expands the full audit content, which aggregates analyses from multiple security firms.
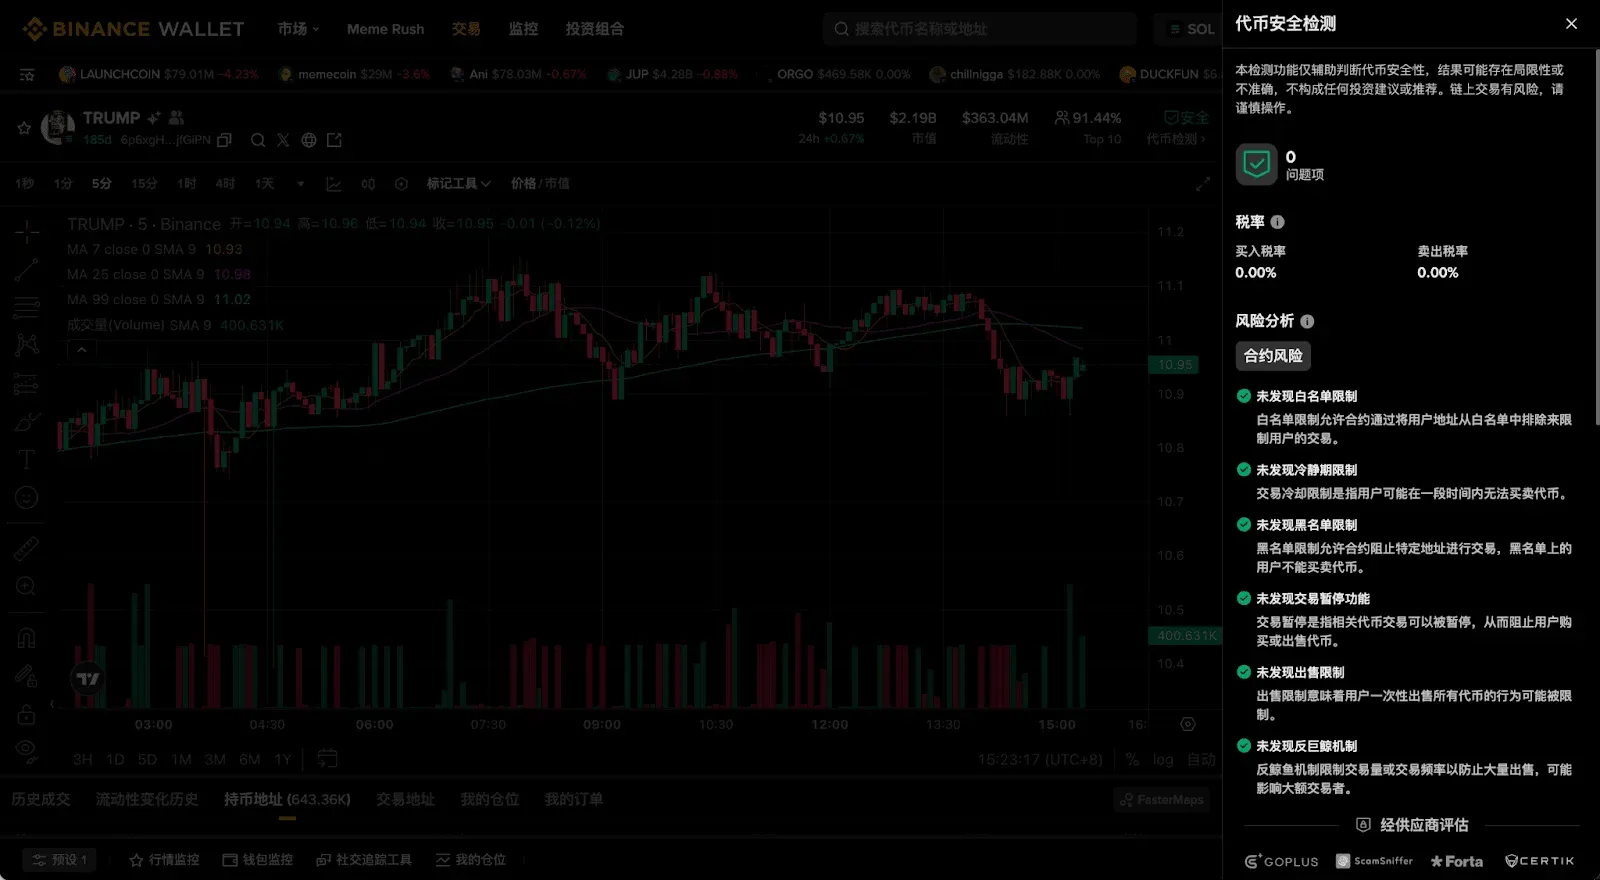
- A risk overview is also provided at the bottom of the page for quick scanning.
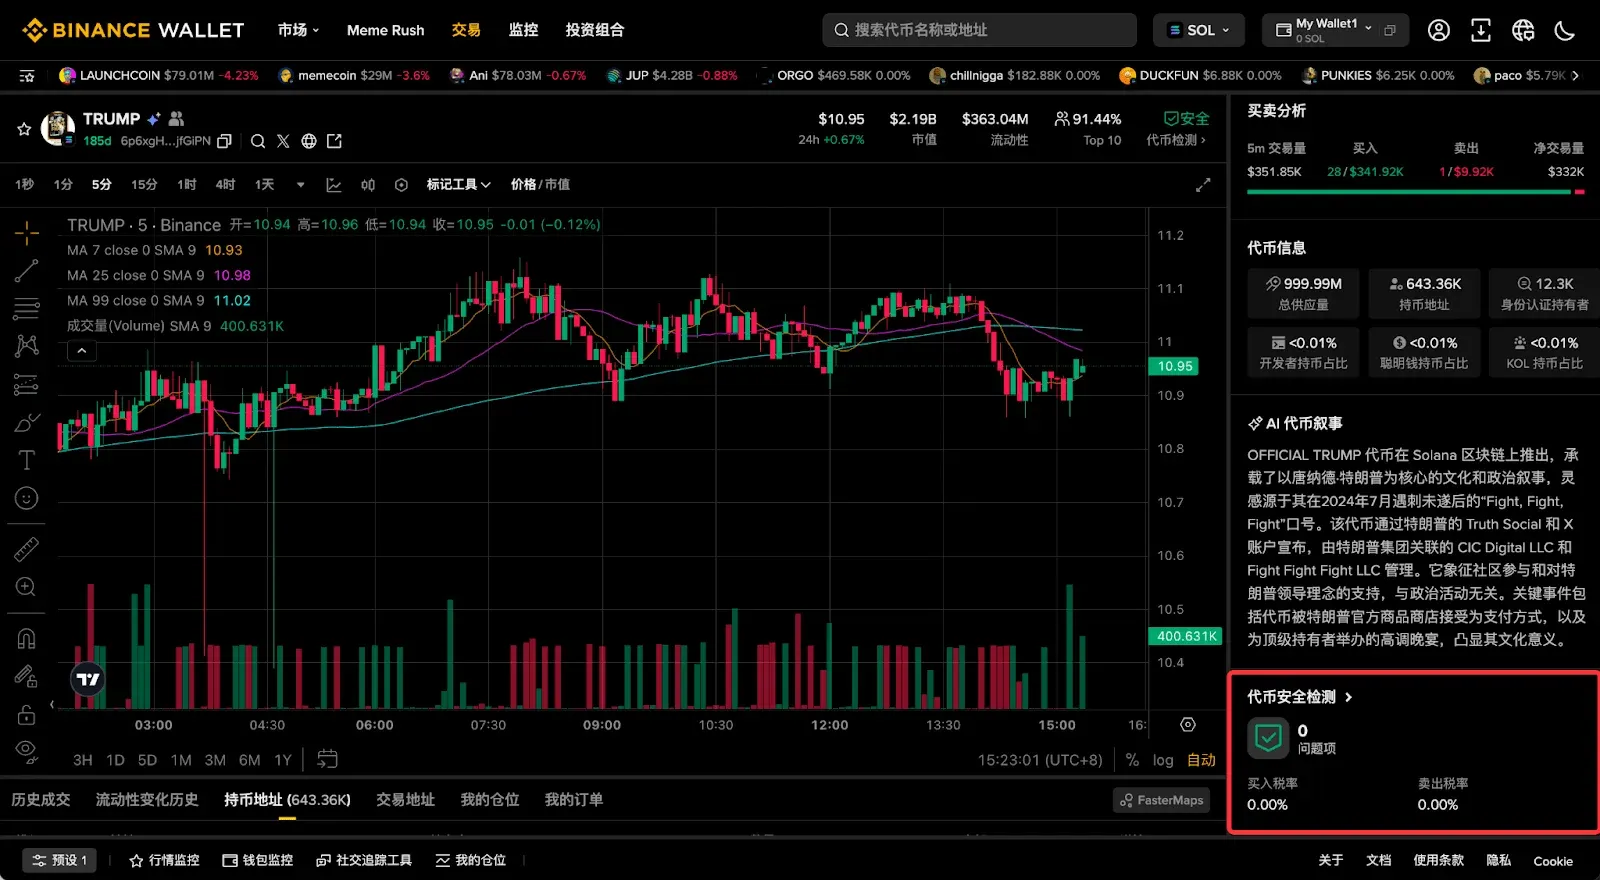
Important note: Audits cover most common vulnerabilities but cannot guarantee a token is 100 % risk‑free. Newly issued tokens with low market cap or trading volume still require your own due‑diligence before any transaction.
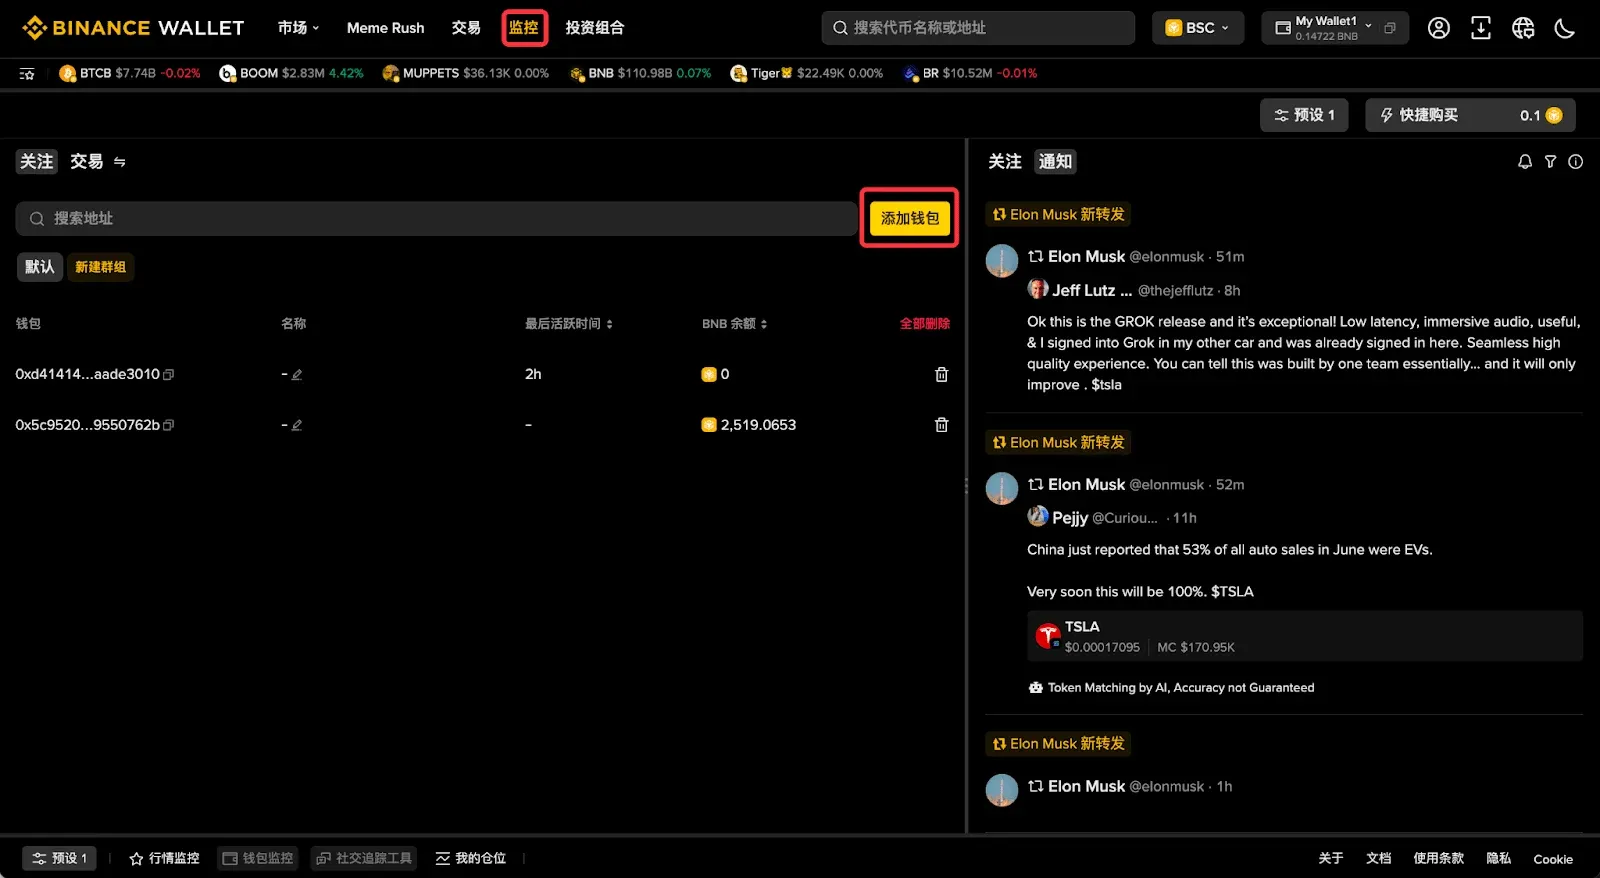
Step 4: Capture Opportunities via Address Monitoring
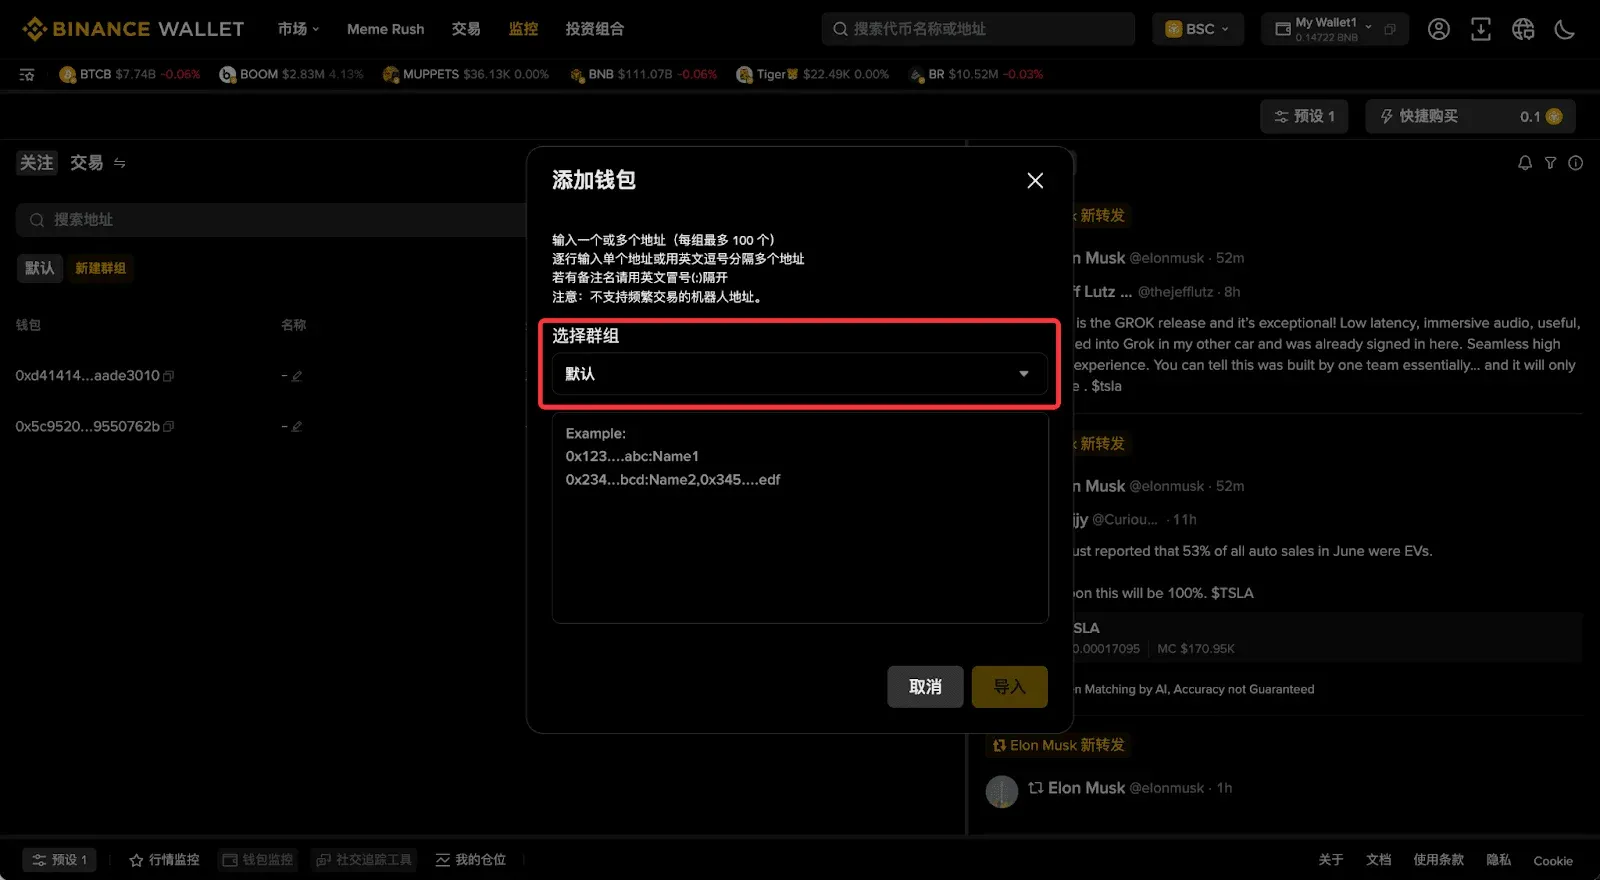
- Navigate to the [Monitor] page, click [Add Wallet], and input the addresses you wish to track, organizing them into groups as needed.
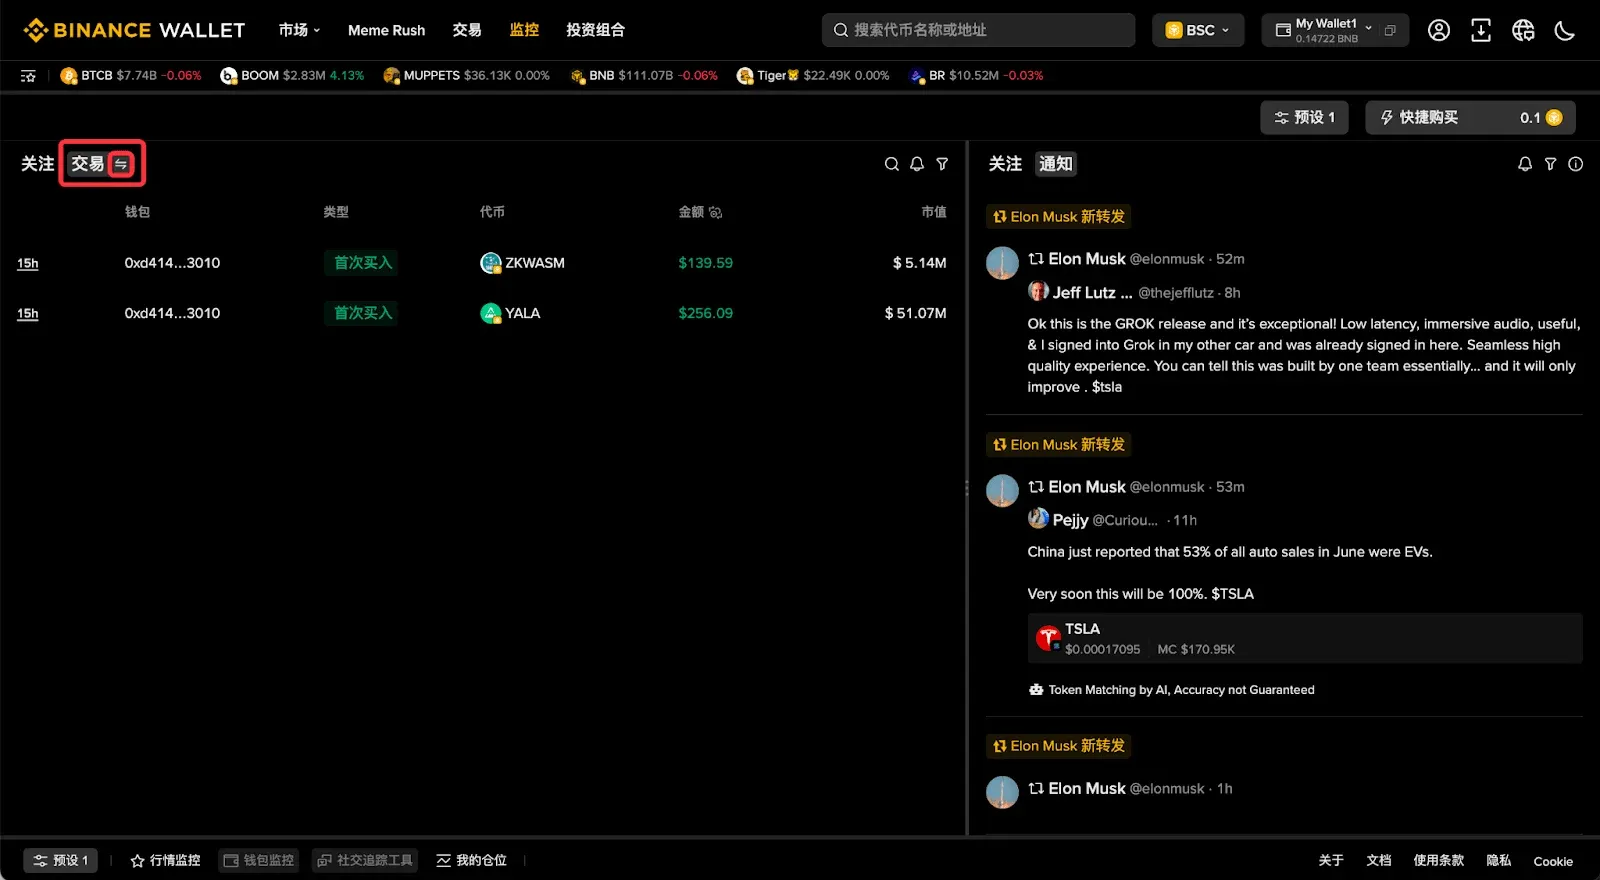
- Choose either the Transaction view or Token view for display.
- Enable notifications; the system will instantly alert you when a monitored address makes a large transfer in or out.
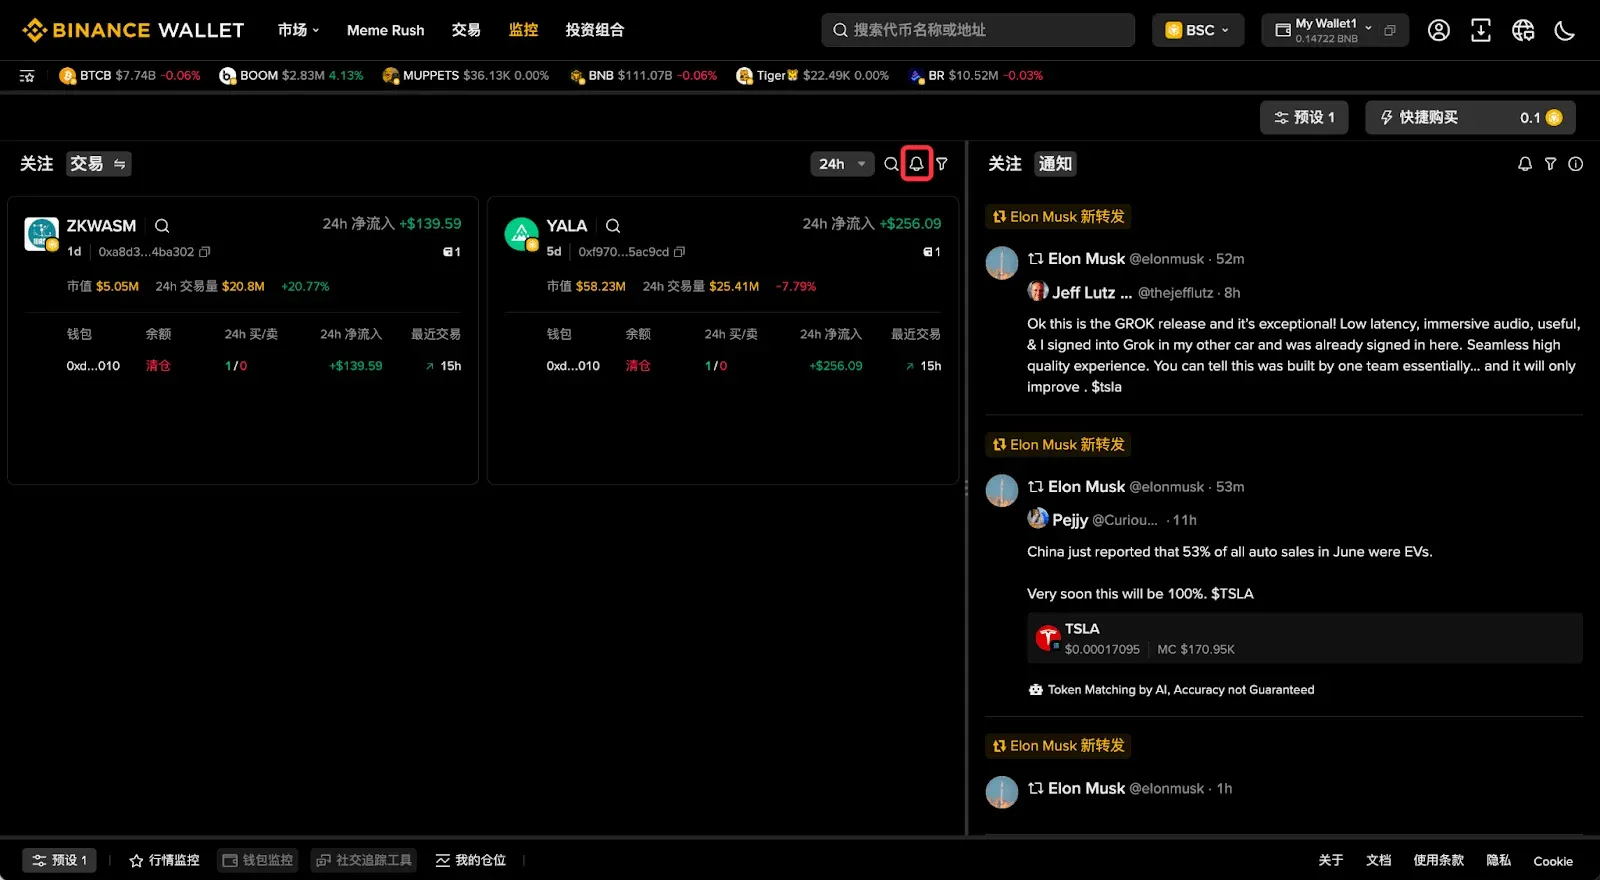
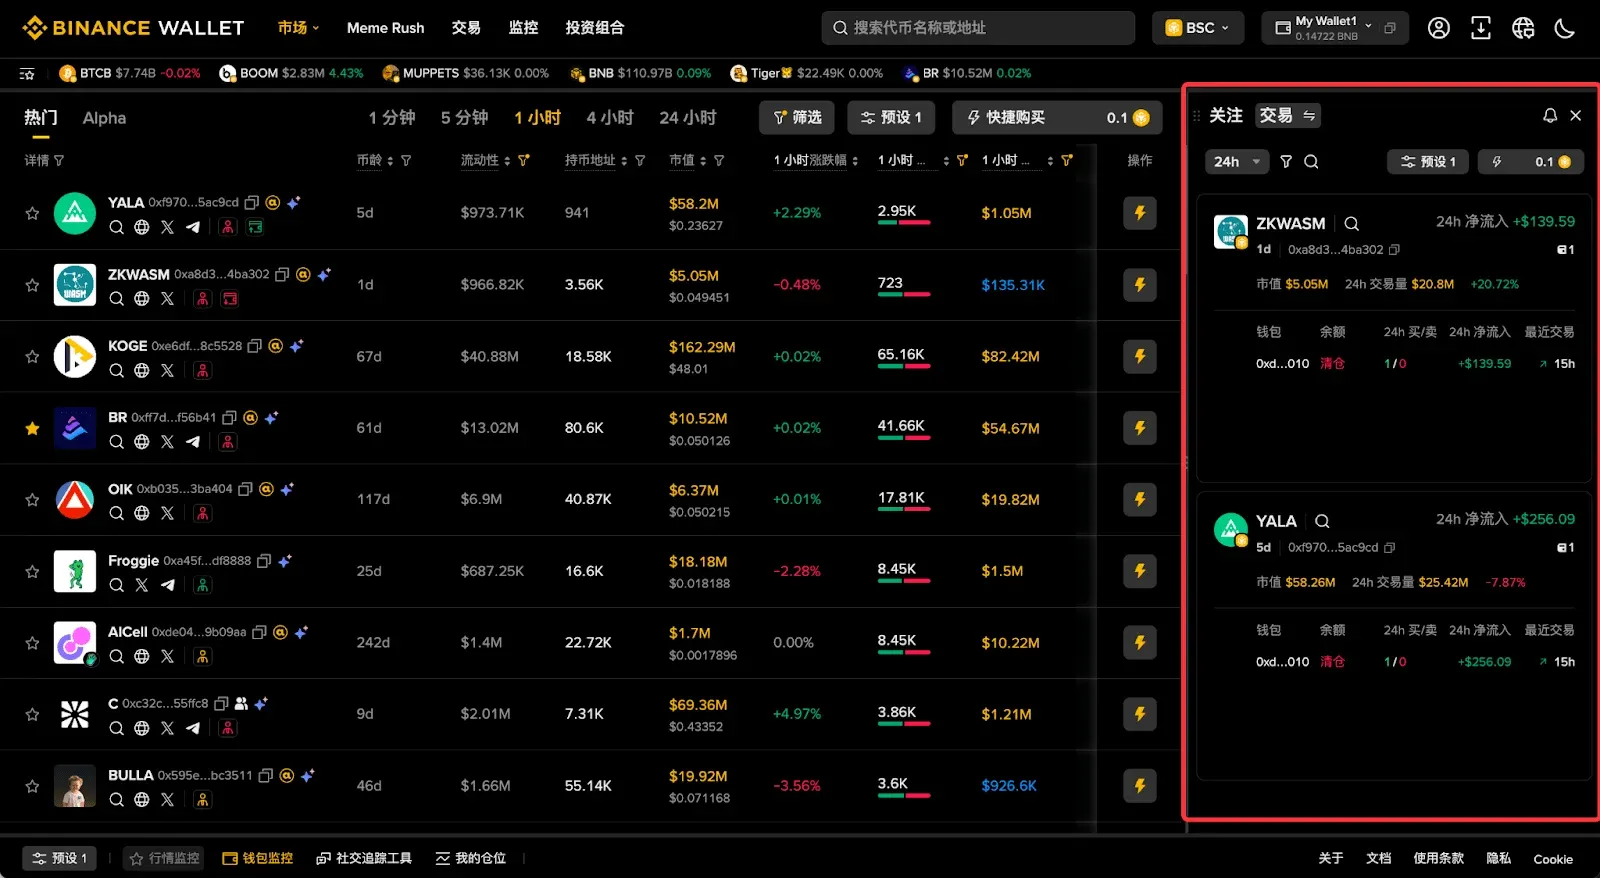
- For faster buying or selling, use the floating plugin on the right‑hand side to embed monitoring data into any page.
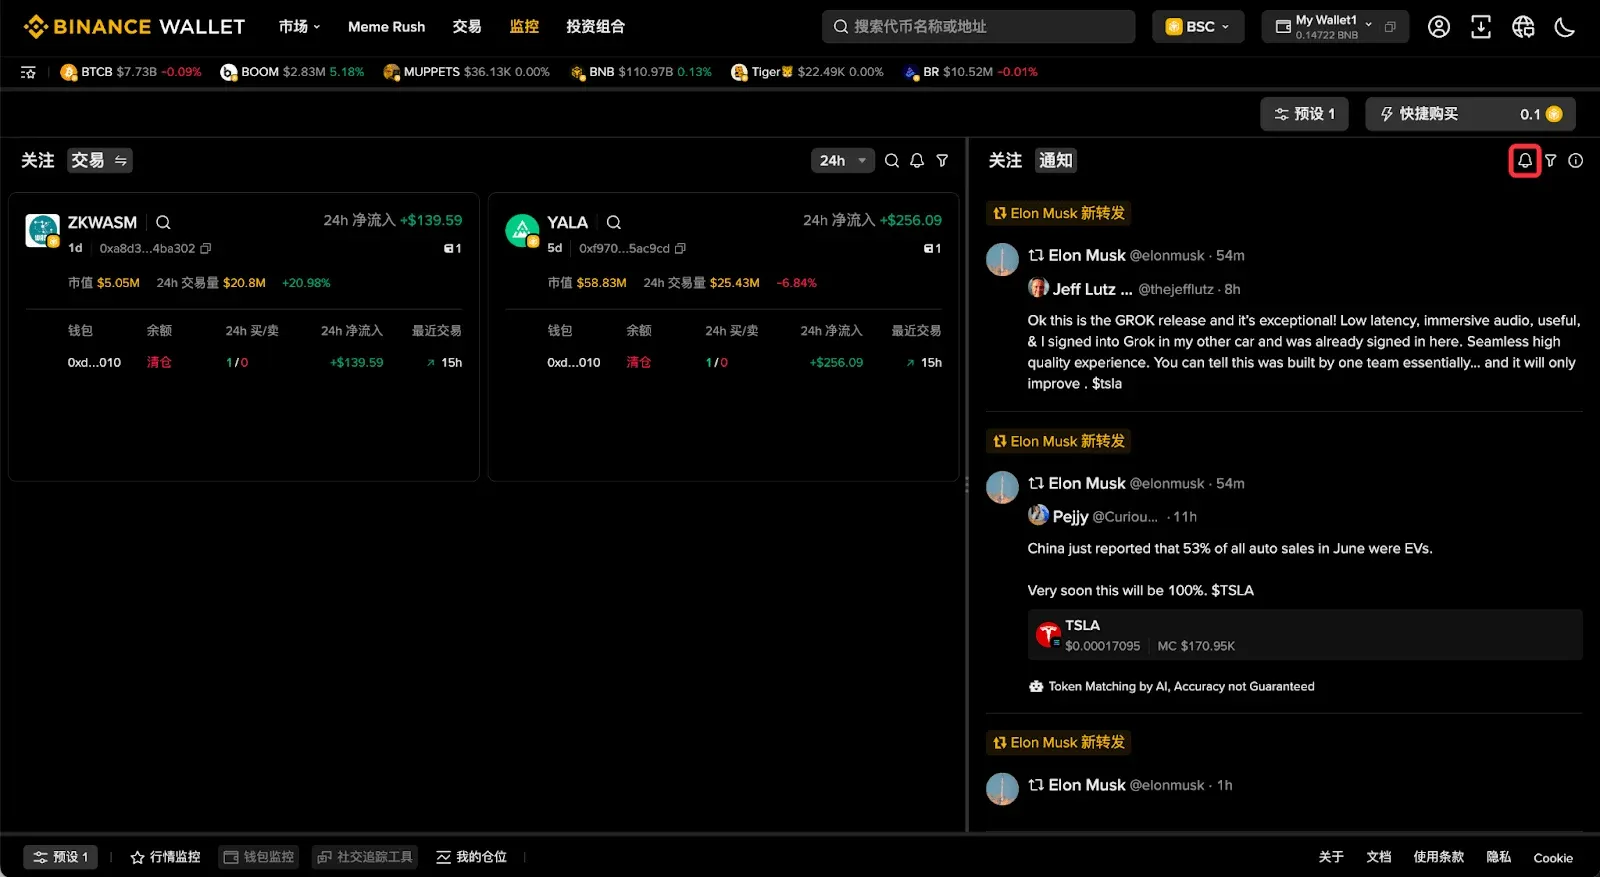
Step 5: Find Hot Topics via Social‑Media Monitoring
- In the [Monitor] page, select [Add Username], enter the X (Twitter) handle you want to follow, and group it as desired.
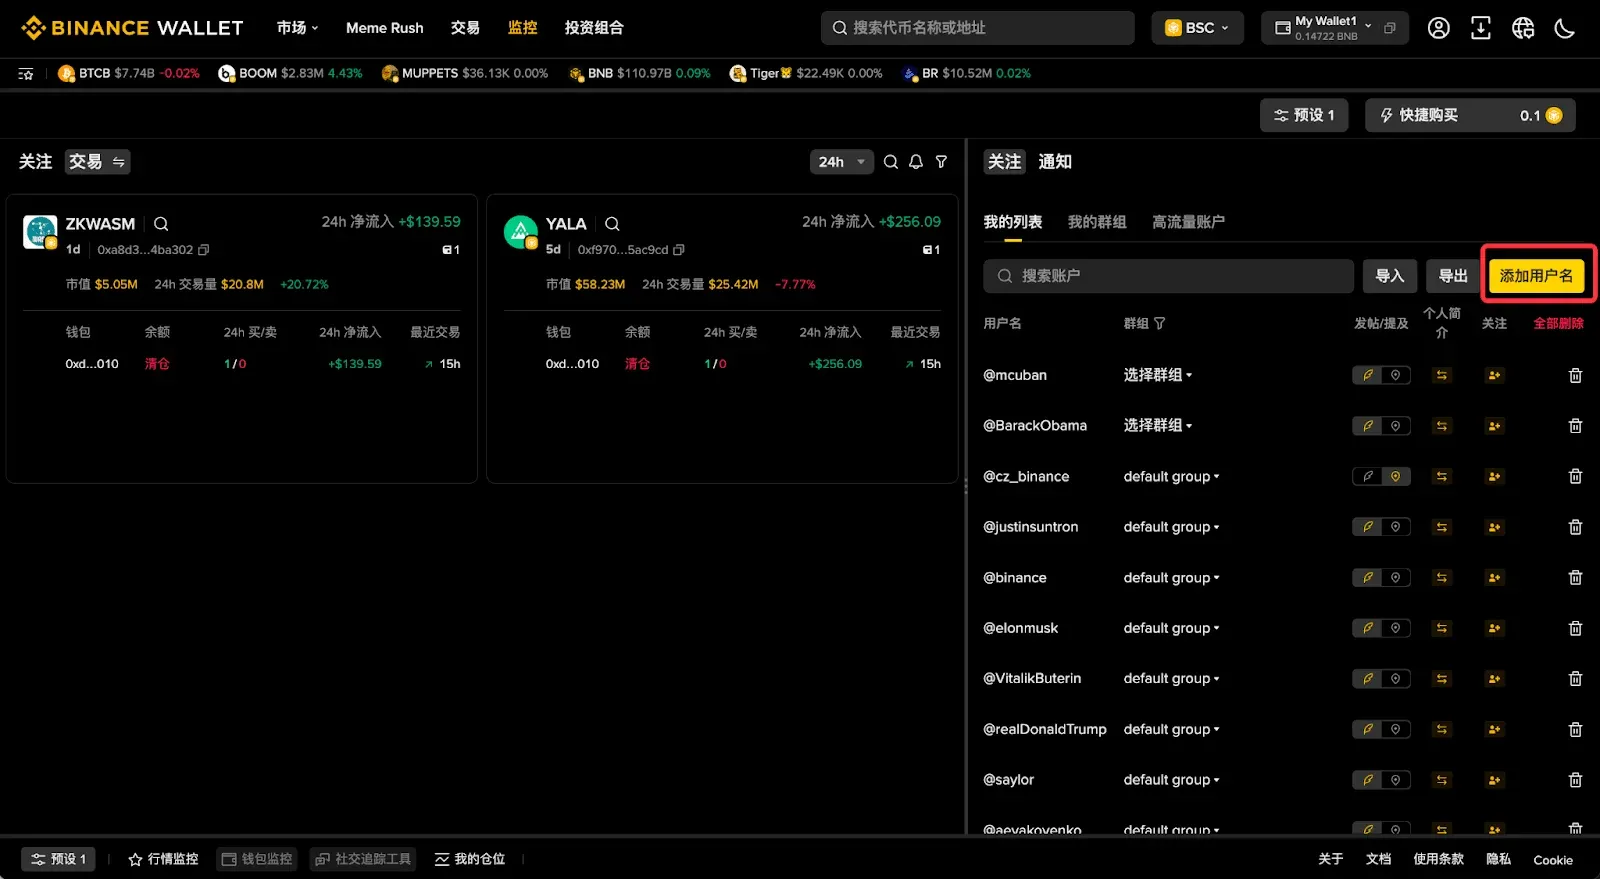
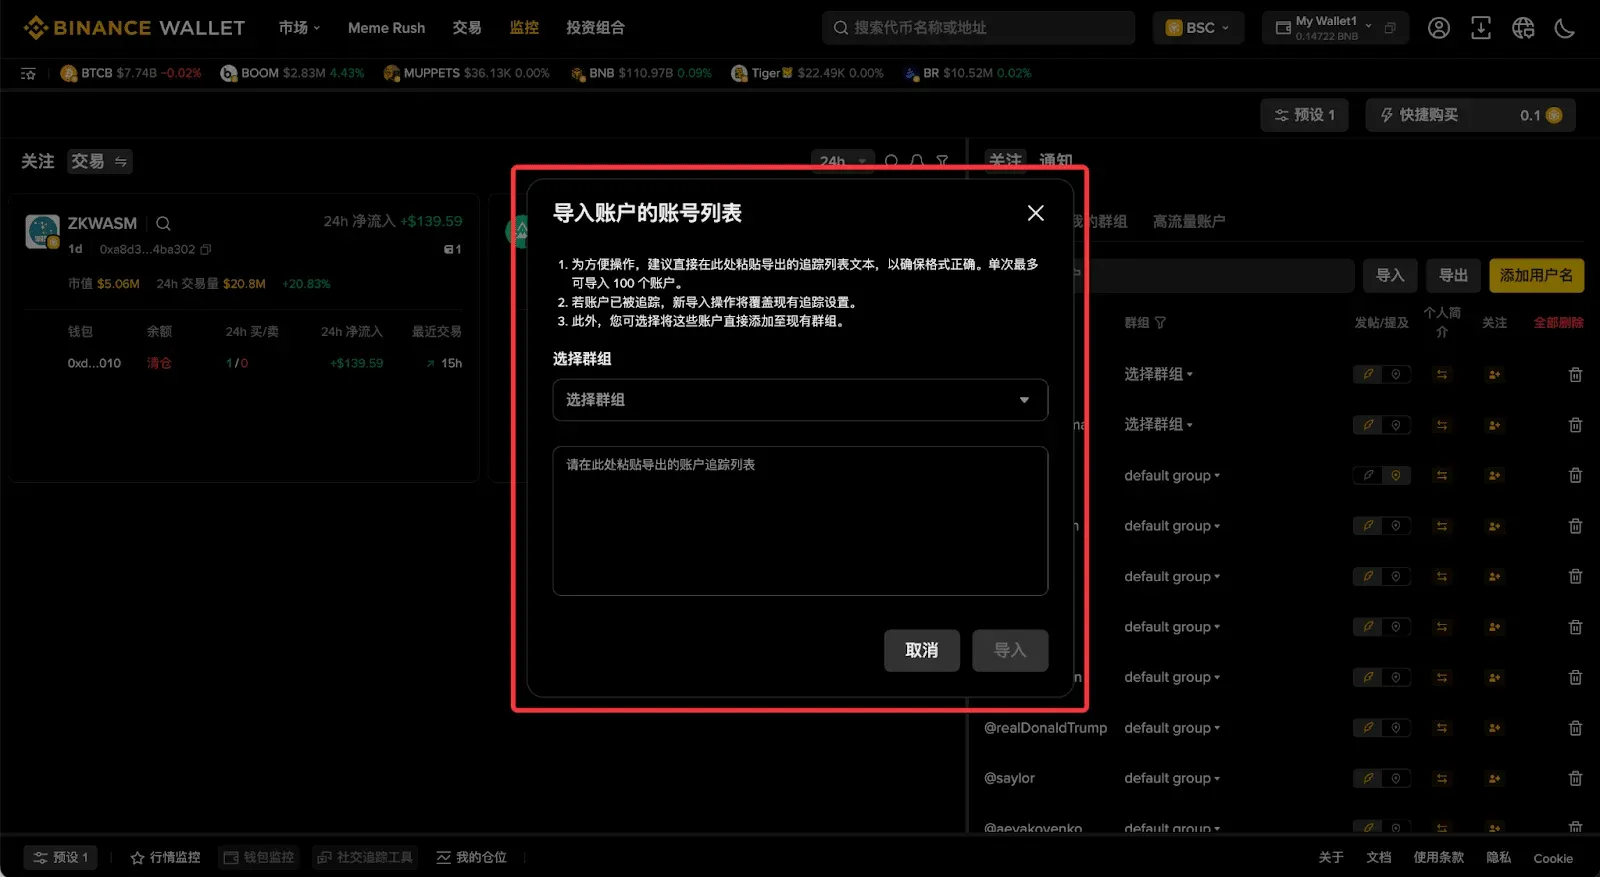
- The High‑Traffic Accounts feature lets you quickly follow active accounts, and the filter button helps reduce noise.
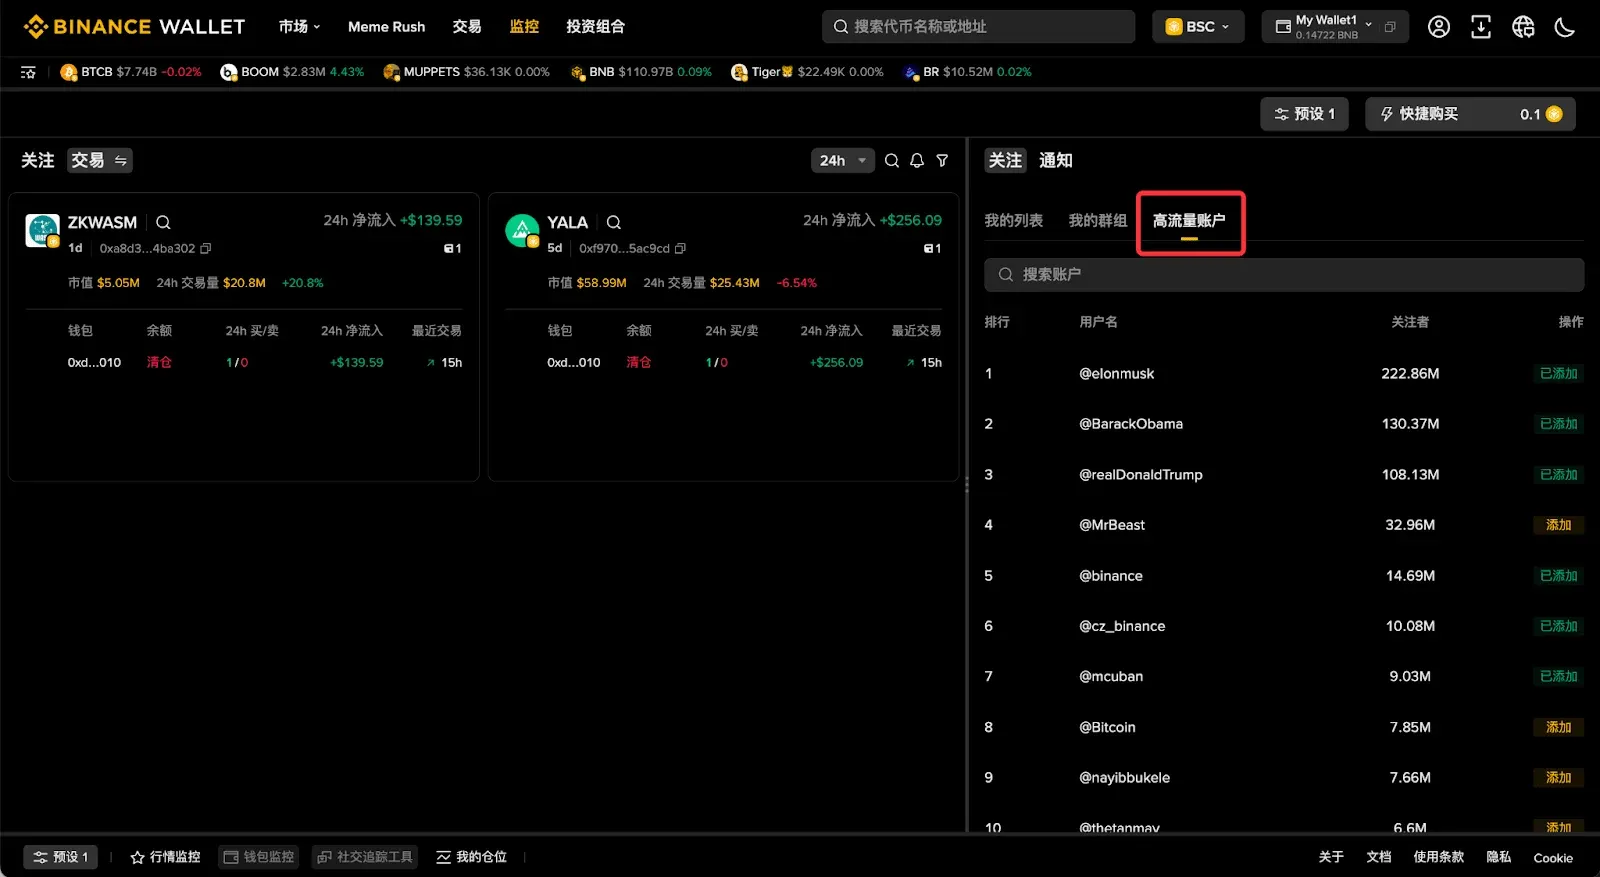
- Turn on notifications; relevant tweets or retweets will be pushed to you instantly.
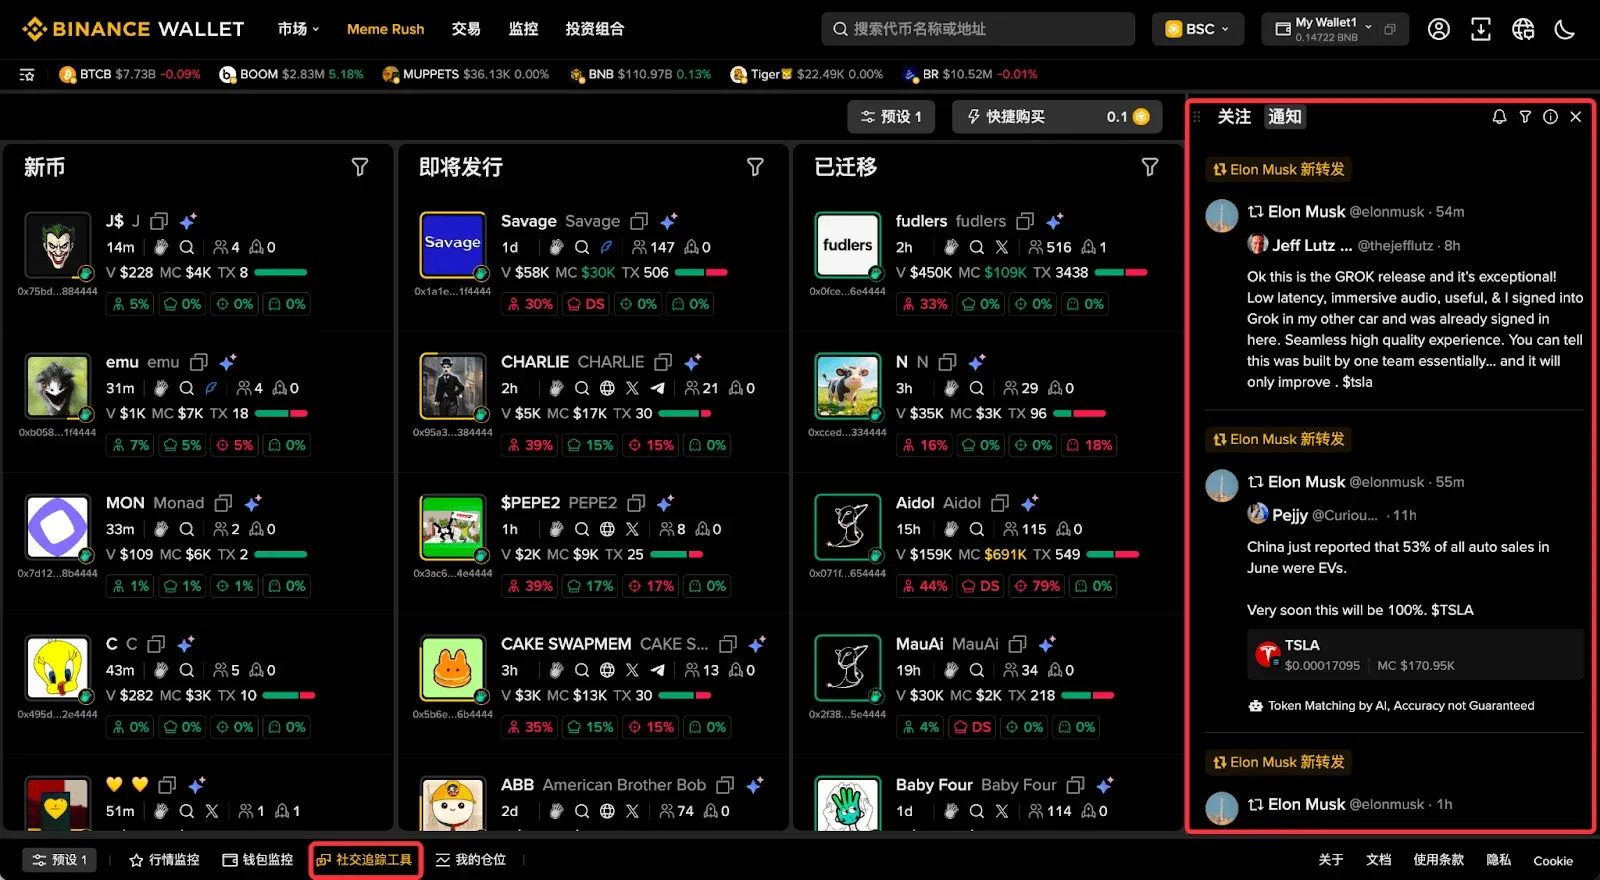
- As with address monitoring, the floating plugin can embed the feed into other pages for a “single‑pane” experience.
Step 6: Filter Leaderboards to Pinpoint Targets
- The [Hot] and [Alpha] tabs both provide global filtering and custom sorting, helping you quickly locate trading candidates.
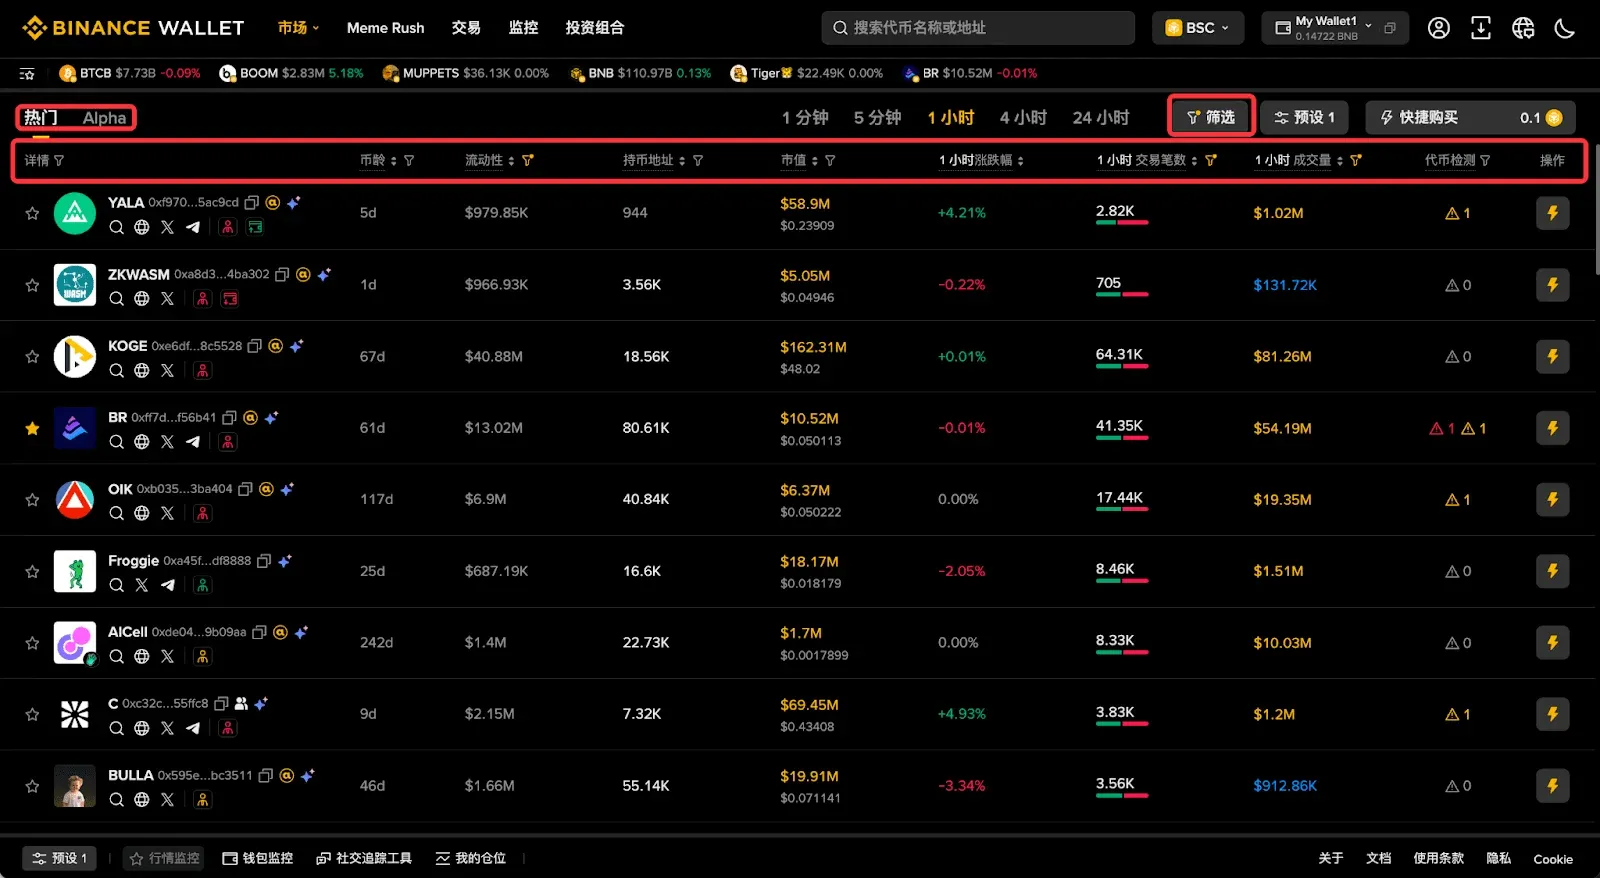
- The [Quick Buy] button in the upper‑right corner lets you pre‑set amount, slippage, etc., and execute a trade with a single click.
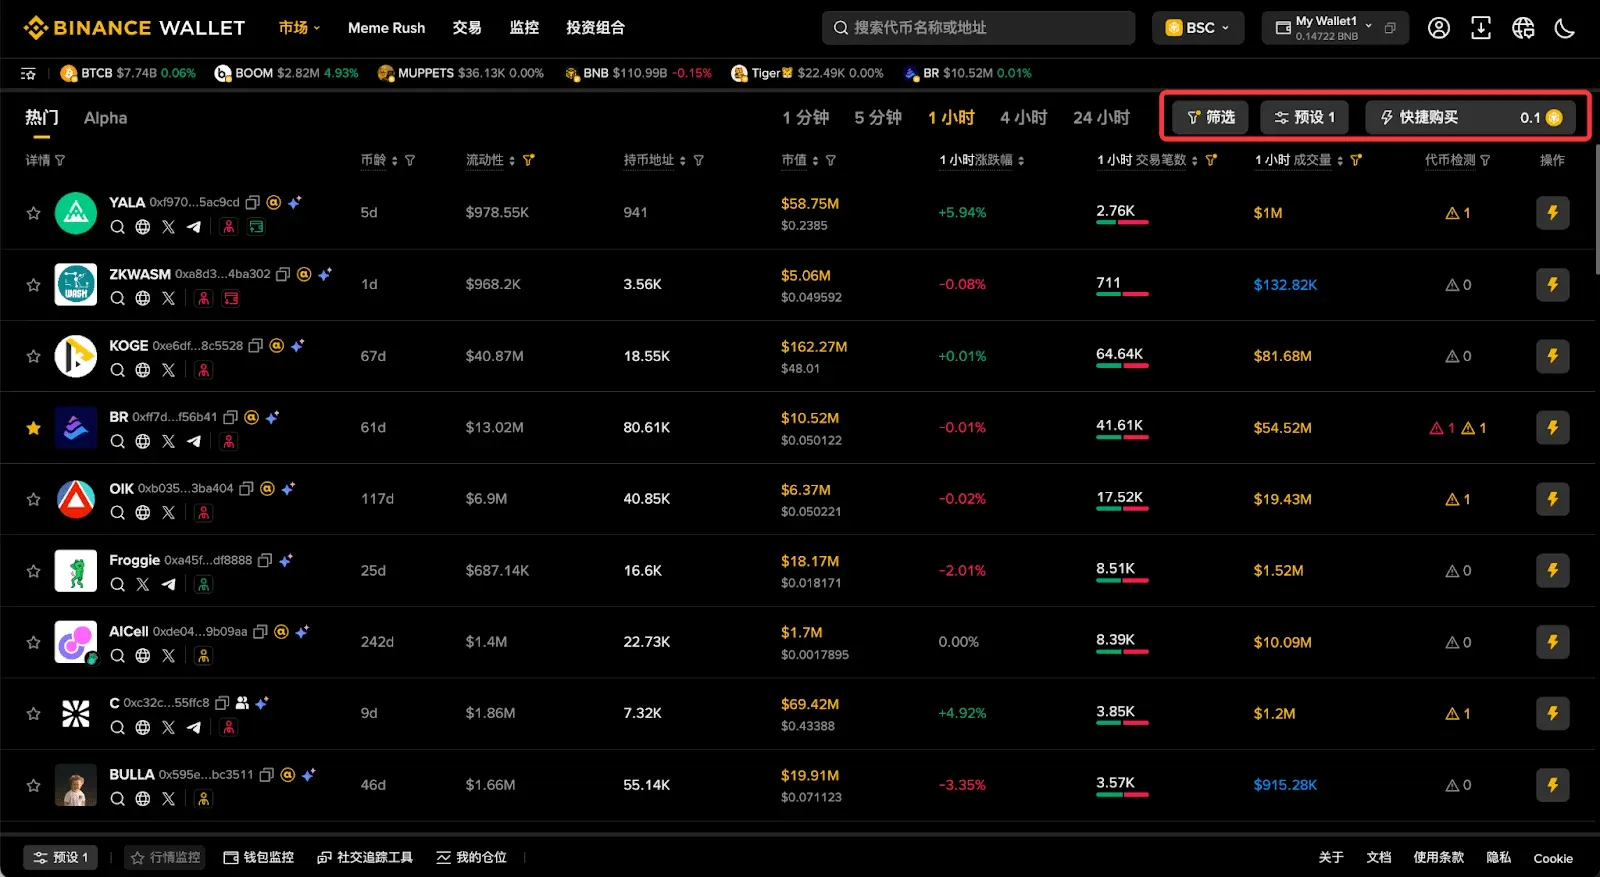
- If you prefer to act from another page, the floating plugin can be enabled there as well.
Step 7: Rapid On‑Chain Trading (Meme Rush Example)
- Open the [Meme Rush] page to see a continuously updated list of newly listed coins on the internal market.
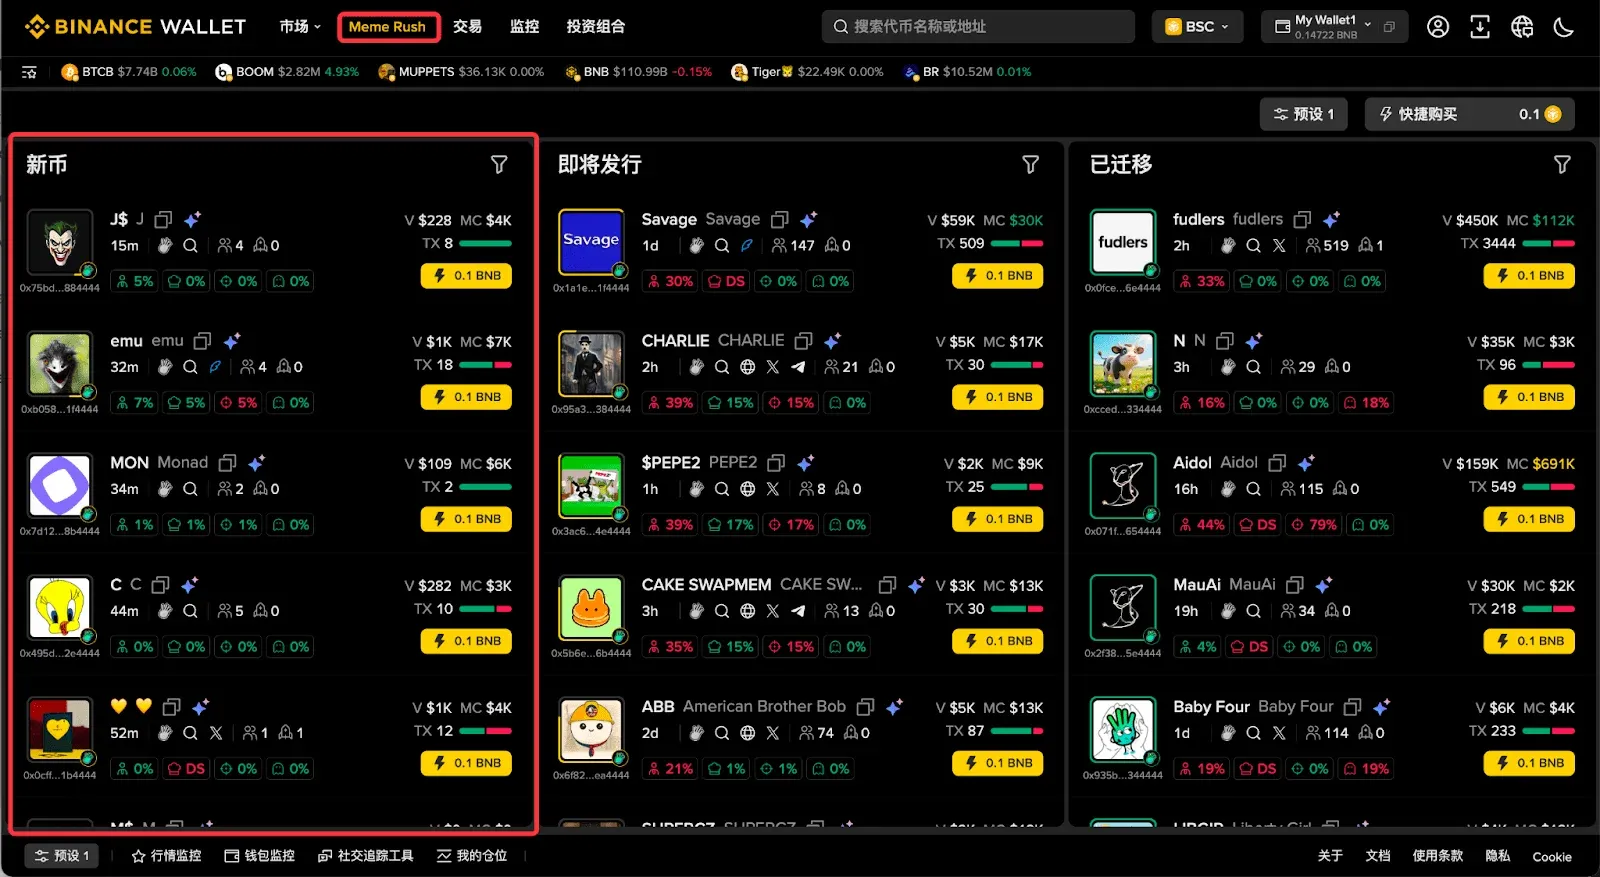
- Use the built‑in filter to perform an advanced search, select your target, then click [Quick Buy] to set the purchase amount.
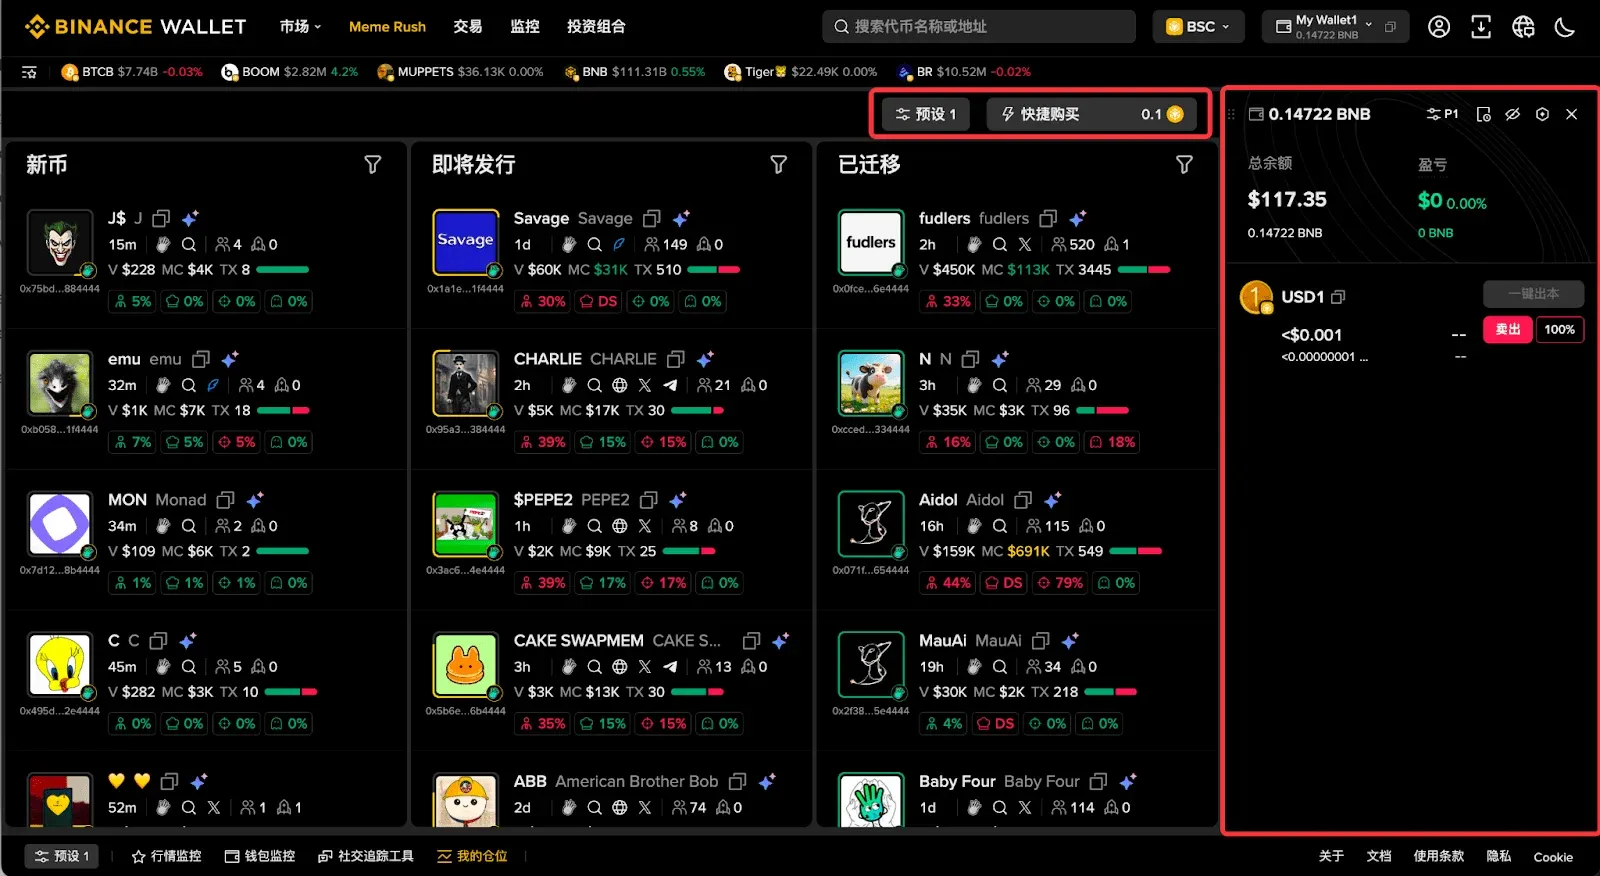
- Open the My Positions floating plugin, pin it to the side of the screen, and you can instantly buy or sell the new token without leaving the page.
---
Common Issues When Connecting the Wallet Plugin
Binance Wallet (Web) supports connection to mnemonic‑ or private‑key‑based wallets via the Binance Wallet Plugin, enabling on‑chain transactions.
1️⃣ Preparations Before Connecting
- Download and install the Binance Wallet Plugin (version V1.1
💡 Register on Binance with referral code B2345 for the maximum trading fee discount. See Binance complete guide.


