
Binance is the world’s largest cryptocurrency exchange, supporting more than 600 assets and handling daily trading volumes exceeding $200 billion. After completing account registration and KYC verification on Binance, you can exchange USDT for Bitcoin (BTC) via P2P or spot markets in roughly one hour, and withdraw at any time.
In this article we systematically walk mainland Chinese users (and, by extension, any global user) through the entire process—from downloading the Binance client, completing account registration and identity verification, to quickly swapping USDT for Bitcoin via P2P or spot channels. Screenshots are provided to help you, on a compliant and secure basis, complete funding, buying, and flexible withdrawals efficiently. Continue reading for the details.

Full Tutorial: Registering on Binance, Completing KYC, and Buying / Selling Bitcoin (BTC)
Mainland Chinese users need a reliable VPN/Proxy tool to access the platform in a compliant manner. The exchange now supports mainland ID‑card KYC; from 2025 onward KYC will be mandatory, and users who have not completed verification are limited to a daily withdrawal cap of 0.06 BTC.
Step 1 – Create a Binance Account
- Download and install the Binance App (official download: <https://www.bitaigen.com/binance/download>). Open the app and go to the Register / Login screen.
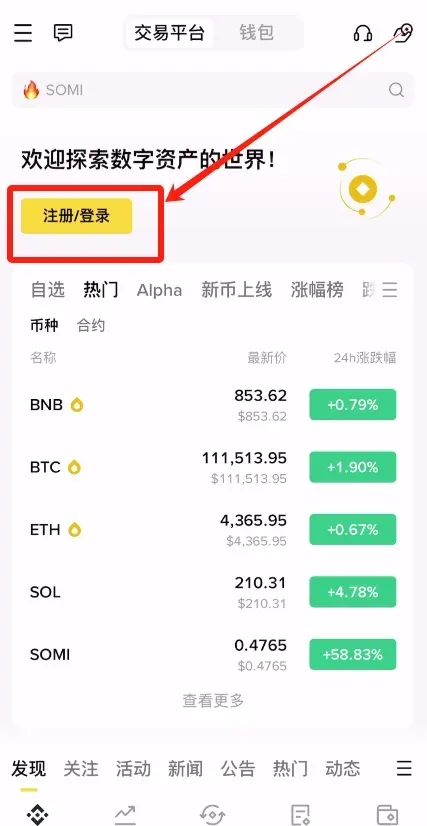
- Tap Create Binance Account.
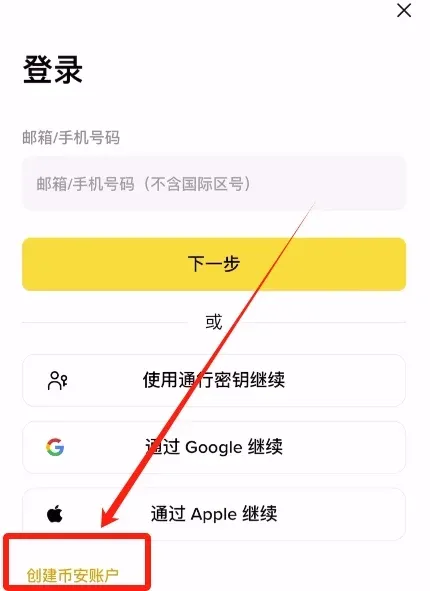
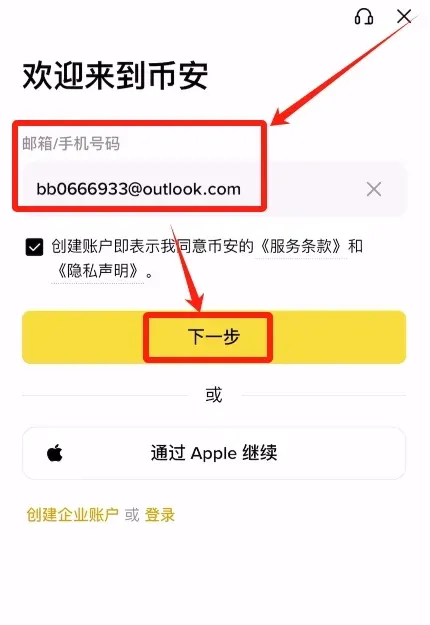
- Choose to register with an email address or a mobile number. For phone registration use the appropriate international country code (e.g., +86 for China, +1 for the United States, etc.).
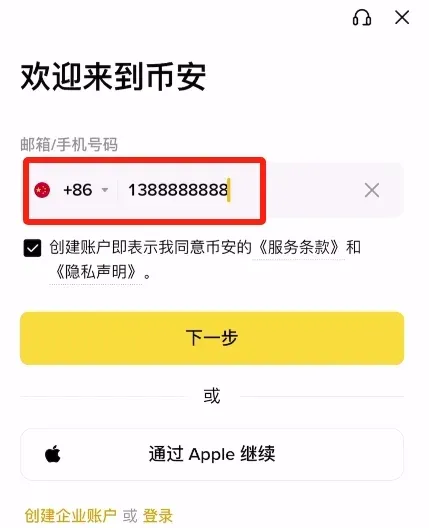
- It is recommended to use an overseas email provider (Outlook, Gmail). Domestic services such as QQ or 163 are also accepted. After entering the address, click Next.
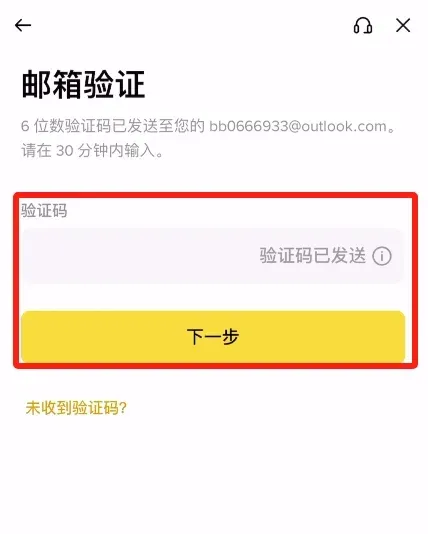
- Binance will send a verification code to the mailbox; retrieve it and fill it in.
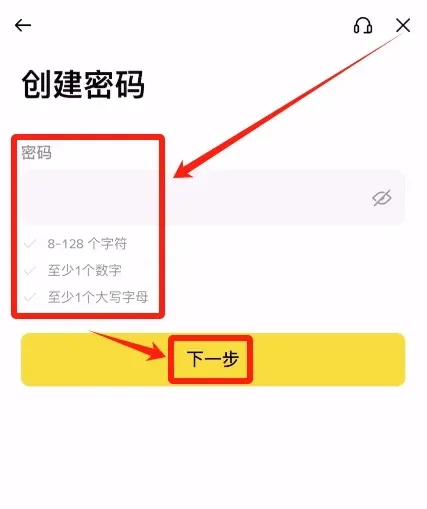
- Set a password that is at least 8 characters long and includes both numbers and uppercase letters, then click Next.
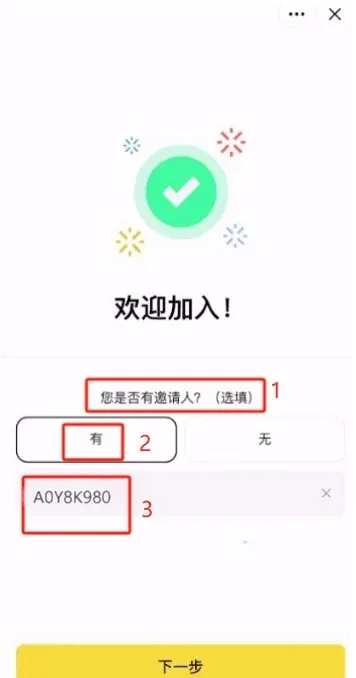
- After successful registration the system will ask whether you have an inviter. Select “Yes” and enter the invitation code `B2345`; you will enjoy a permanent 20 % fee discount on future trades.
- Completion automatically redirects you to the KYC (Know‑Your‑Customer) verification entry point.
Step 2 – Identity Verification (KYC)
Starting in 2025, KYC is mandatory; users who have not completed verification cannot trade large amounts or withdraw funds. The verification workflow includes personal‑information entry, document upload, and facial‑recognition, typically completed within a few hours to two days (AI‑accelerated).
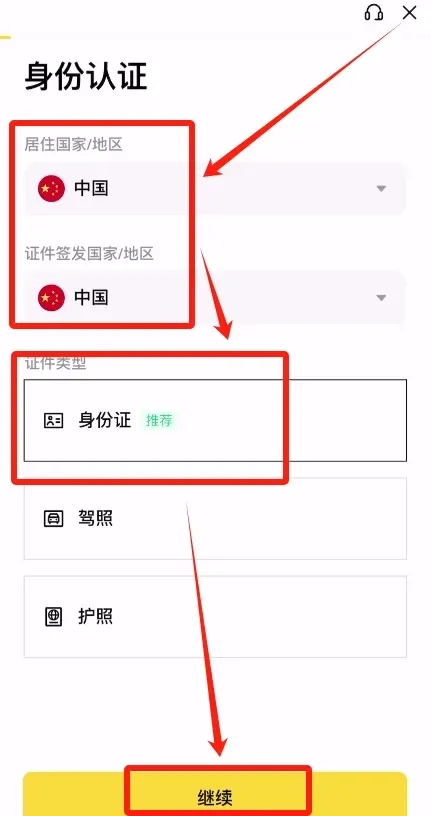
- On both the Residence Country/Region and Document Issuing Country/Region fields, select China (or your actual country). Choose Identity Card as the document type, then click Continue.
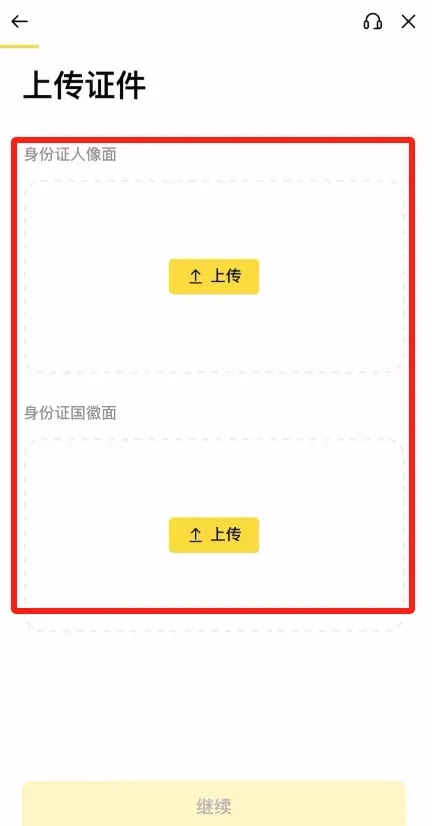
- Upload clear front‑ and back‑side photos of the ID card.
- Complete the facial‑recognition step (blink, turn head, etc.).

- Verify that the displayed name, nationality, date of birth and other details are correct, then submit.
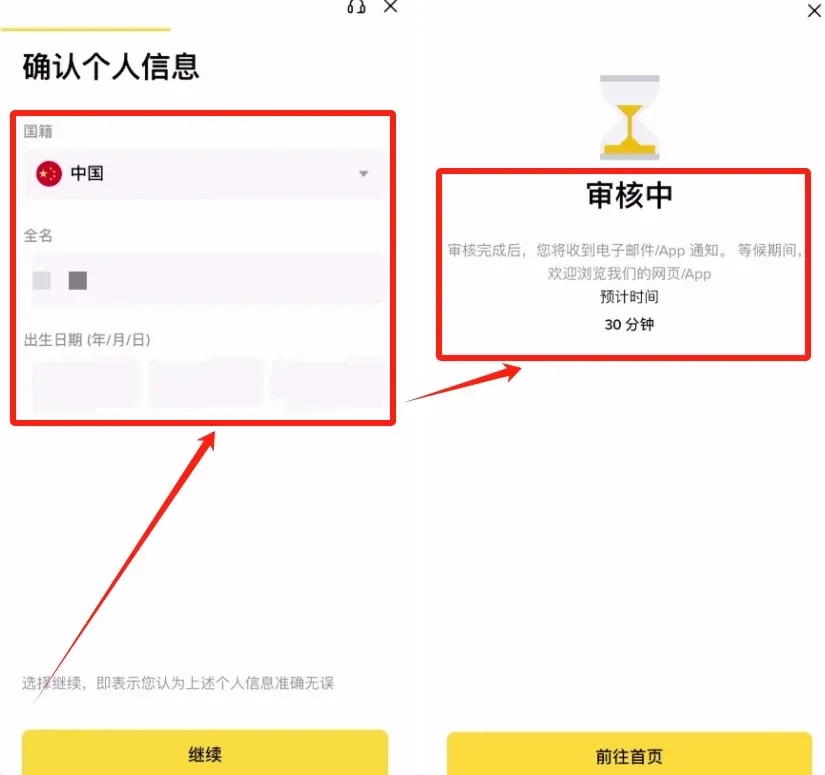
- Tap Submit and wait for an in‑app or email notification about the review result. Do not submit repeatedly.
Common Issues
- Reasons for failure: blurry photos, mismatched information.
- Review time: 1‑3 days during peak periods; you can contact live‑chat support to expedite.
Step 3 – Funding Your Account (Deposits)
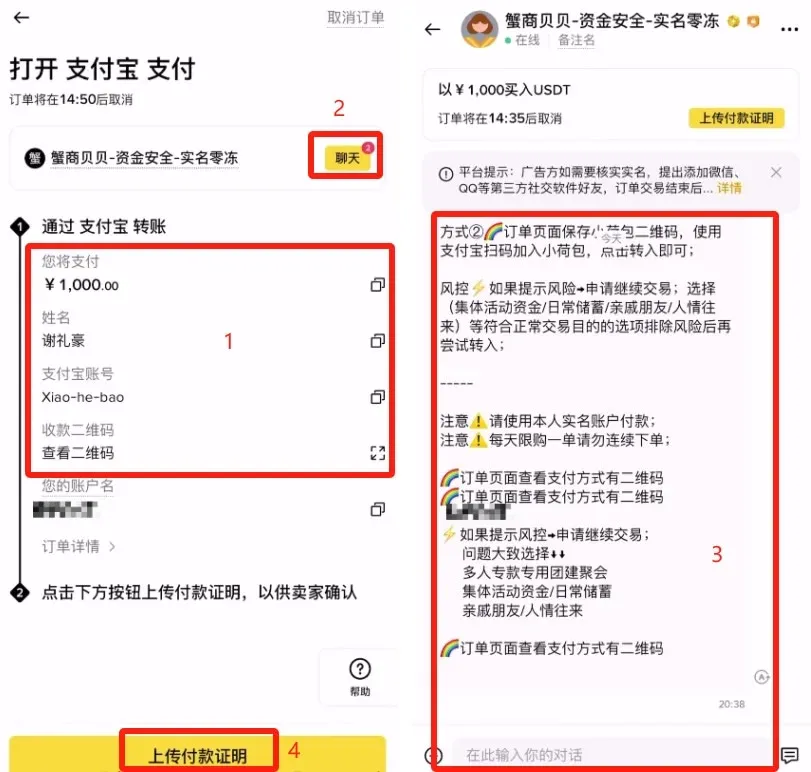
Once KYC is finished, purchase USDT with fiat (e.g., USD) and then convert it to BTC. The minimum deposit is equivalent to $7 USD (≈ 50 CNY). For most users the P2P (formerly C2C) marketplace is the most convenient way, allowing payments via bank transfer, SEPA, SWIFT, or credit/debit cards.
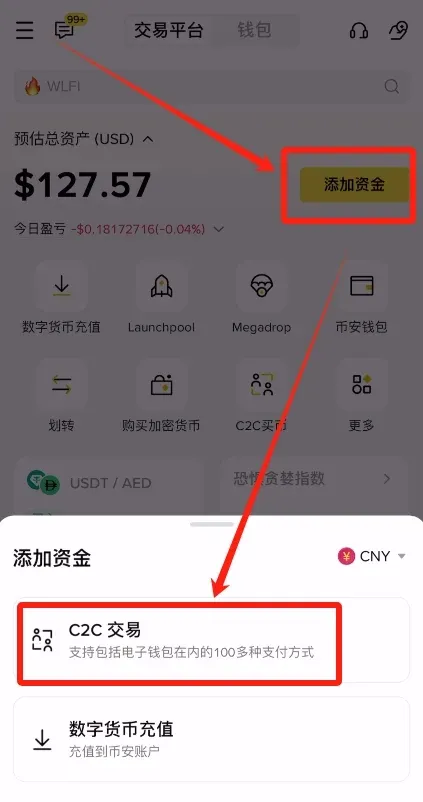
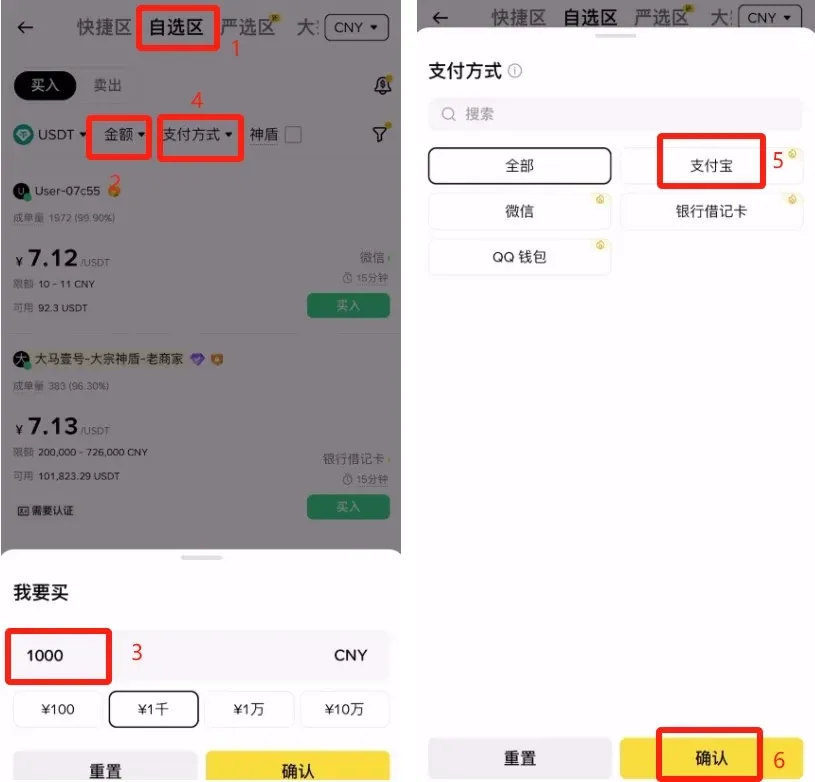
- Open the Binance APP, tap Add Funds → P2P Trading.
- The screen is divided into Quick, Custom, Premium, and Bulk sections.
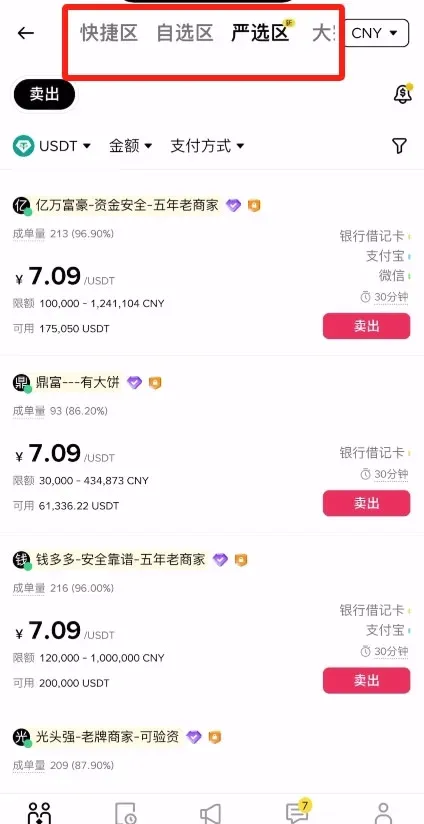
- Quick: Enter the amount you wish to buy; the system automatically matches you with the best‑priced seller.
- Custom: Manually filter sellers (e.g., those that accept only SEPA transfers).
- Premium: Shows only “Protected” offers backed by Binance’s escrow service.
- Bulk: Designed for large‑volume transactions.
- As an example using the Custom section, enter $1,000 USD worth of USDT, select Bank Transfer (SEPA) as the payment method, tick the Protected option, then click Confirm.
- After choosing a seller, open their profile to inspect trade volume, completion rate, and account age (recommended ≥ 6 months). When satisfied, tap Buy.
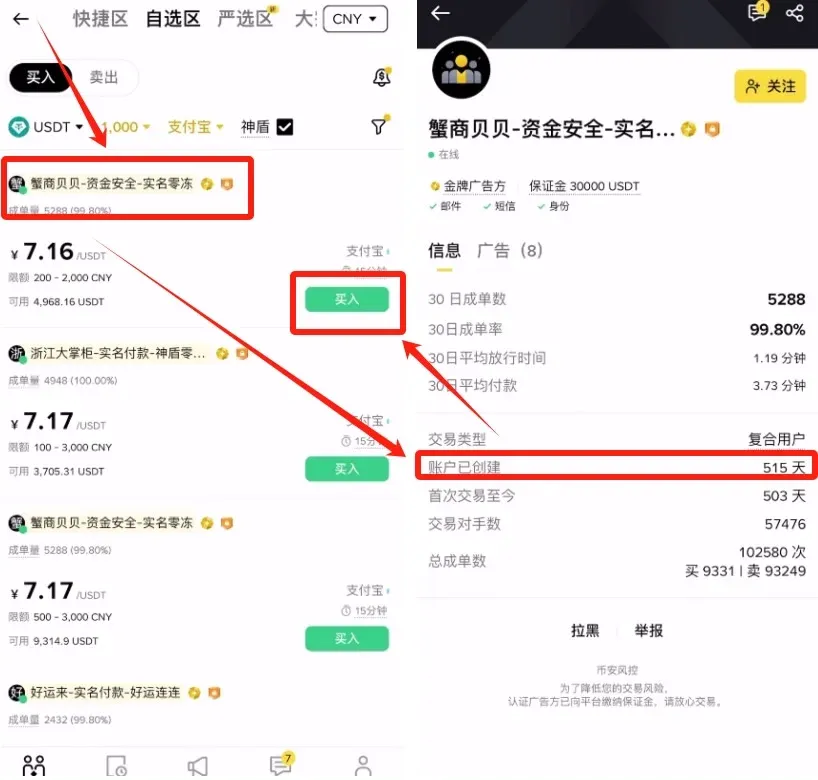
- Input the exact purchase amount, double‑check any seller requirements (e.g., “real‑name payment”, “use the provided reference”), then click Place Order.
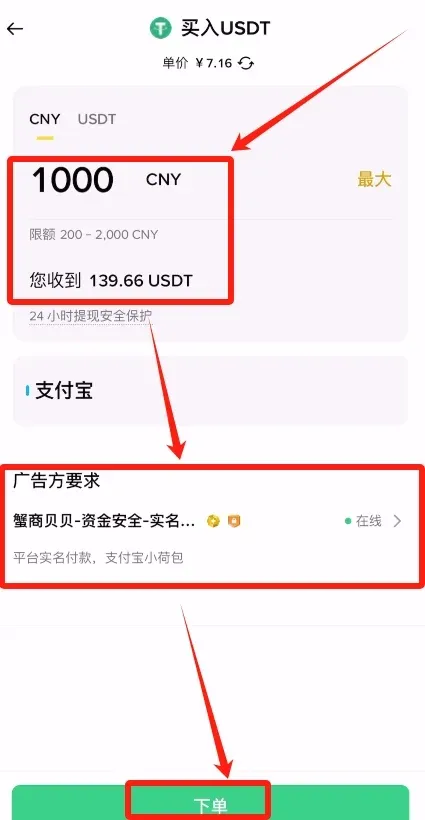
- Once the order is placed, the app shows the seller’s bank account details. Follow the seller’s instructions to complete the transfer, then upload the payment proof in the Chat window. After the seller confirms receipt, the USDT will be released to your Binance wallet.
Other Funding Options
- Instant Buy: Use a debit/credit card; fees range from 1 %‑3 %, and funds arrive instantly.
- On‑Chain Transfer: Send USDT from an external wallet; we recommend the TRC‑20 network for low fees, and always test with a small amount first.
Tip: A large first‑time deposit may trigger your bank’s risk controls. Be prepared to provide the transaction contract or order details to unblock the transfer.
Step 4 – Buying Bitcoin (BTC)
Spot trading is the most straightforward method; the standard taker fee is 0.1 % (holding BNB reduces it by 25 %).
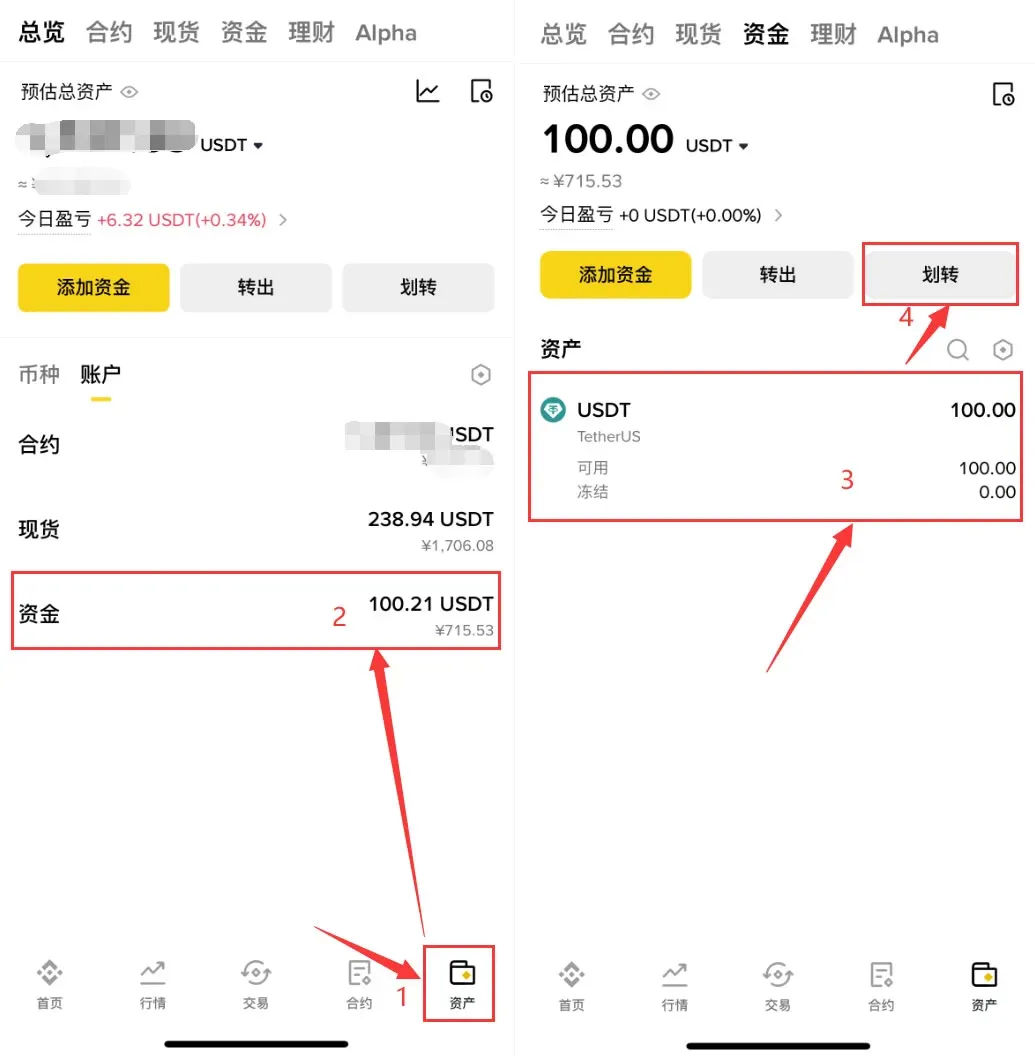
- Go to Wallet → Overview, then transfer USDT from the Funding Wallet to the Spot Wallet.
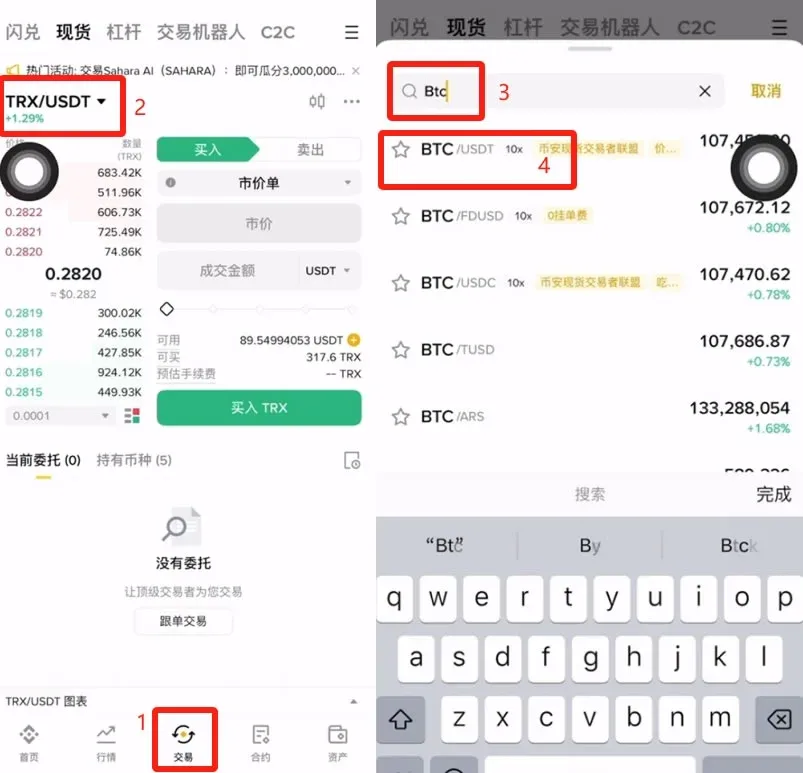
- Tap the bottom Trade button, search for “BTC”, and select the BTC/USDT pair.
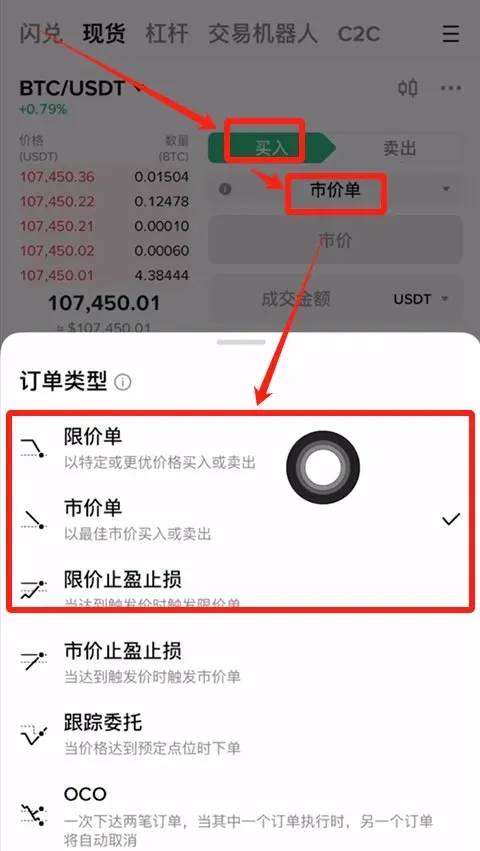
- Choose an order type: Market (executed instantly) or Limit (set your desired price).
- Limit order example: If the current price is 107,473 USDT, and you wish to buy at 107,000 USDT, type 107,000 into the price field, specify the amount or total spend, then click Buy BTC.
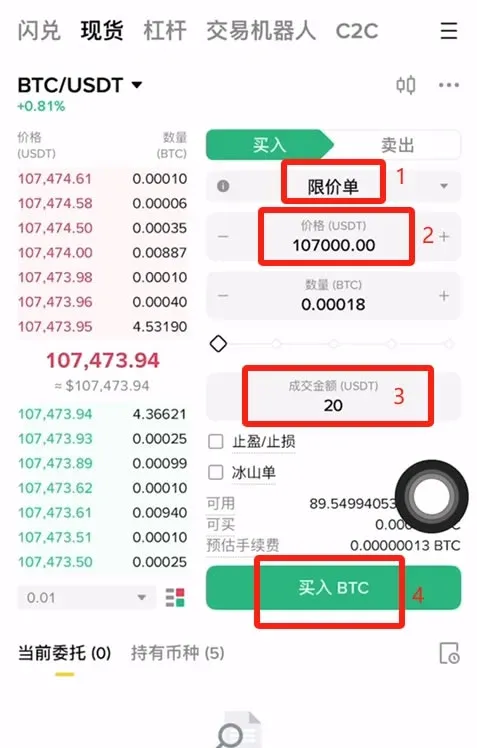
- For immediate execution, select Market, enter the amount you want to spend, and press Buy BTC.
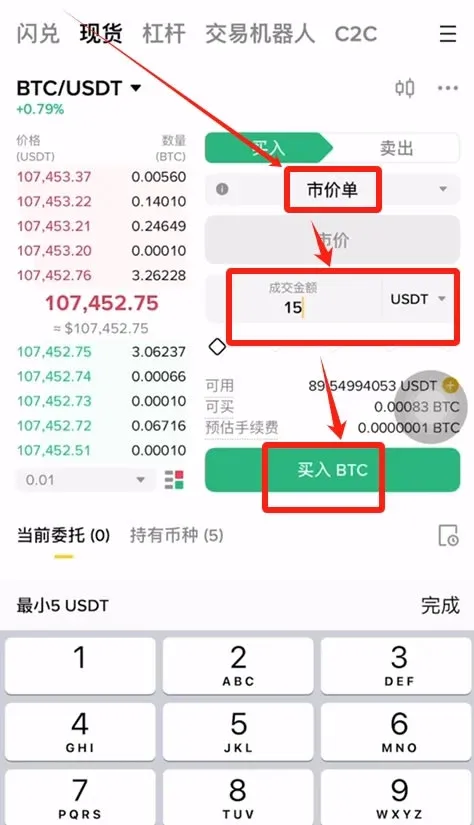
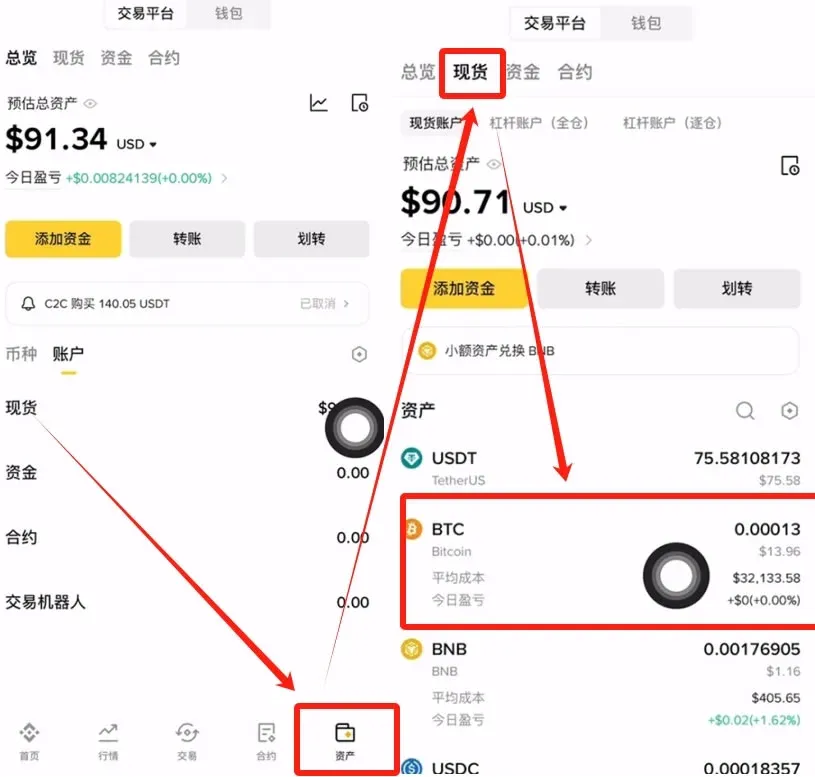
- After the trade completes, return to the Wallet page; the Spot Wallet will now display your newly acquired Bitcoin.
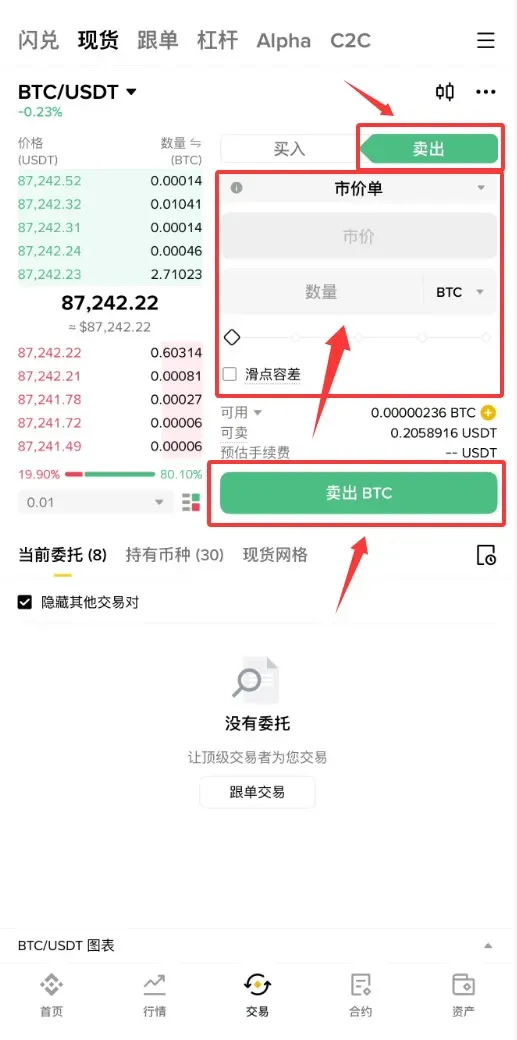
Step 5 – Selling Bitcoin (BTC)
The cash‑out flow is BTC → USDT → P2P fiat withdrawal.
5.1 Spot Sale
- Navigate to Spot → BTC/USDT.
- Choose Market or Limit sell, enter the amount you wish to sell, and tap Sell BTC. The USDT will be credited back to your spot wallet.
5.2 P2P Cash‑Out (Fiat Withdrawal)
- In the Binance APP, tap Add Funds → P2P Trading.


