
 Bitaigen Research
 OKX Web3 Decentralized Wallet – A Complete Beginner’s Guide (2026)
As the crypto ecosystem continues to evolve, owning a self‑custodied, multi‑chain digital wallet has become a basic requirement for most investors in 2026. Beyond its trading platform, OKX (formerly OKEx) has launched a Web3 Decentralized Wallet of the same name, enabling users to manage their assets on‑chain with full control. Below we cover why you might choose the OKX Web3 Wallet, the full account and KYC process, wallet creation and mnemonic backup, as well as common on‑chain operations, providing a systematic entry‑level guide.
In this article we outline the core advantages of the OKX Web3 Wallet and walk through the complete registration flow, helping newcomers achieve private‑key self‑custody, cross‑chain asset management, secure backup, and practical instructions for everyday tasks. Read on to get up and running with a safe decentralized wallet.
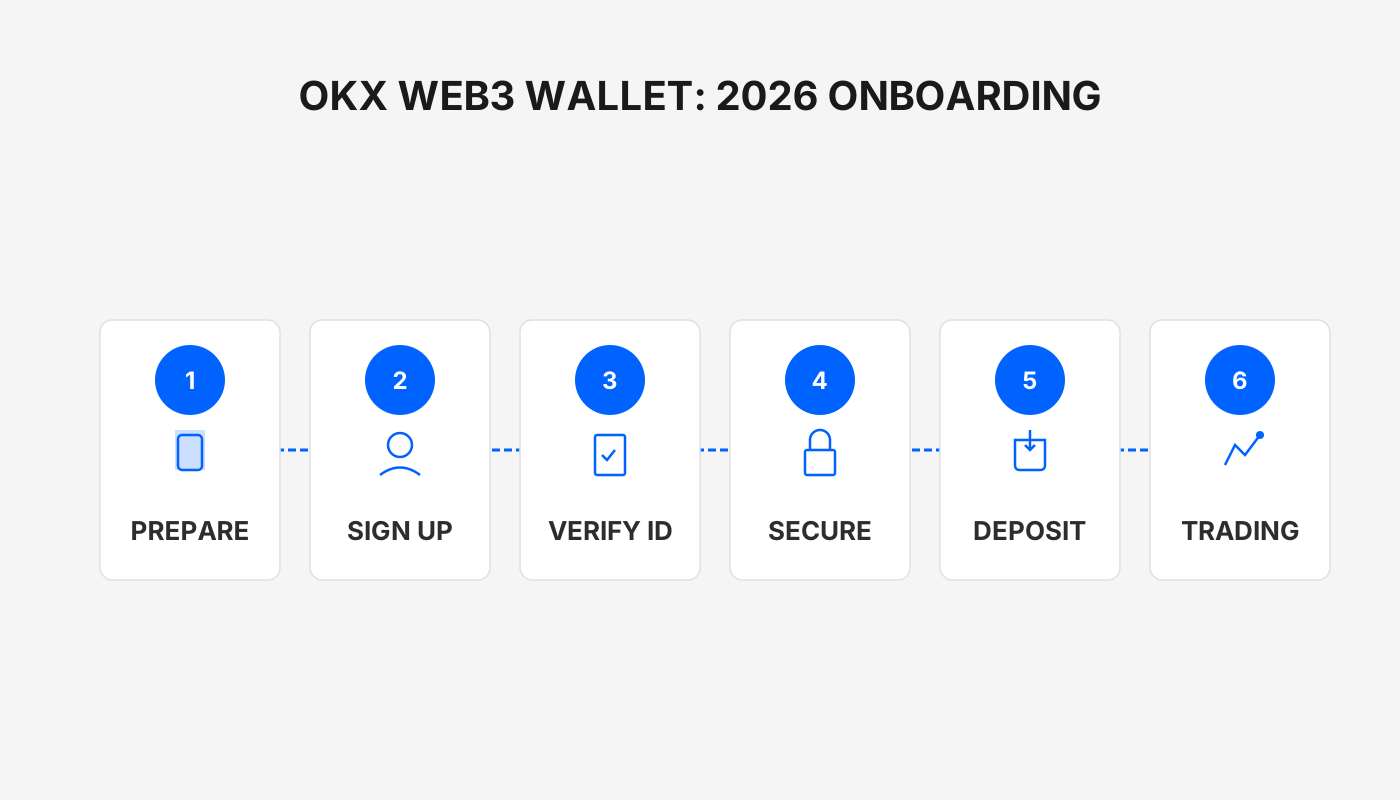
Why We Recommend the OKX Web3 Wallet?
Before you start the registration steps, it is essential to understand the core value proposition of the OKX Web3 Wallet. Unlike the custodial services offered by centralized exchanges, a Web3 wallet stores all private keys locally in the hands of the user, truly embodying the principle “not your keys, not your crypto”. The wallet offers the following benefits:
- Decentralized control – Assets are not subject to a single point of control by the platform, enhancing security.
- Multi‑chain compatibility – One login lets you manage assets on more than 20 major public blockchains.
- Built‑in DeFi and cross‑chain functions – Swaps, bridges, lending, and other services can be executed directly inside the wallet.
- Seamless exchange integration – Assets can be transferred with a single click, eliminating tedious withdrawal procedures.
Because of these features, the OKX Web3 Wallet has become the preferred tool for the majority of crypto users worldwide in 2026. Next, we will start from account registration and demonstrate step‑by‑step how to create and safely operate the wallet.
---
Detailed Steps to Register an OKX Account
- Download the official client
Follow the guide “How to Safely Download the Official OKX App? A Must‑Read Installation Guide for Mainland Users” for the correct download source.
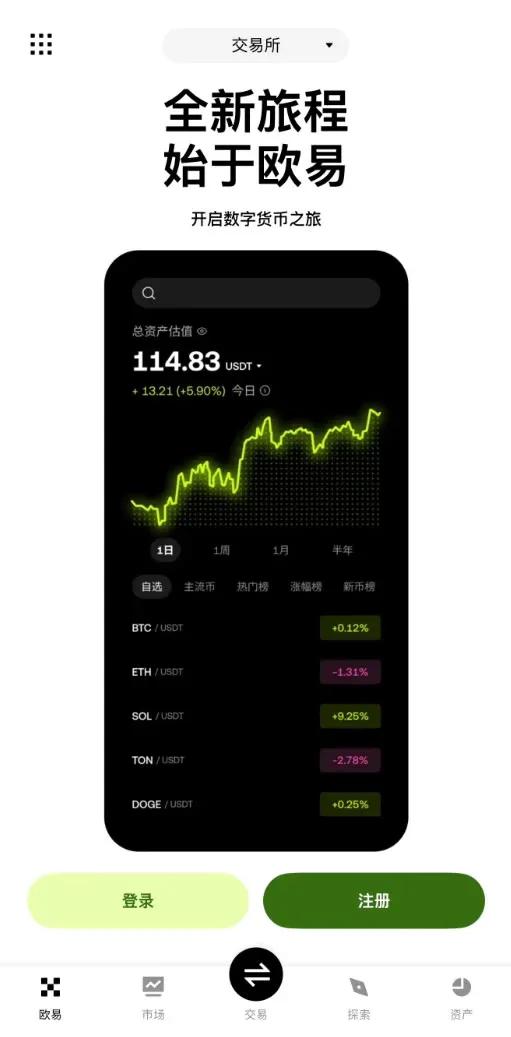
- Open the app and go to the registration page
Tap the Register button on the home screen.
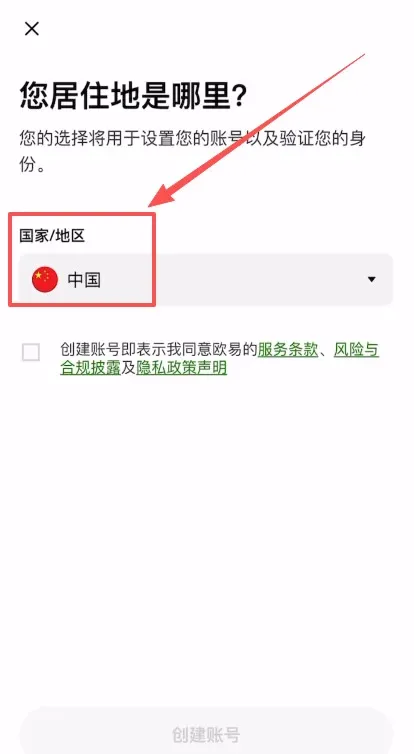
- Select your region
The system will prompt you to choose your country of residence; mainland Chinese users should select China.
- Read and tick the Terms of Service, then click Create Account.
- Enter your email address
Provide an email that can receive messages reliably.
- Enter an invitation code
Input the code `B2345` to enjoy a permanent 20 % fee discount on subsequent trades.
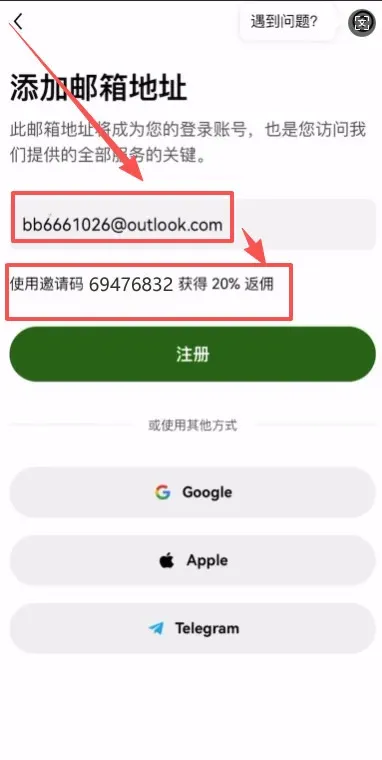
- Submit the registration; the system will send a verification code to your email.
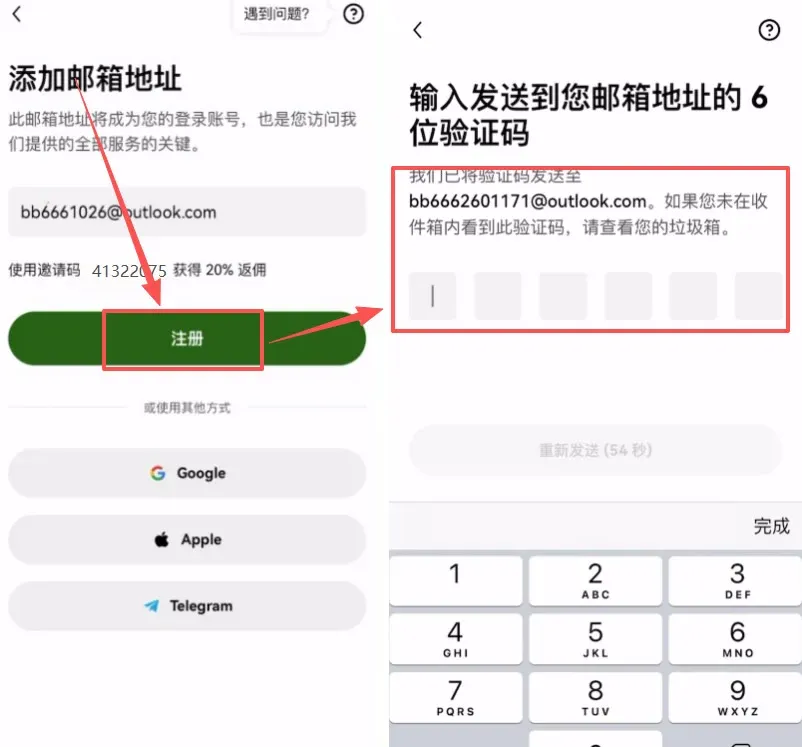
- Complete email verification by entering the received code and continue.
- Bind a mobile number (Mainland Chinese phone numbers can be bound directly).
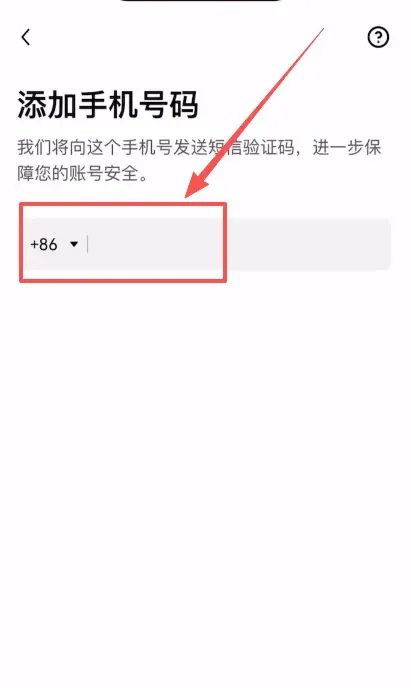
After completing the steps above, your account is registered. The app will automatically redirect you to the identity verification (KYC) page.
Note for U.S. users: Access to OKX services is provided through Binance.US for compliance with U.S. regulations; the global Binance platform is not available to U.S. residents.
---
Identity Verification (KYC) Process
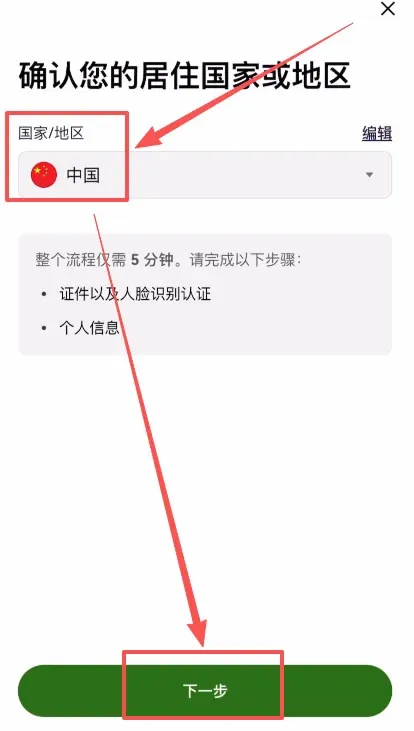
- Confirm your residence – make sure the country is still set to China.
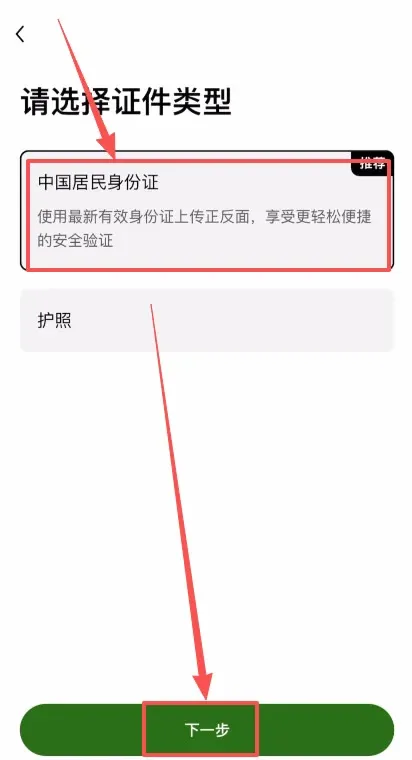
- Select document type – we recommend using a National ID Card; tap Next.
- Upload document photos – capture and upload the front and back of your ID card.
- Perform facial recognition – the system will ask you to complete a live face‑match. After submission, the review usually finishes within minutes to a few hours.
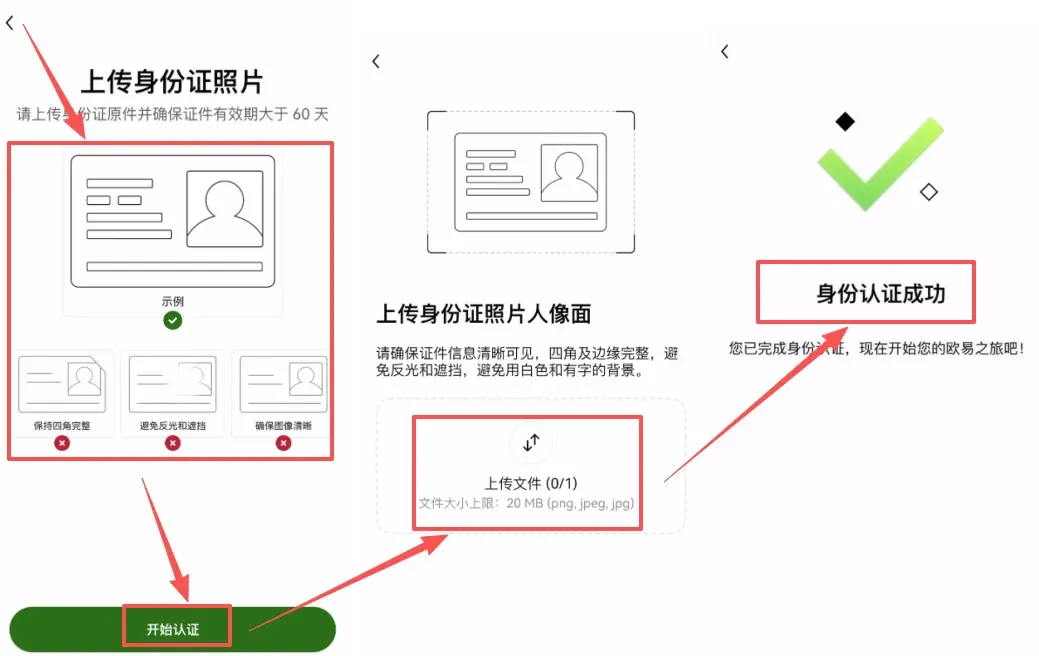
If the information you provide is genuine and the images are clear, the verification will most likely be approved, unlocking all OKX trading and wallet functionalities.
Tax reminder: Crypto gains may be taxable in your jurisdiction. Consult a local tax professional to ensure compliance.
---
Activating the OKX Web3 Wallet
Once KYC is finished, you can proceed to create your wallet:
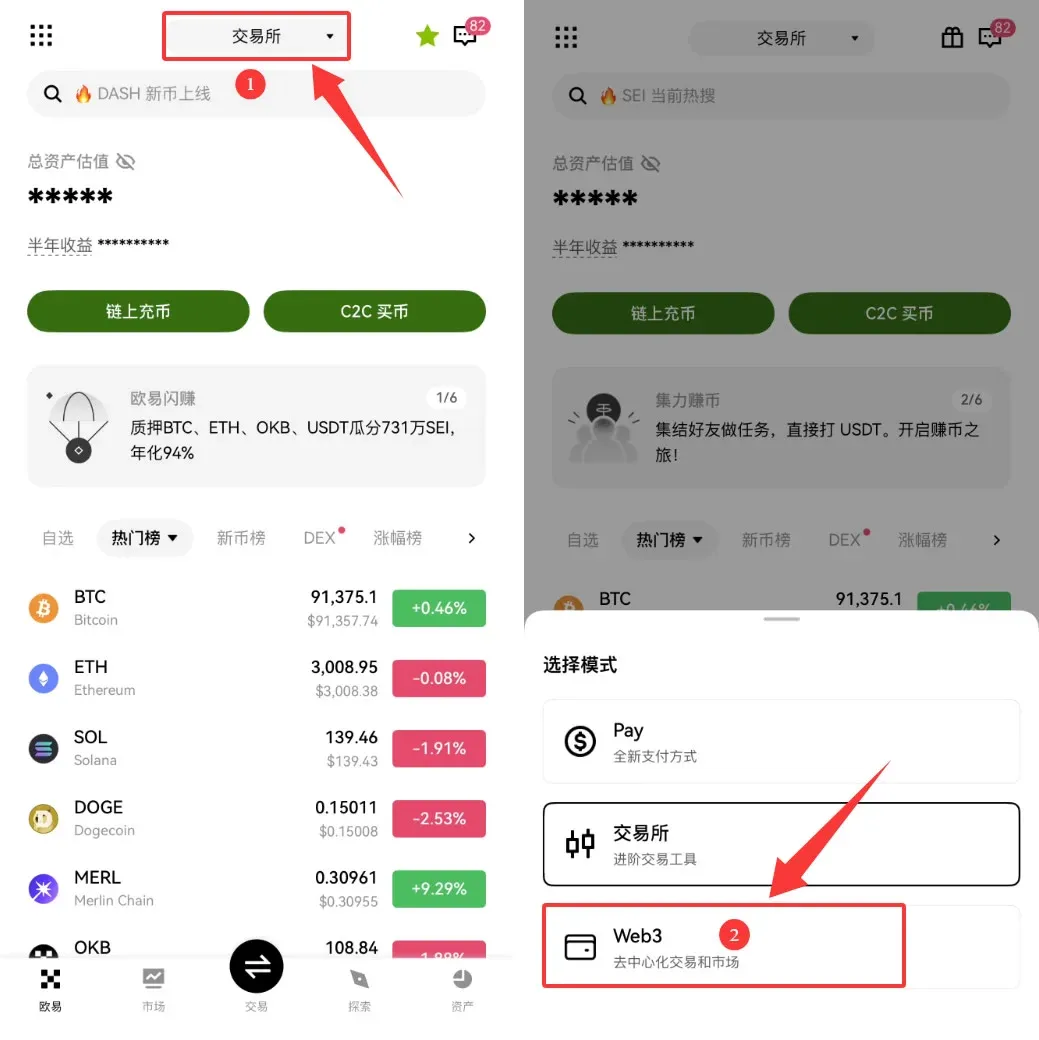
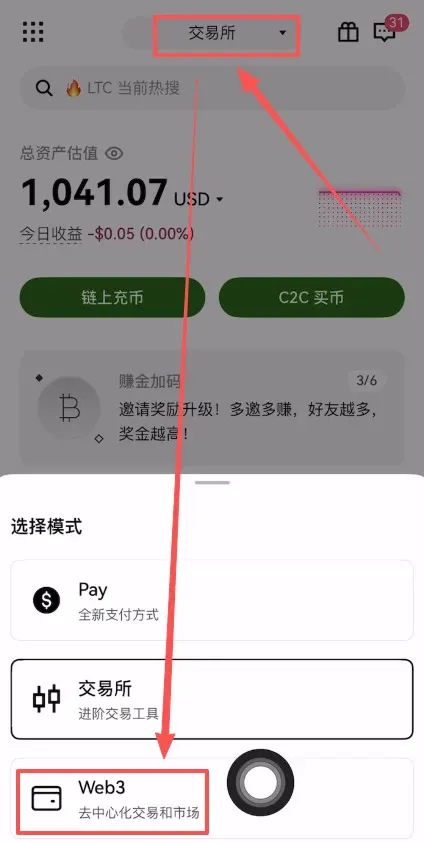
- Switch to the Web3 page – from the top navigation bar, tap Exchange → Web3.
- Initiate wallet creation – tap Create Wallet → Create Now.
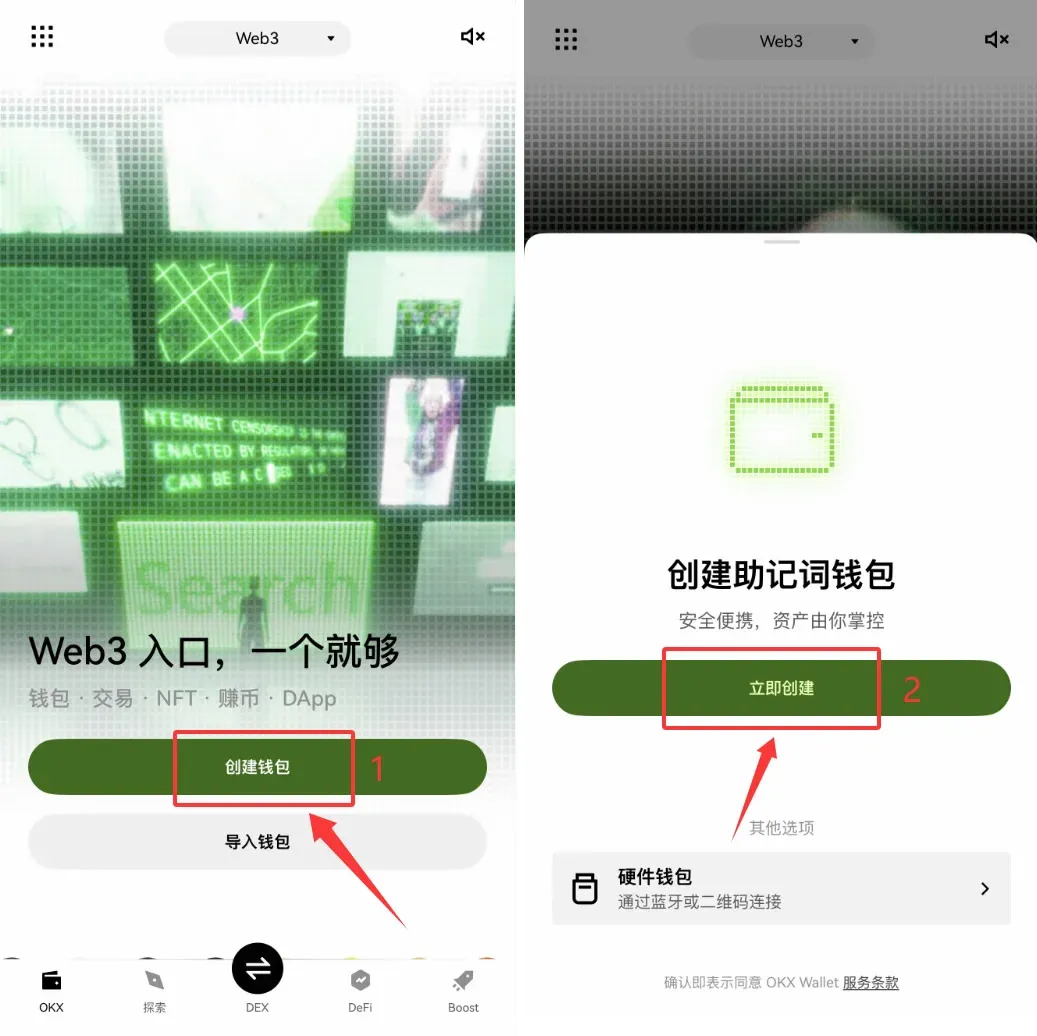
- Success confirmation – a pop‑up will confirm that the wallet has been created.
- Enter the backup flow – tap Manual Backup to start the mnemonic‑phrase backup.
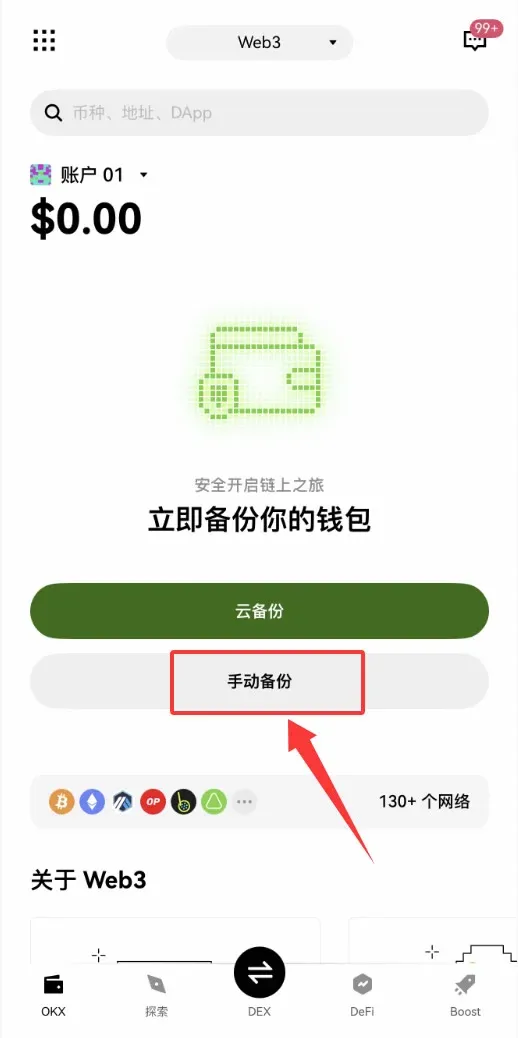
Important: After creating the wallet, you must back up the mnemonic immediately; otherwise you risk losing access to your assets permanently.
---
Full Mnemonic‑Phrase Backup Procedure
- Read the backup notice – the system displays why mnemonic backup is crucial.
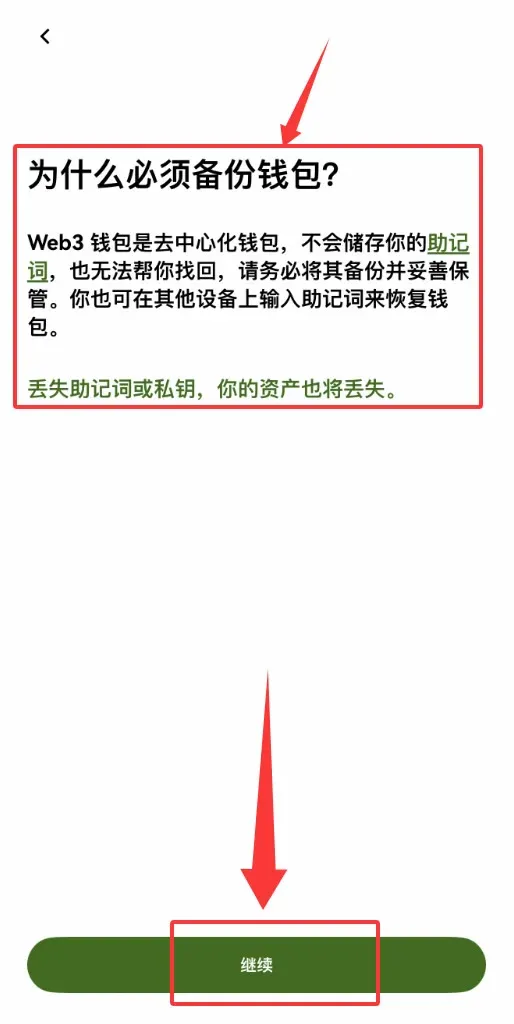
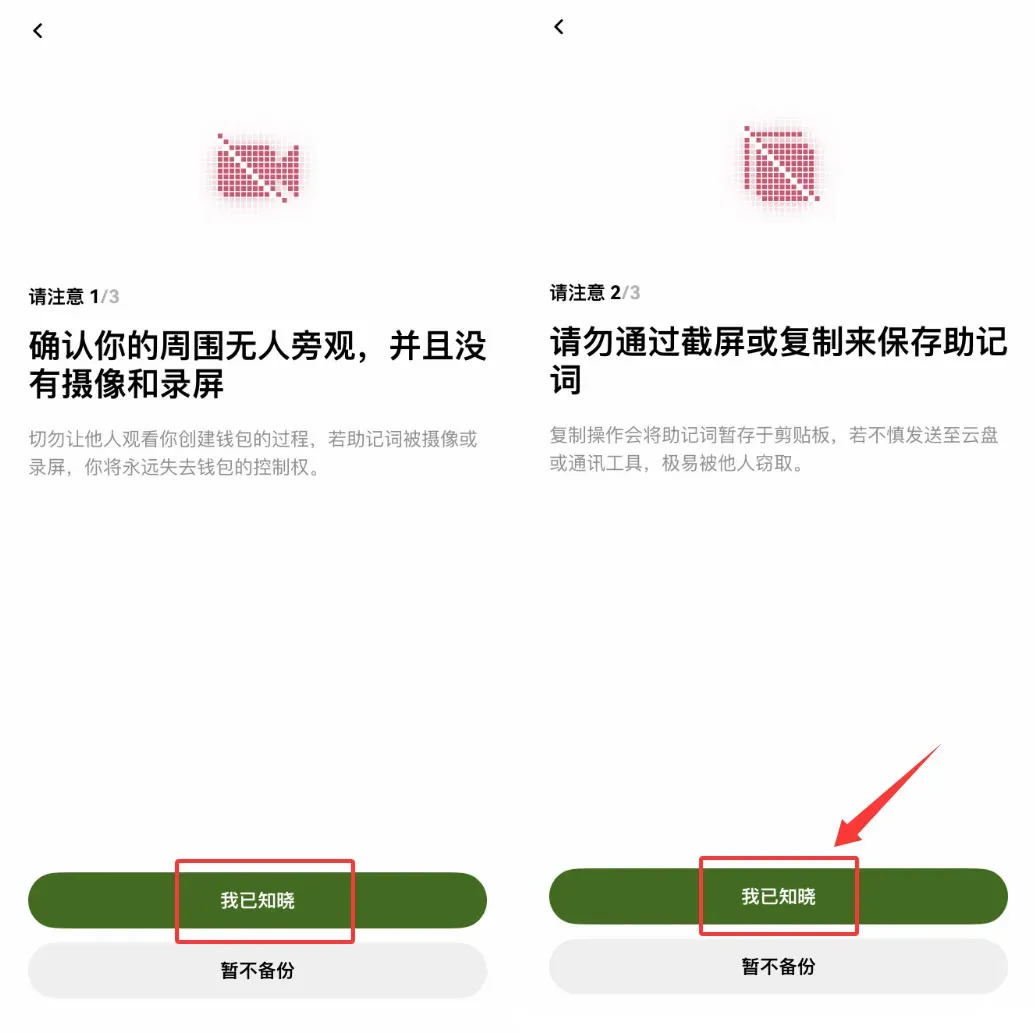
- Acknowledge understanding – tap I Understand in the dialog to continue.
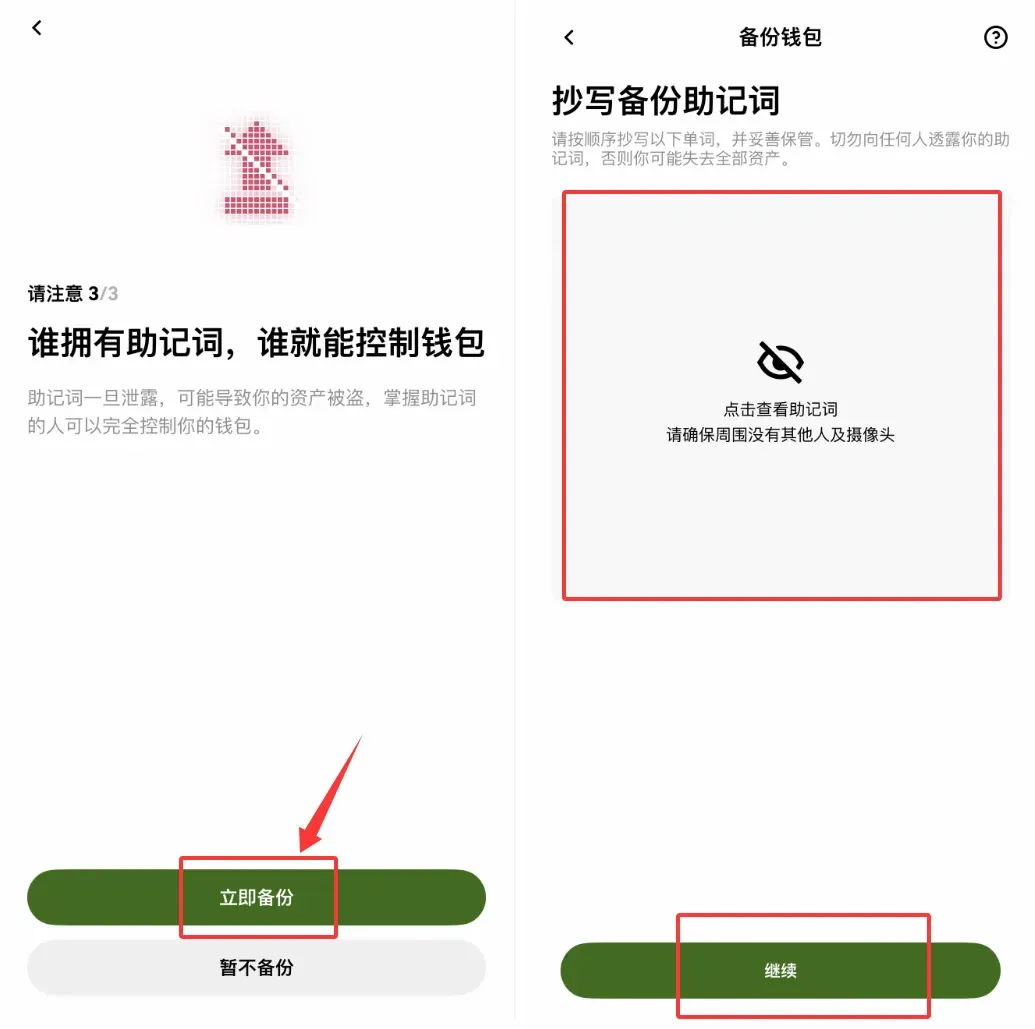
- View the mnemonic – tap Backup Now → View Mnemonic.
- Record the words – the screen will sequentially display twelve words. Write them down in order on a piece of paper.
- Store securely – do not photograph or keep a digital copy. Store the paper in a fire‑ and moisture‑proof environment.
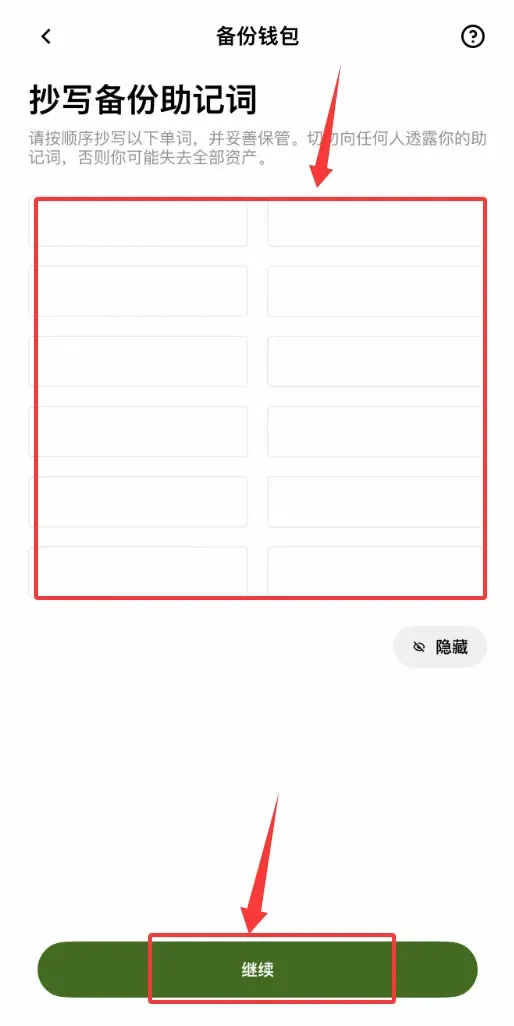
- Mnemonic verification – re‑enter the twelve words as prompted to confirm you have recorded them correctly.
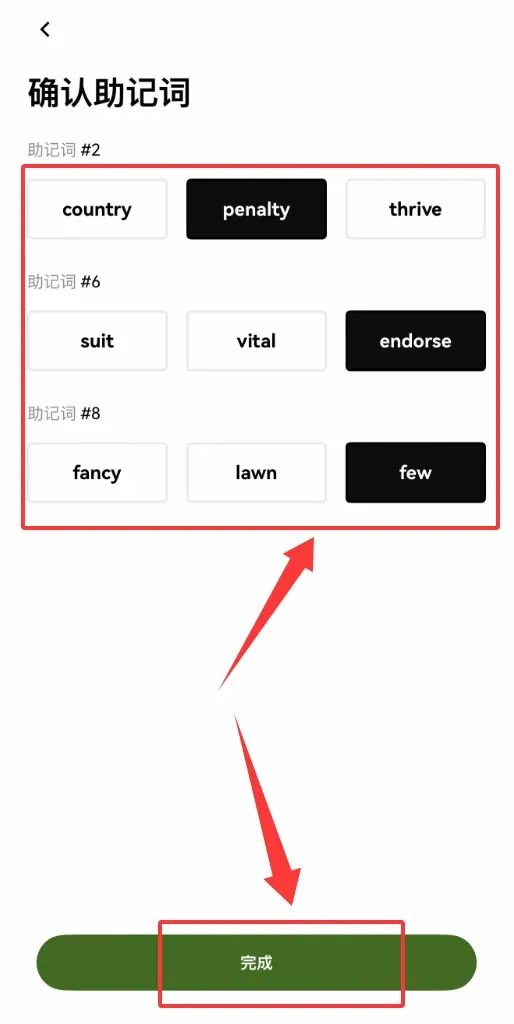
Once these steps are completed, your wallet is safely backed up. Remember: the mnemonic is the *only* recovery credential; loss of it means irreversible loss of funds.
---
Using the OKX Web Wallet on a PC (Browser Extension)
- Install the browser extension
Go to the Chrome Web Store and download from: https://basebiance.com/okex
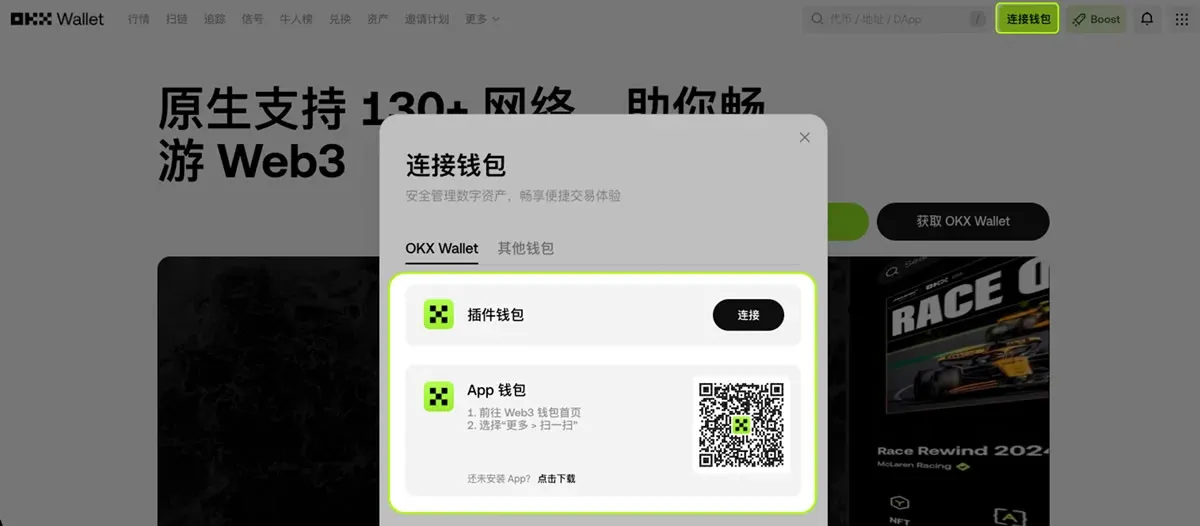
- Create or import a wallet
- First‑time users: click Create Wallet, set a login password, and follow the mnemonic‑backup flow described above.
- Existing users: import using your mnemonic or private key to manage assets directly from the browser.
Caution: The extension does not store your password or mnemonic; if you lose them, the platform cannot help you recover the wallet. The extension can hold up to 1,000 accounts, while the mobile app caps at 100 accounts (including created, imported, hardware, and watch‑only wallets).
---
Quick Access to View / Backup Mnemonic or Private Key
- Open the OKX Web3 Wallet and tap the Profile icon at the top‑left corner.
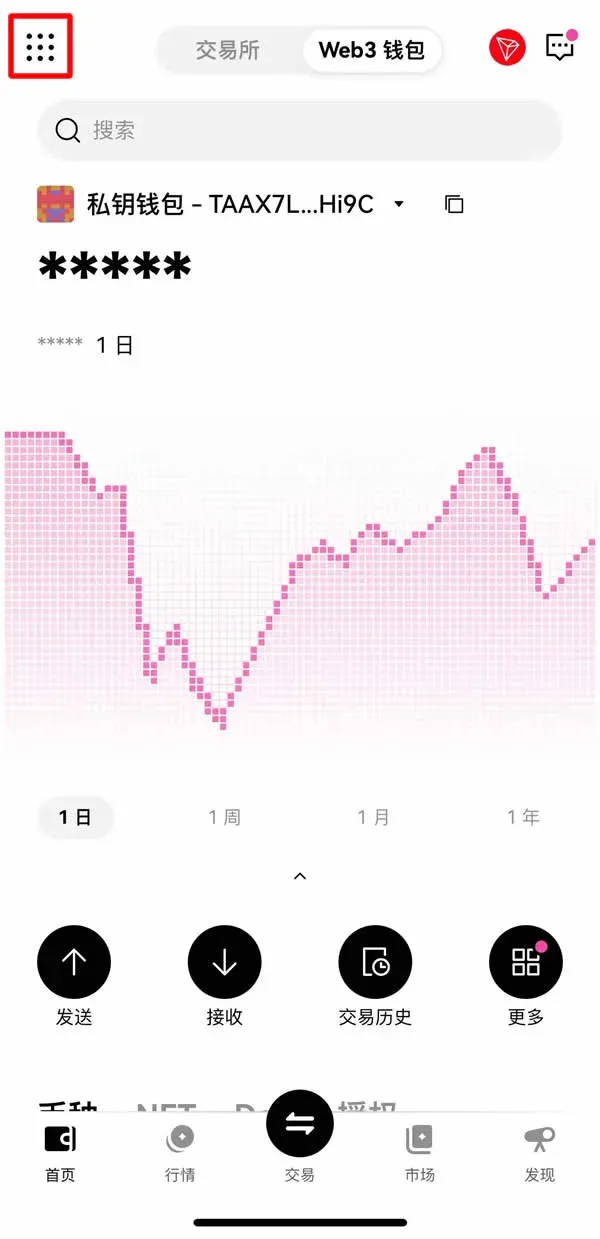
- In the pop‑up menu, select Wallet Backup.
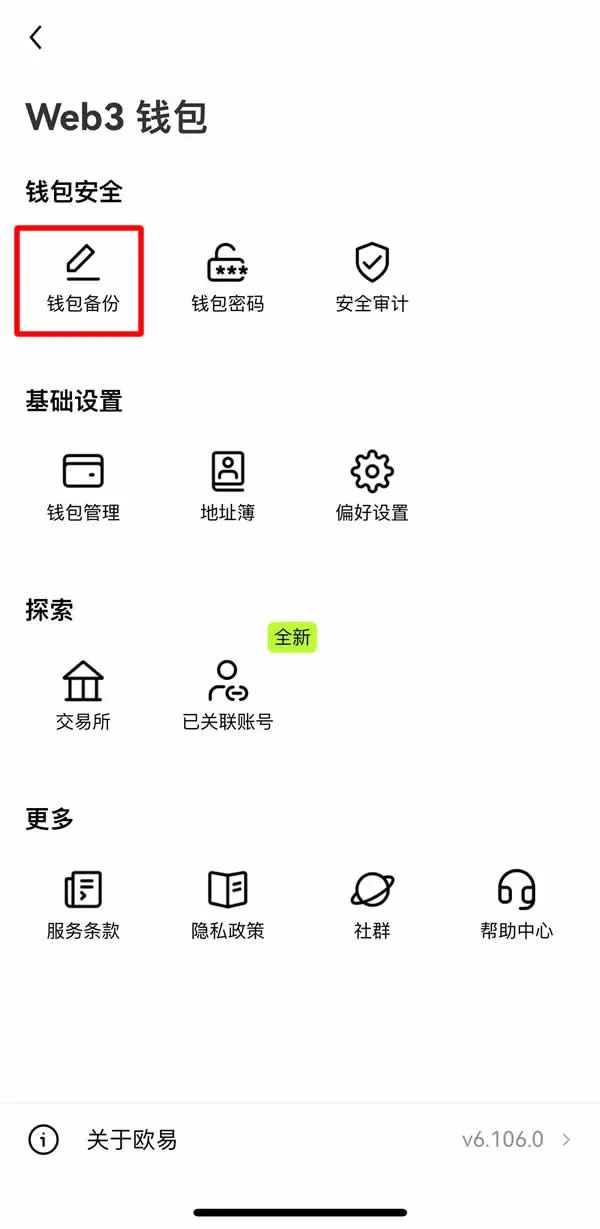
- Choose the specific wallet you wish to back up.
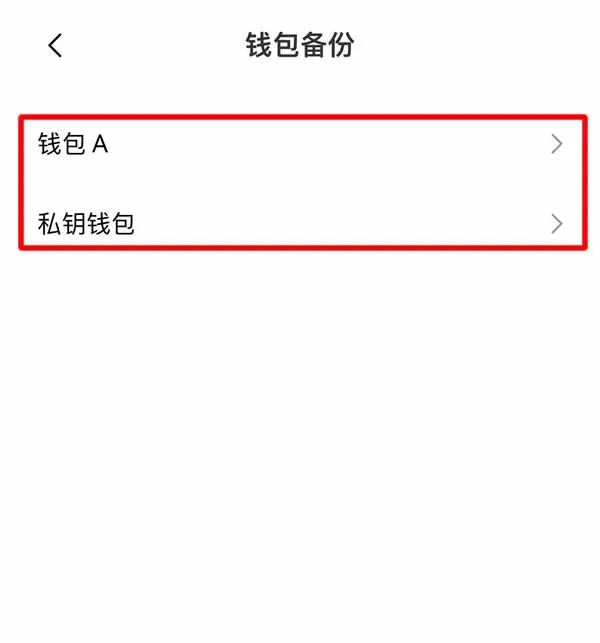
- Follow the prompts and repeatedly tap Continue → Continue → Continue → Backup Now.
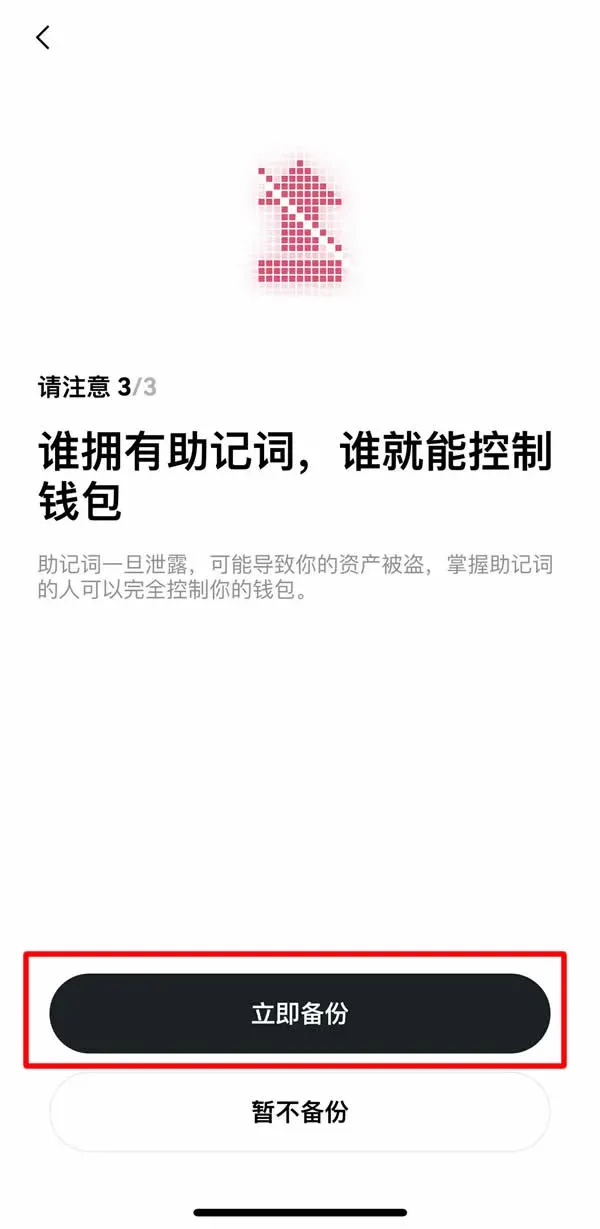
The system currently offers two backup options:
- Mnemonic backup – one set of 12 words protects a master wallet and all its derived child wallets, allowing management of assets on 70+ public chains.
- Private‑key backup – for single‑chain assets, you must store the private key of each chain separately.
---
Adding a New Account or Sub‑Wallet
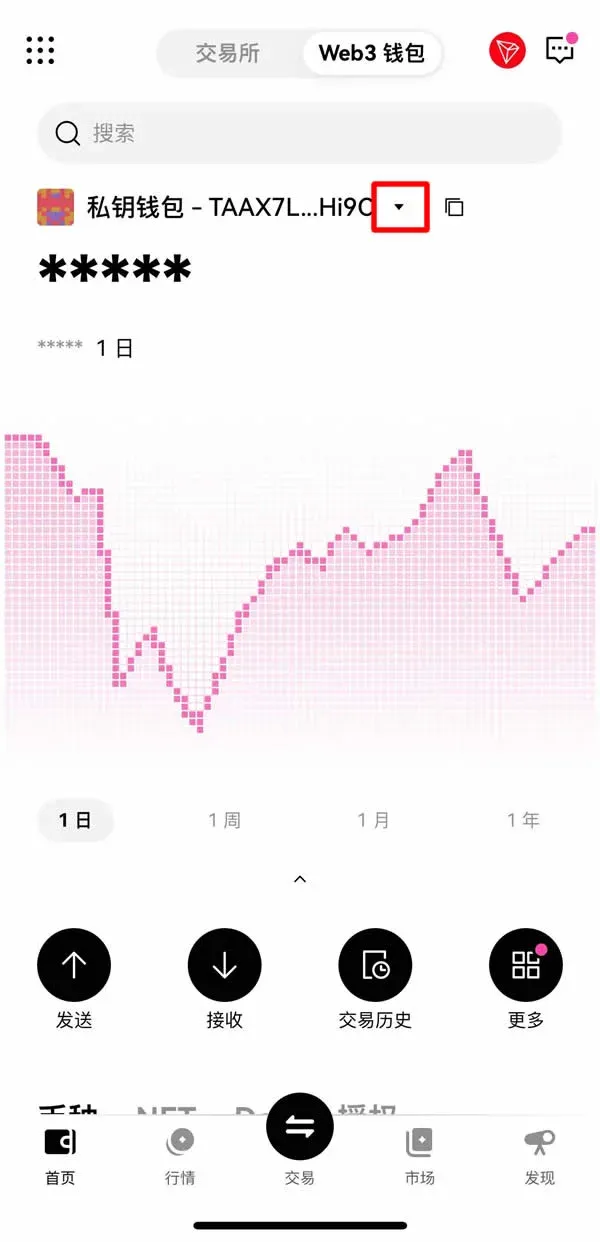
- In the wallet list, tap the ▼ next to a private‑key wallet.
- Select + Add Account.
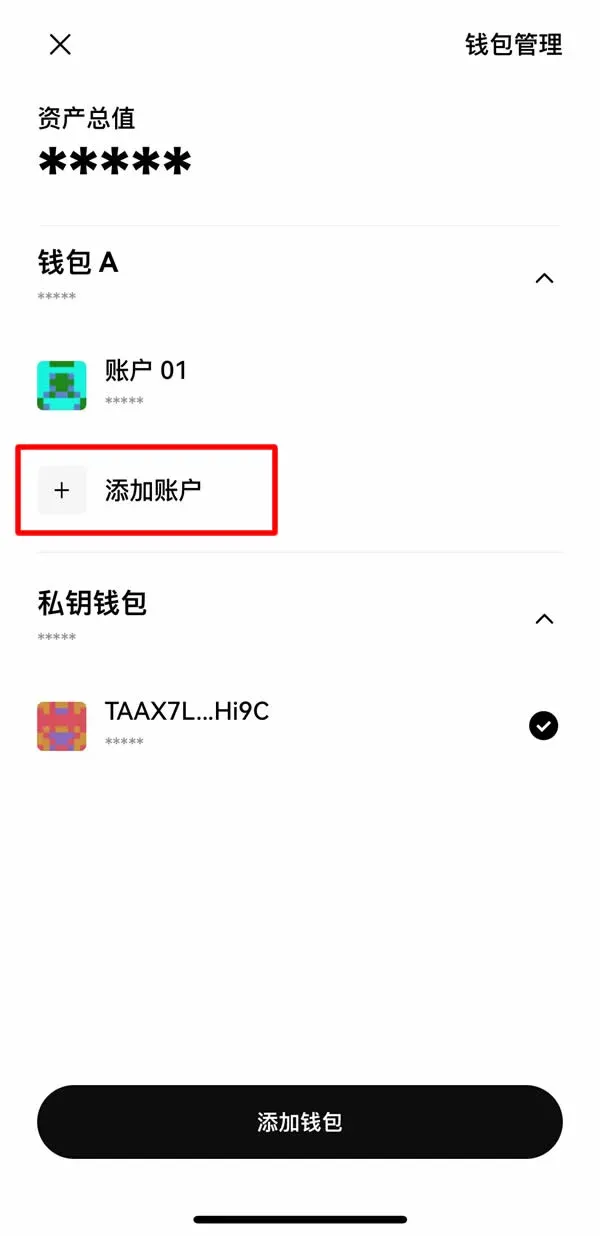
- Choose whether to add a single account or batch‑add multiple accounts.
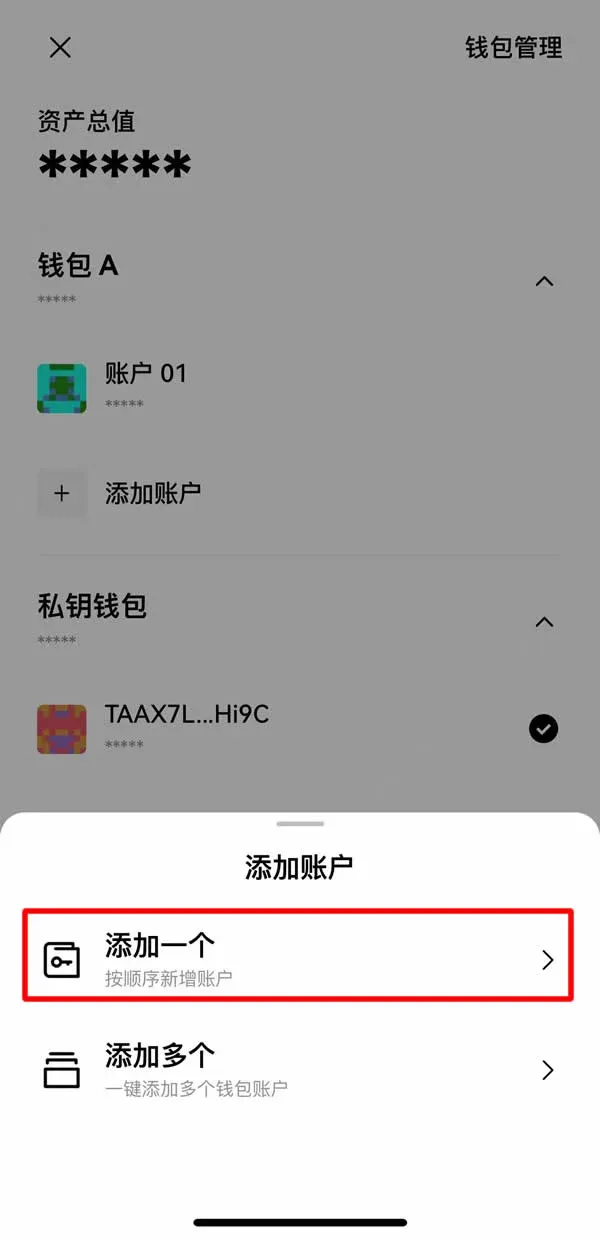
- After confirmation, the newly created accounts appear in the list.
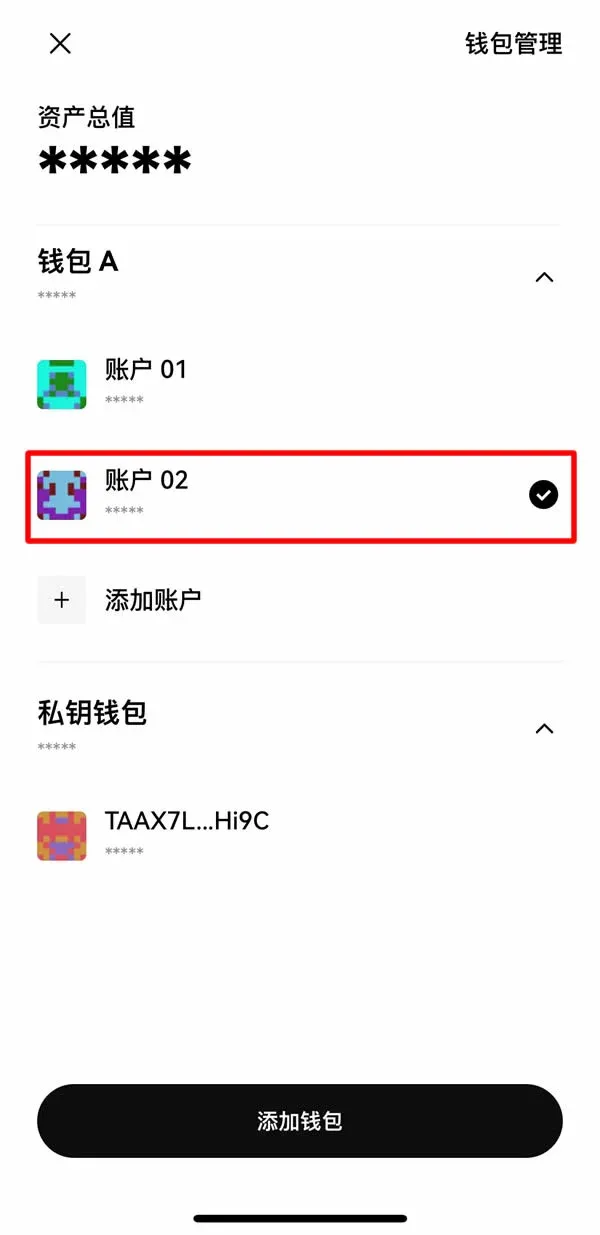
Multiple accounts under the same master wallet share the same mnemonic and are considered derived wallets. Both accounts and wallets can be renamed via Wallet Management → Edit Wallet. Currently, individual derived accounts cannot be deleted; to remove them you must delete the whole master wallet and re‑import using the mnemonic. Wallets imported via private key do not support adding sub‑accounts.
---
Transferring BNB into the Web3 Wallet
- Switch to the Web3 Wallet tab in the app.
- Tap Receive → Start Now.


