
In this article we outline the complete process of withdrawing assets from an exchange to a cold wallet, and explain the core principles and security advantages of cold wallets. With illustrated step‑by‑step guidance, even first‑time users can get up to speed quickly, ensuring assets are reliably protected in an offline environment. If you want to master the essential techniques for securely moving digital assets, keep reading for the full guide.

Concept and Significance of Cold Wallets
Before diving into the specific steps, let’s first clarify what a “cold wallet” is. It is a type of Bitcoin storage solution developed by technology companies that focus on blockchain asset security, offering the following features:
- Multi‑signature transaction password protection
- Real‑time market data and news push notifications
- Hard‑fork handling mechanisms
These characteristics enable cold wallets to substantially resist hacking attempts and improve the security of digital assets.
---
Complete Process from Exchange Withdrawal to Cold Wallet
- Log in to the exchange you use and navigate to the Assets page.
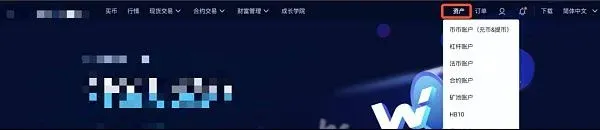
- Locate and click the Withdraw button.
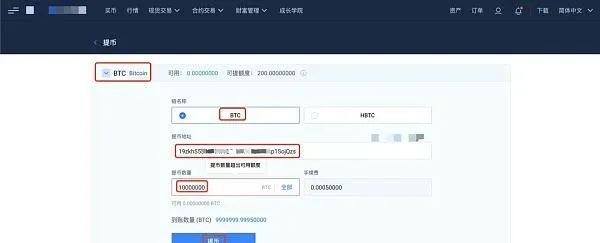
- Using BTC withdrawal as an example, open the already installed Bitpie wallet, select the “BTC network”, tap Receive and copy the displayed address.
- Return to the exchange page, select the cryptocurrency (here BTC), ensure the network is set to BTC Mainnet, then paste the address you just copied. After pasting, double‑check the address to avoid mistakes.
- Enter the amount you wish to withdraw, verify that all details are correct, and then click Withdraw.
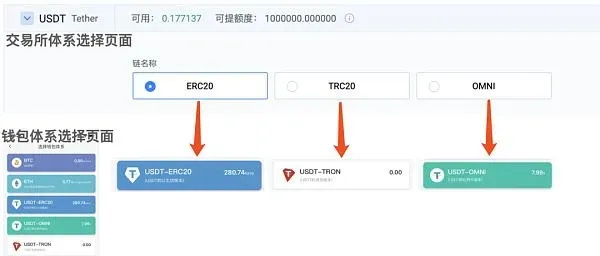
- The same steps apply to tokens such as USDT. The most widely circulated USDT on the market is the ERC‑20 version; if you are unsure which variant to withdraw, default to ERC‑20. Bitpie wallet supports all USDT versions and is a powerful USDT wallet.
- ERC‑20 tokens (such as PAX, USDC, etc.) have a specific consideration when withdrawing: these tokens are issued on the Ethereum mainnet, so you can receive them using your wallet’s Ethereum address, and the balance will appear automatically after the transaction is confirmed.
Step‑by‑Step Guide to Creating a Cryptocurrency Cold Wallet (Using TokenPocket as an Example)
- Prepare a smartphone that you don’t use regularly. Connect to the internet and download the TokenPocket app; once the download finishes, immediately disconnect from the network (turn off Wi‑Fi or switch to airplane mode) to ensure that the subsequent steps are performed offline.
- Install TokenPocket while offline. After launching, choose Import Wallet and pick Bitcoin from the list of wallet types.
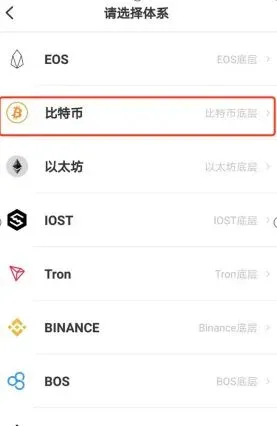
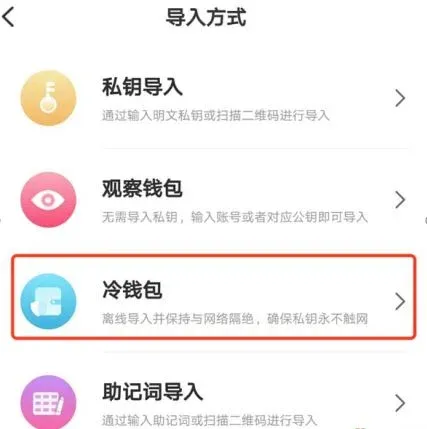
- On the import method screen, select the Cold Wallet option.
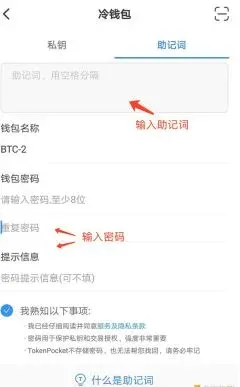
- In the cold wallet interface, input your mnemonic phrase, then set a wallet password, and finally tap Start Import at the bottom.
- After a successful import, the cold wallet is created, as shown below.
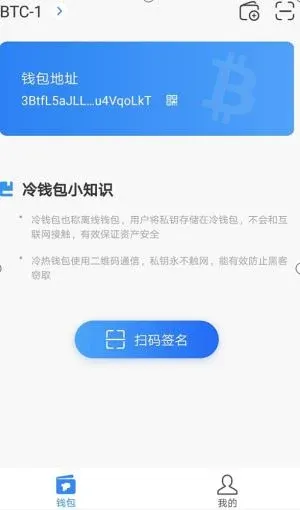
Interaction between cold and hot wallets relies on QR‑code scanning; the private key never touches the internet, which effectively reduces the risk of hacker theft.
By following the steps above, you can securely transfer assets from an exchange to a cold wallet and complete the creation of the cold wallet. For more information on downloading and using Bitcoin cold wallets, feel free to explore other articles from Bitaigen.
Related Reading
- Gate.io On‑Chain Deposit & Withdrawal Guide (App & Web)
- How to Securely Withdraw or Liquidate on OKX in 2026
- Top 10 Crypto Custodial Companies for Secure Storage
💡 Register on Binance with referral code B2345 for the maximum trading fee discount. See Binance complete guide.


