
Today we share a guide about which USDT wallet is the safest. Our primary recommendation is the OKX Web3 Wallet, which is widely regarded as one of the higher‑security USDT wallets available.
For beginners and the majority of users, the OKX Web3 Wallet offers a combination of safety, ease of use, a complete ecosystem, and multi‑chain support. It balances the security of a decentralized wallet with the convenience of a centralized exchange, allowing users to hold their own private keys rather than relying on custodial storage. Below we first explain why you might choose this wallet.
This article is aimed at newcomers and walks through the entire process—from registering an OKX account, creating an OKX Web3 Wallet, to transferring funds from the exchange to the wallet. Let’s start by looking at the main advantages of the OKX Web3 Wallet.
Among the many ways to store USDT, security is usually the factor users care about most. We compare mainstream options from three angles—private‑key management, chain compatibility, and user‑friendliness—and use the OKX Web3 Wallet as a concrete example. The following step‑by‑step demonstration shows how to move assets on the OKX platform. Read on and you’ll be able to get started quickly while keeping your funds safe.
What are the advantages of the OKX Web3 Wallet?
The OKX Web3 Wallet offers three major advantages:
- Full‑chain support
It supports every major blockchain on which USDT is issued, covering the vast majority of networks in the crypto market.
- Strong security
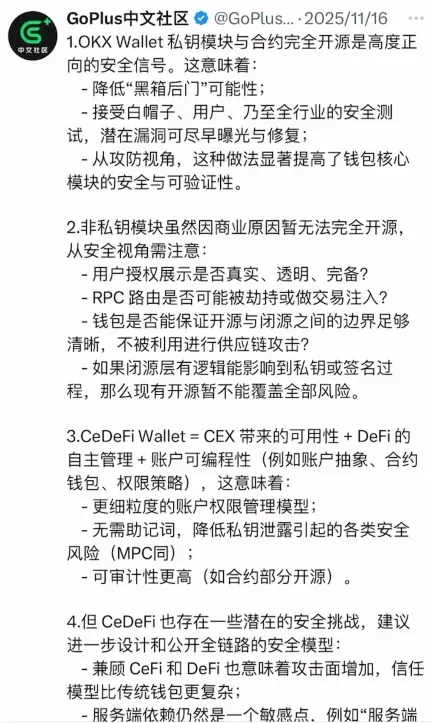
The wallet’s code is open‑source and undergoes public audits, reducing the risk of hidden backdoors.
- Leading technical capability
OKX recently launched a DEX feature that enables on‑chain trades directly from the centralized exchange interface. The underlying mechanism is explained in detail by industry experts.
The CeDefi Wallet uses an Apple or Google ID together with a secure device enclave chip, combined with OKX account verification, to create a three‑layer self‑custody solution that defaults to the OKX multi‑chain DEX. If you wish to disable on‑chain deposits and withdrawals, you can unbind at any time and revert to a fully self‑custodial mode with complete control. Even without a deep technical background, you can be confident that the security level is sufficient.

Complete process for moving USDT from OKX to the OKX Web3 Wallet
Below is a step‑by‑step guide for beginners on how to transfer USDT held on the OKX exchange into the OKX Web3 Wallet.
Step 1: Register an OKX account
If you do not already have an OKX account, click the registration link below to sign up.
Official OKX registration link: https://www.bitaigen.com/binance
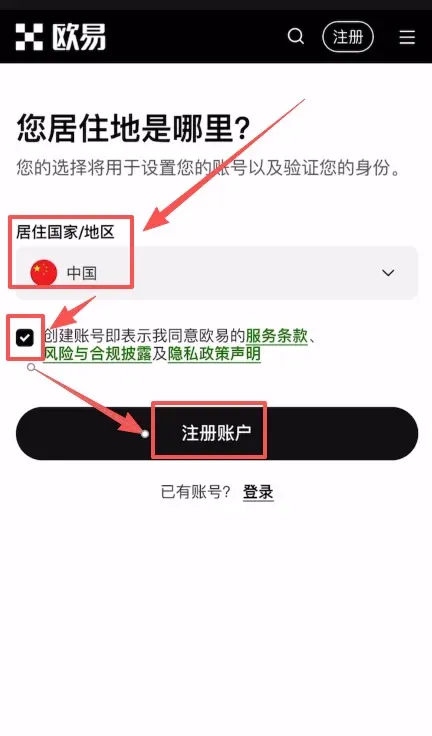
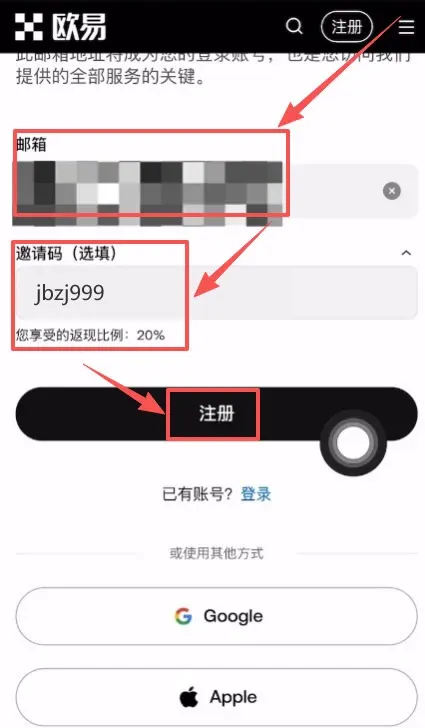
After the page loads, first select your country or region of residence, tick the agreement box, and then click Register Account.
OKX only supports email‑based registration, so enter a valid email address in the indicated field. When you follow the link provided in this article, the referral code `jbzj999` is automatically applied and the system will display “Your cashback rate: 20%”. This means you will permanently enjoy a 20 % fee discount on subsequent trades.
Click Register.
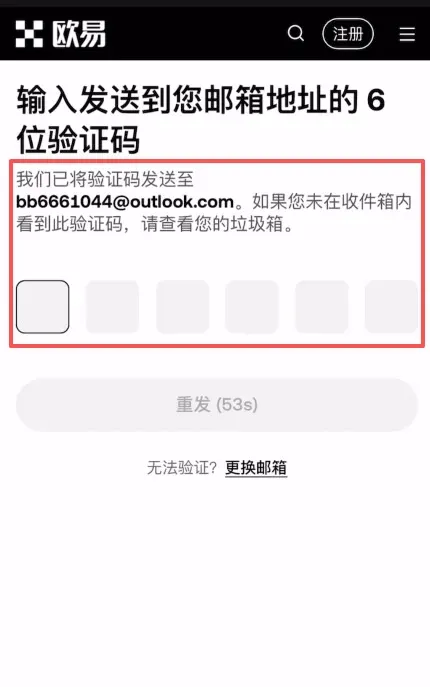
The system will send a verification code to the email you supplied; log into your inbox, retrieve the code, and enter it on the registration page.
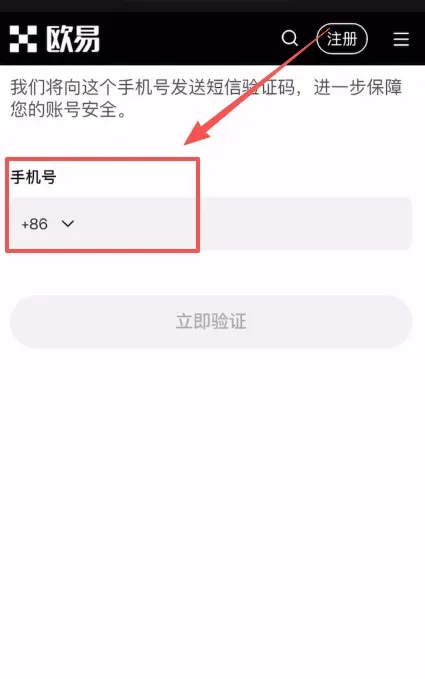
Next, bind a mobile phone number (the default country code is China +86). This number is used only for receiving verification codes and does not expose you to additional privacy risks. After the phone number is linked, the account registration is complete and you can start using all of OKX’s trading features.
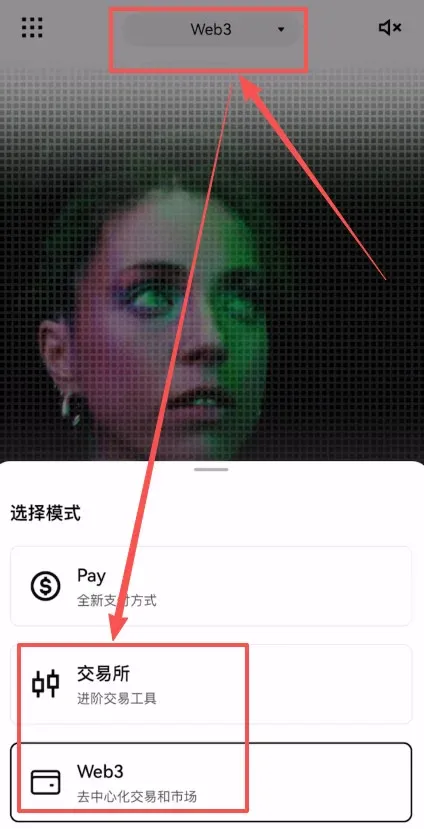
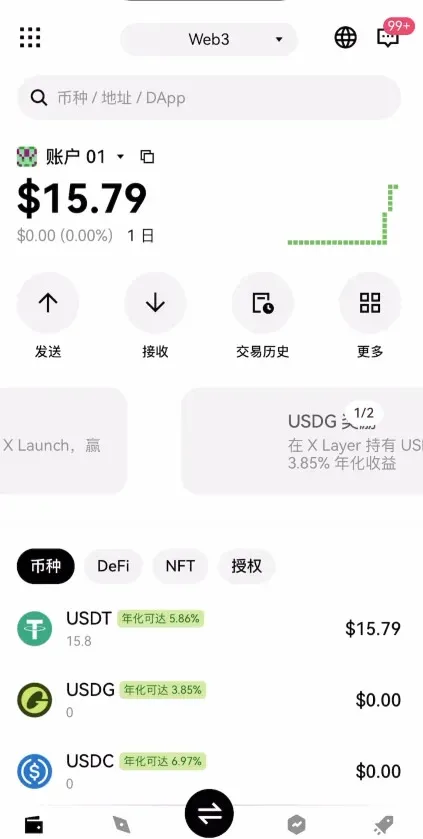
When you log in, the landing page may default to the “Exchange” view or the “Web3” view. You can freely toggle between “Exchange” and “Web3” using the switch located at the top‑center of the page.
Important: The wallet that belongs to the OKX exchange and the OKX Web3 Wallet are two separate entities. Although they are both under the OKX brand, they do not share the same address or private keys.
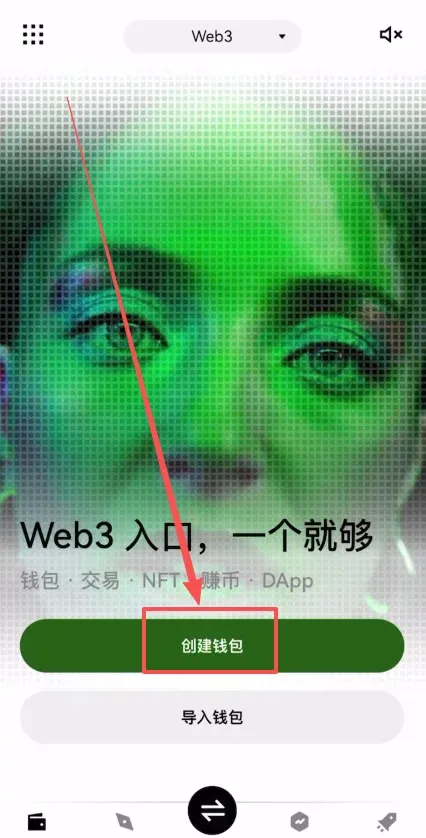
Step 2: Create an OKX Web3 Wallet
Navigate to the OKX Web3 Wallet page and click Create Wallet.
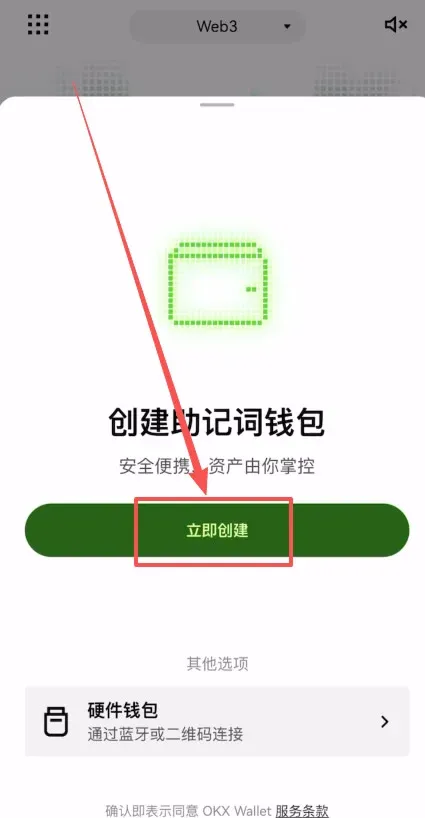
Then click Create Now. The creation process can be completed simply by performing a facial scan.
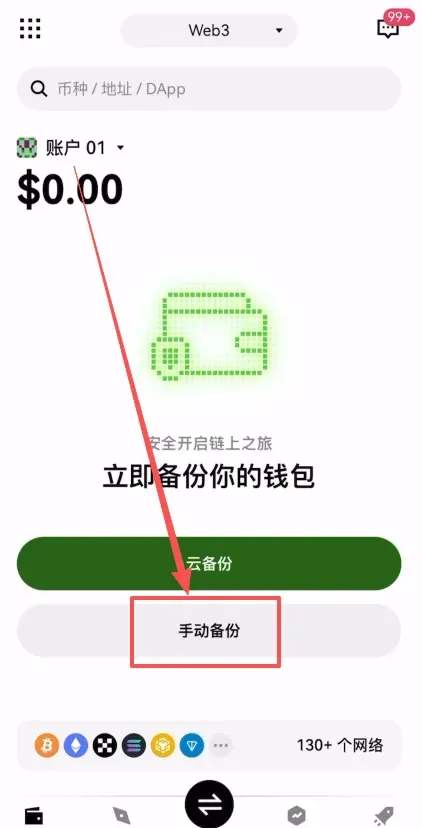
After the wallet is generated, you will be prompted to back it up. Click Manual Backup.
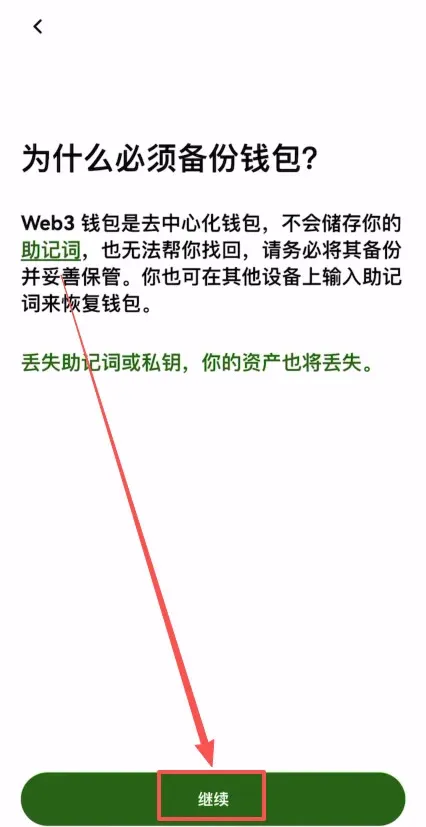
The system will emphasize the importance of backing up your wallet; click Continue.
Make sure no one is watching you and that you are not recording the screen.
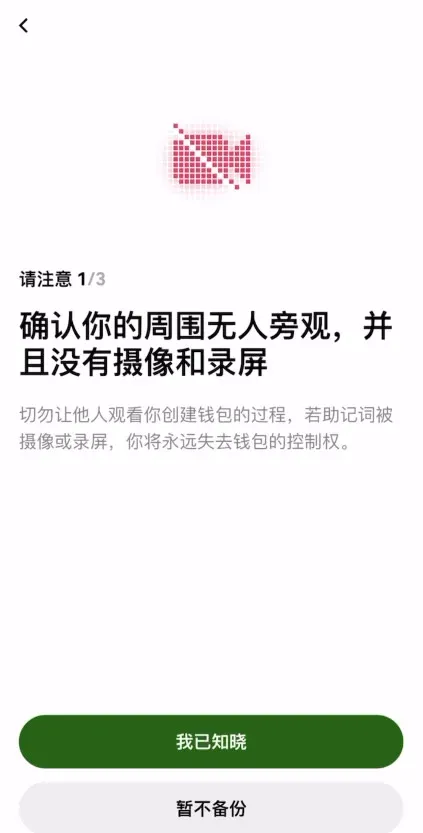
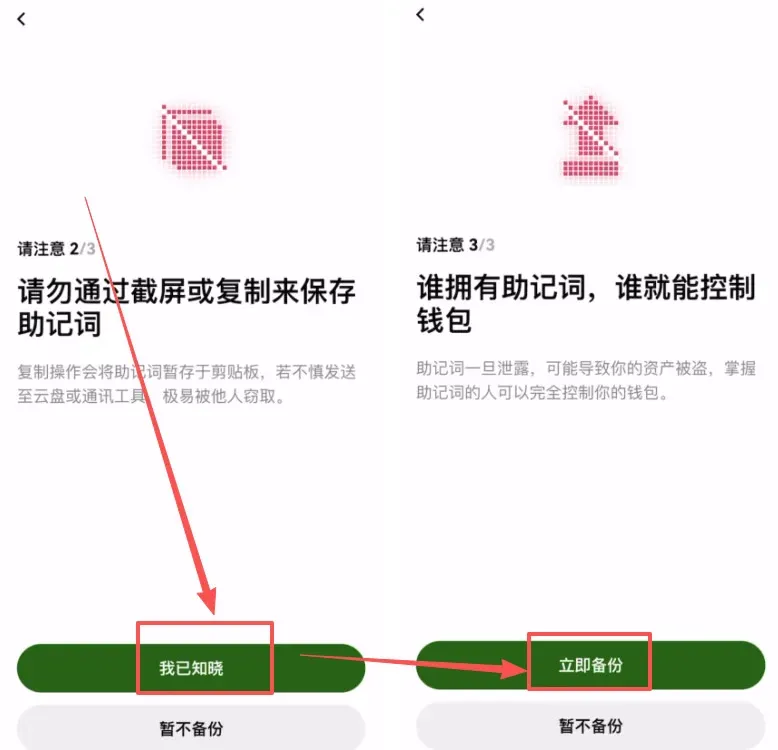
The mnemonic phrase is the sole credential that controls the wallet; never store it via screenshots or copy‑paste. Choose Backup Now.
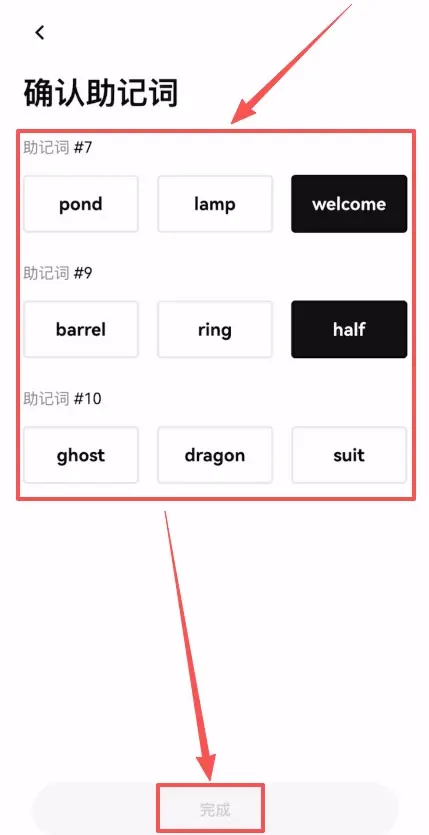
The mnemonic phrase will appear on the screen; click to view it.
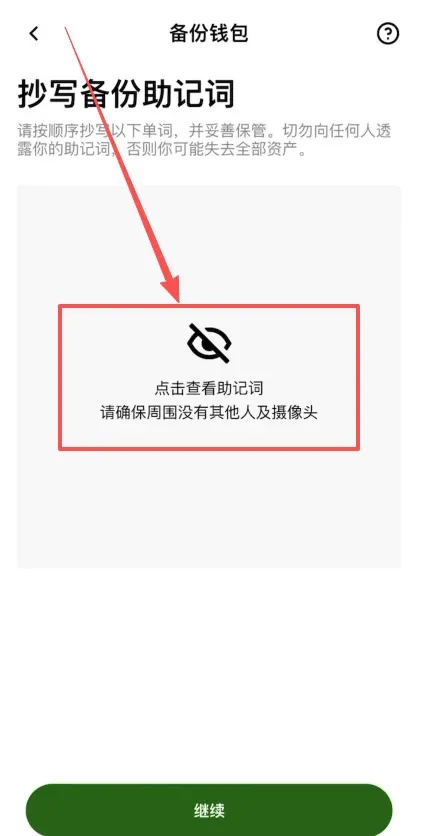
Record the words in order, preferably by hand on paper, then click Continue.
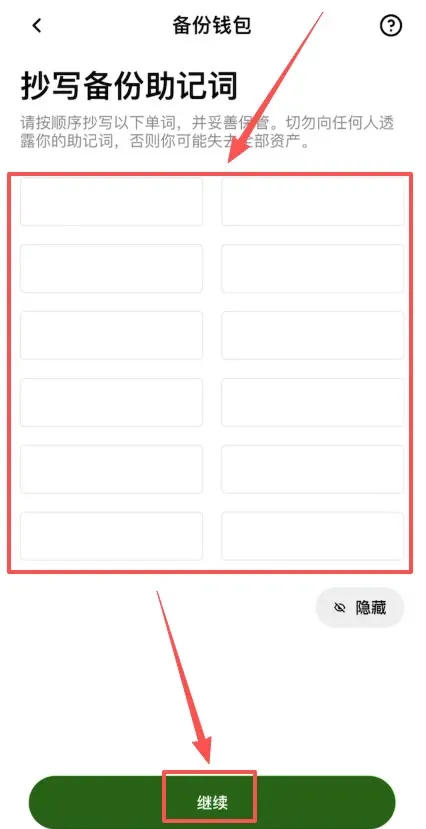
The system will randomly ask you to confirm three of the words (for example, the 7th, 9th, and 10th words). After you correctly verify them, click Finish. Your wallet backup is now complete and you can send and receive crypto assets normally.
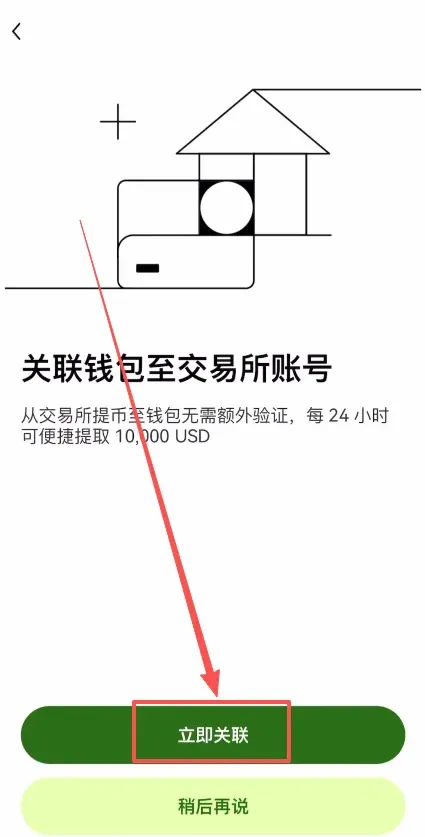
The next step is to link the Web3 Wallet with your OKX exchange account.
Step 3: Link the wallet to your exchange account
In the wallet interface, click Receive.
Select Quick withdrawal from exchange account.
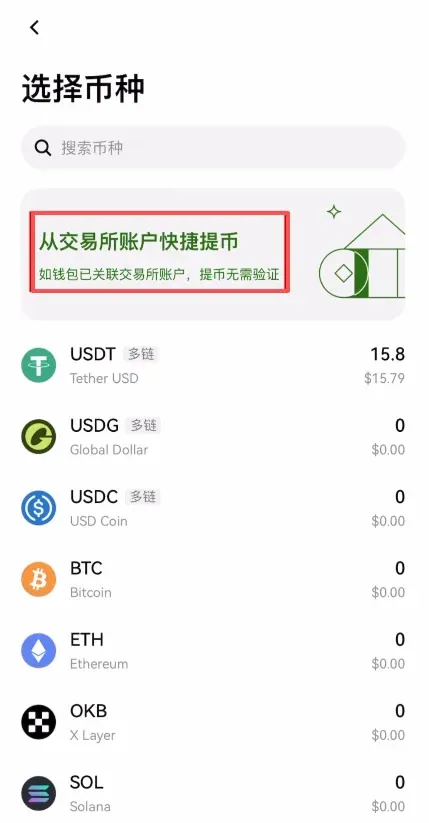
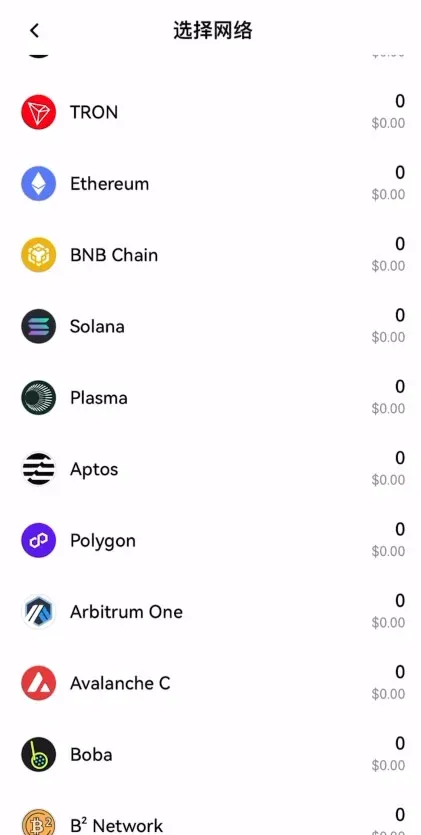
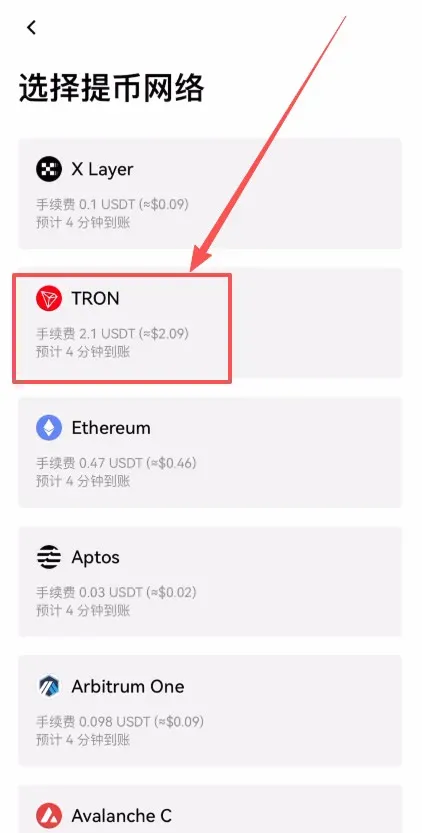
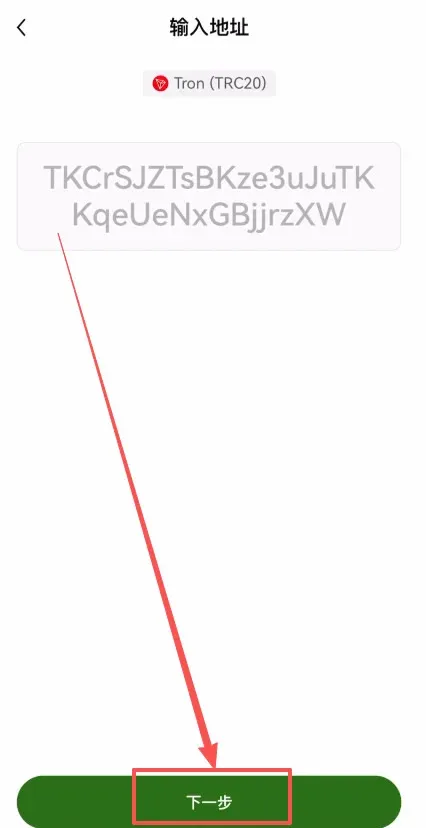
From the list of assets, choose the token you wish to withdraw, e.g., USDT.
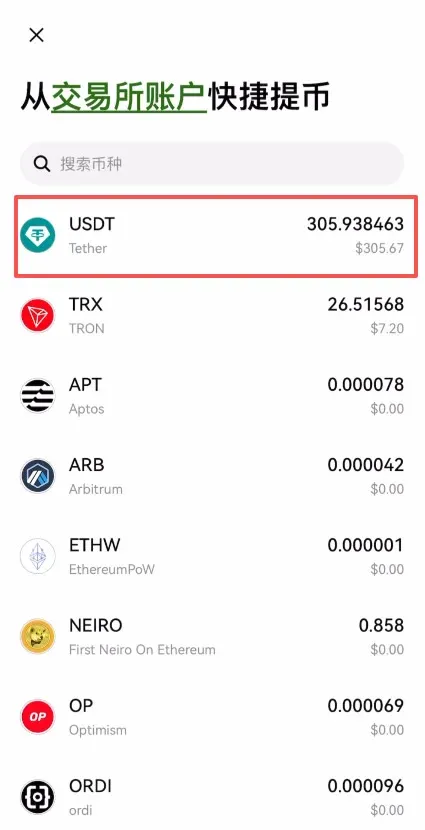
Next, pick the withdrawal network, such as TRON‑TRC20.
A linking page will pop up; click Link Now.
After confirming the linking details, press Confirm.
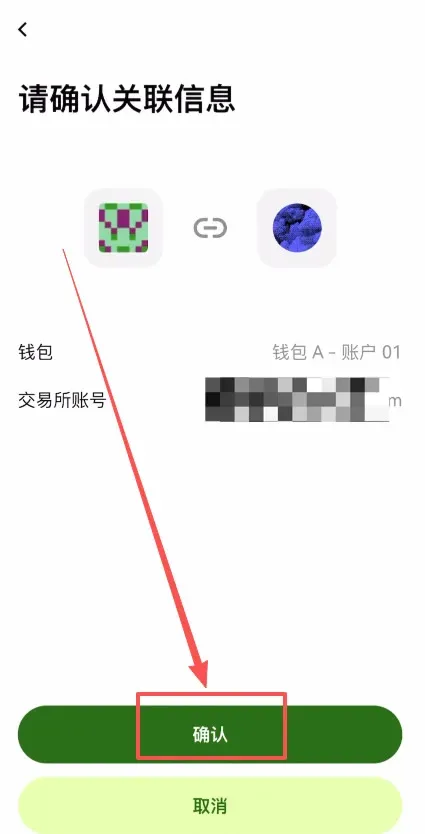
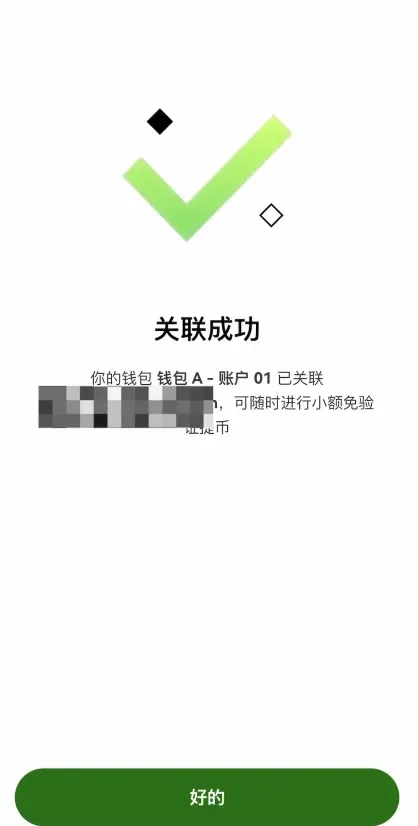
At this point, the exchange account and the Web3 Wallet are successfully linked.
Click Next to continue.
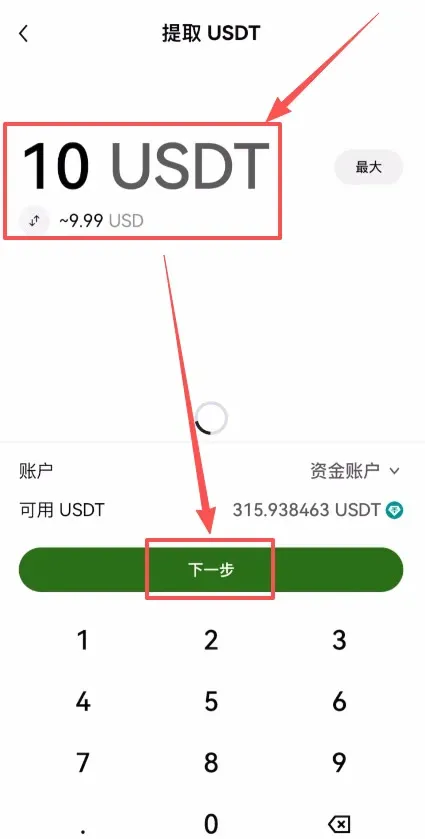
Enter the amount of USDT you wish to withdraw, for example 10 USDT, then click Next.
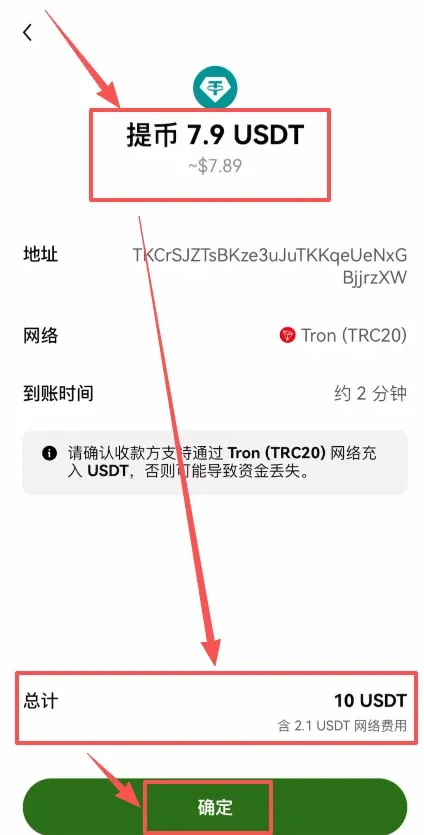
The system will display the net amount you will receive after deducting network fees—for instance, 7.9 USDT after a 2.1 USDT fee. Fees vary across different chains, so you can select the most cost‑effective one for your needs. Click Confirm.
Your USDT is now being transferred out of the exchange.
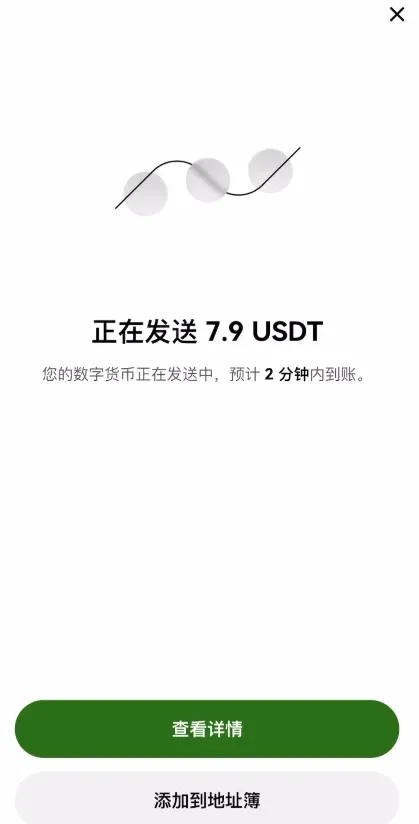
When the transaction finalizes, you will see the USDT appear in your wallet. Because the exchange and wallet are already linked, the arrival is relatively fast. This constitutes the quickest method for moving assets from the OKX exchange to the OKX Web3 Wallet.

That concludes the complete process for moving assets from OKX to the OKX Web3 Wallet and answers the
💡 Register on Binance with referral code B2345 for the maximum trading fee discount. See Binance complete guide.


